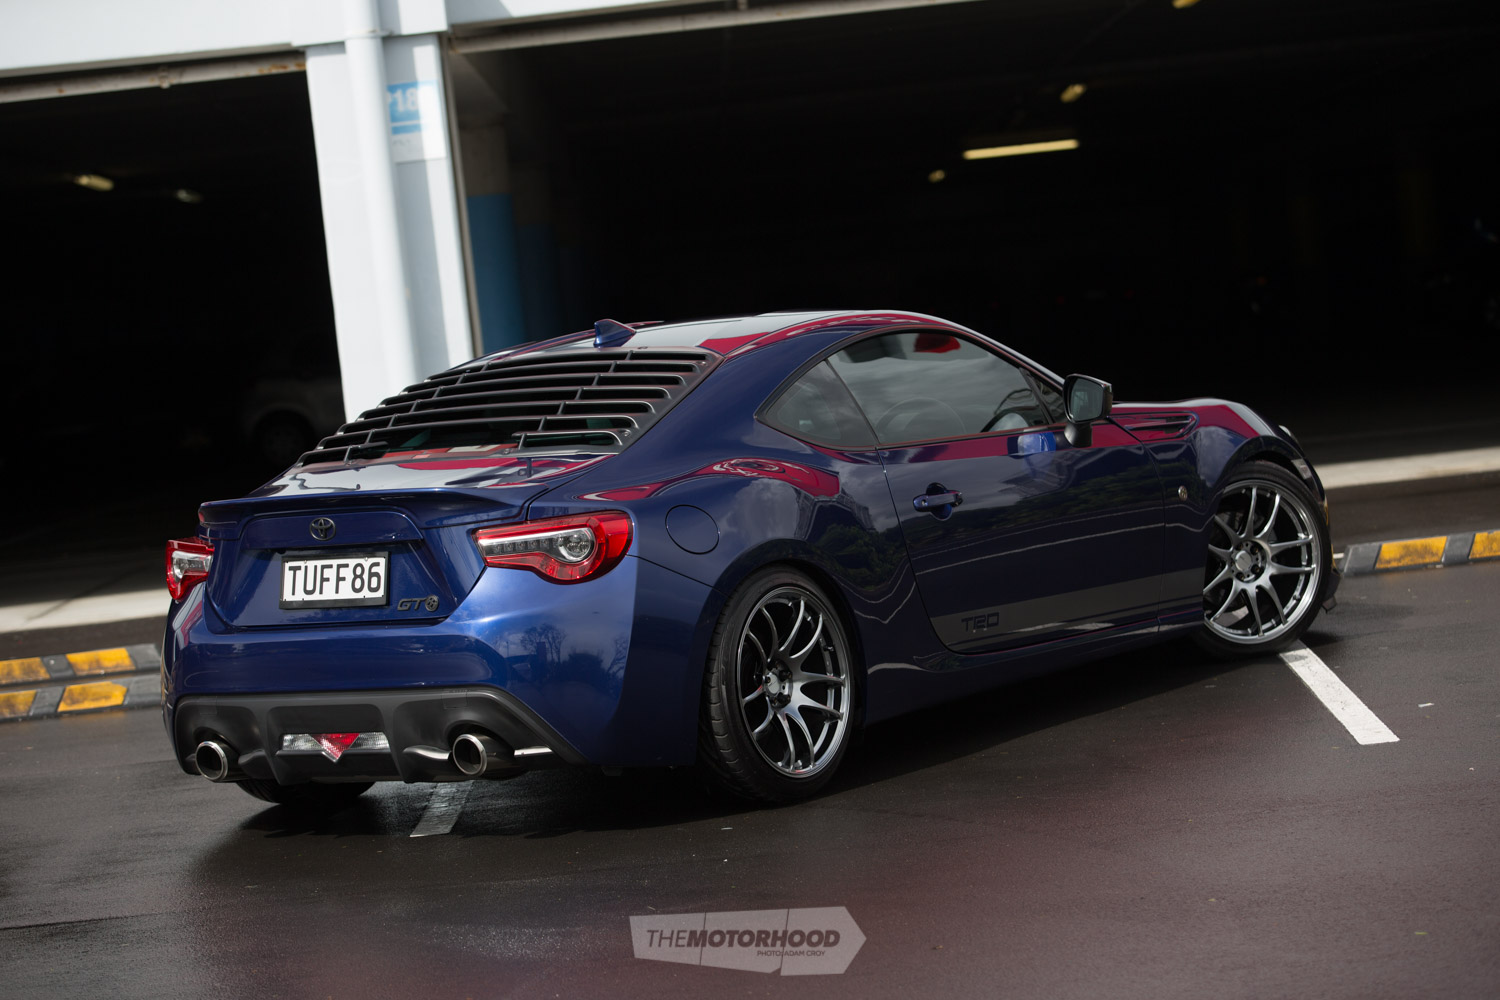
Letting your Toyota 86 (or Subaru BRZ) breathe
Tools
• 10mm spanner
• 10mm, 12mm, 13mm sockets
• Phillips-head screwdriver
• Pliers
• 3mm Allen key
Materials
• K&N Typhoon Intake kit, part No. 69-8619TS
Stage one: Removal of the OEM intake
Step 1
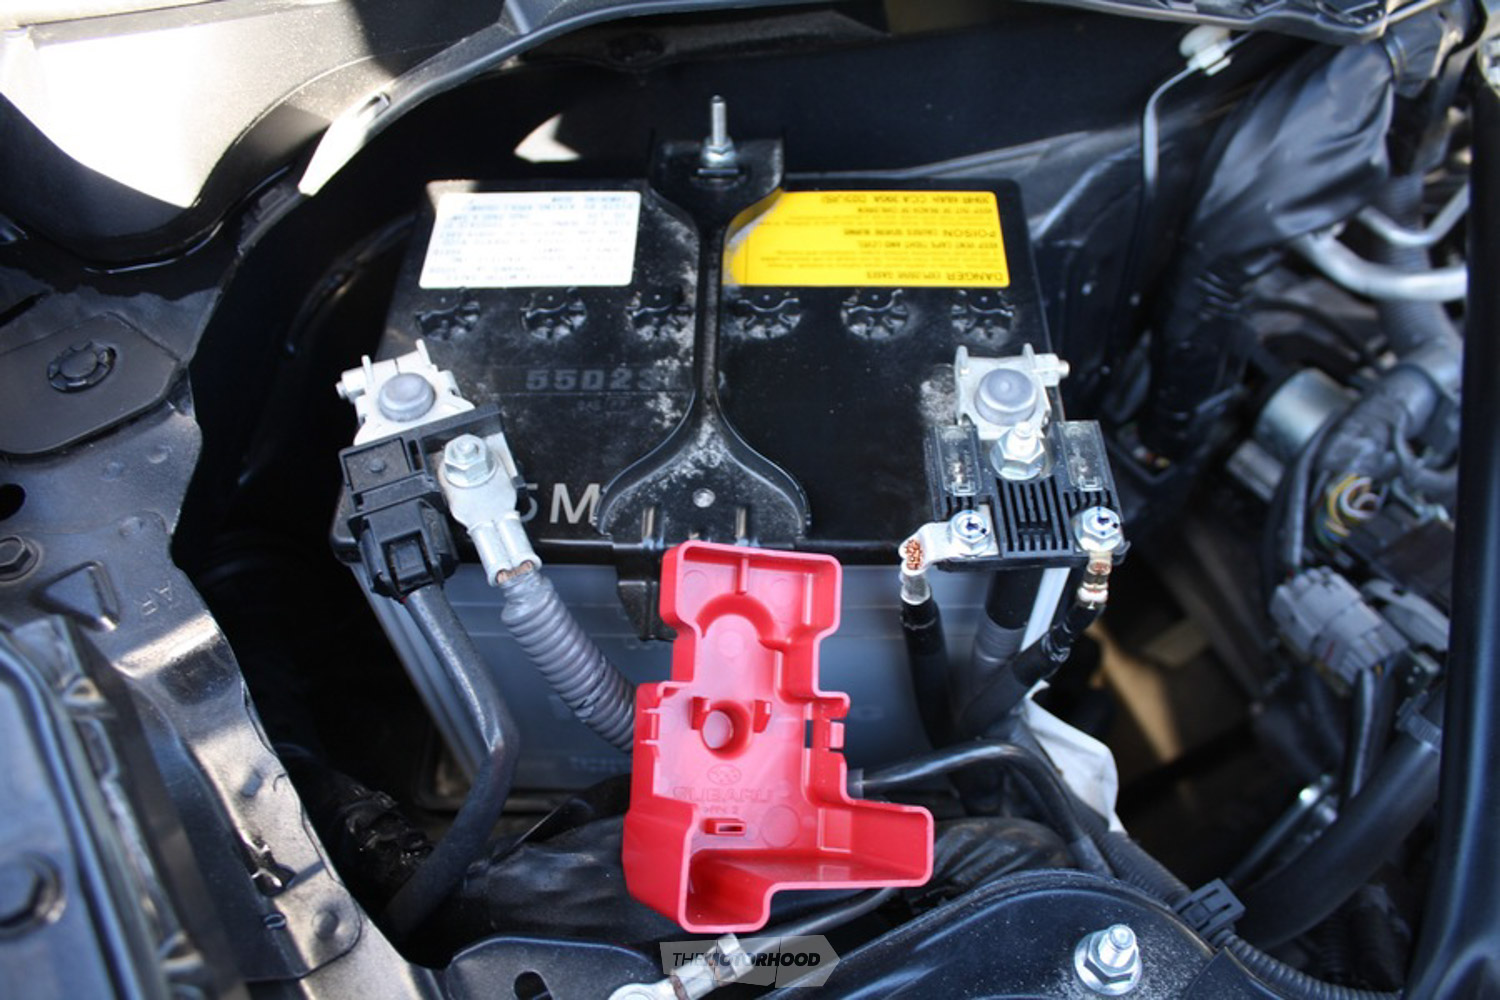
Before any work can commence, the battery negative needs to be disconnected. NOTE: Disconnecting the negative battery cable erases programmed electronic memories, so write down all memory settings before disconnecting it. Some radios will require an anti-theft code to be entered after the battery is reconnected. This code is typically supplied with your owner’s manual. If your vehicle’s anti-theft code cannot be recovered, contact an authorized dealership to obtain it.
Step 2
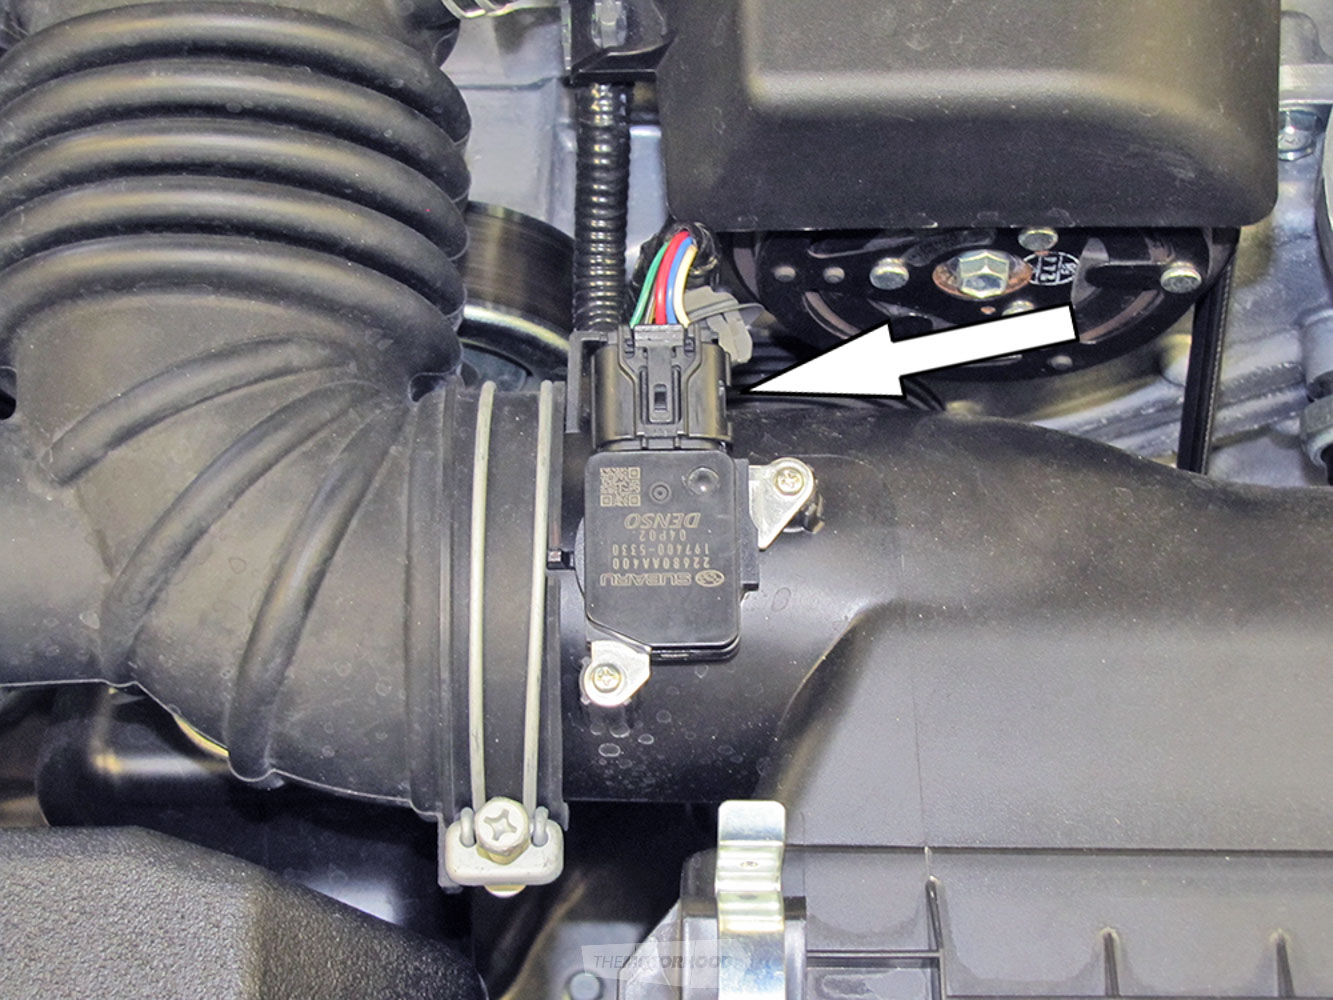
Disconnect the mass airflow (MAF) sensor connector, and unhook the wiring harness from the air-box.
Step 3
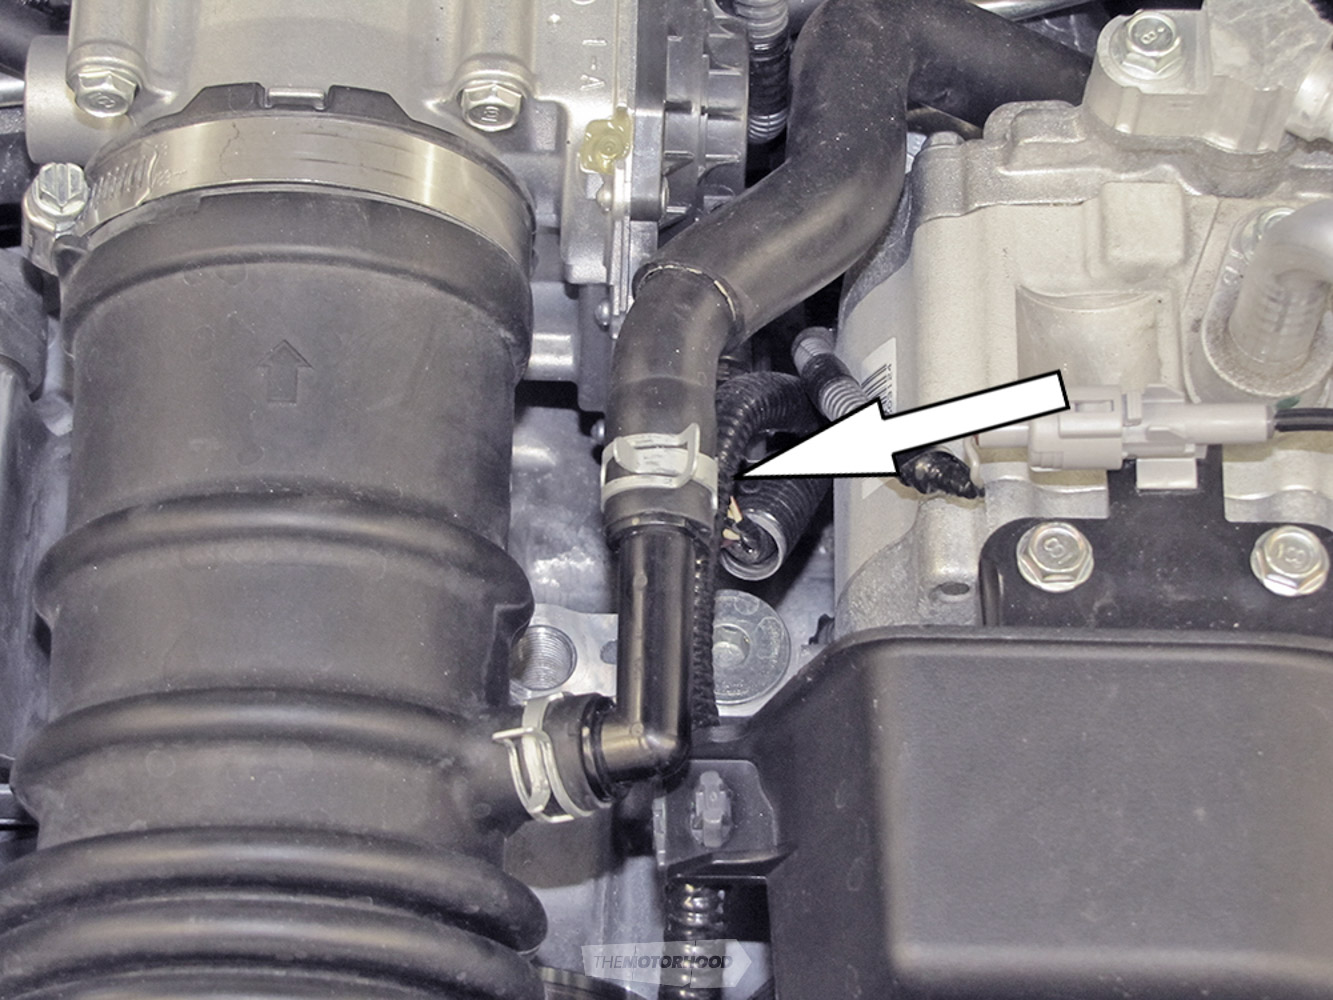
Using the pliers, remove the two spring clamps and disconnect the crankcase vent fitting from the intake.
Step 4
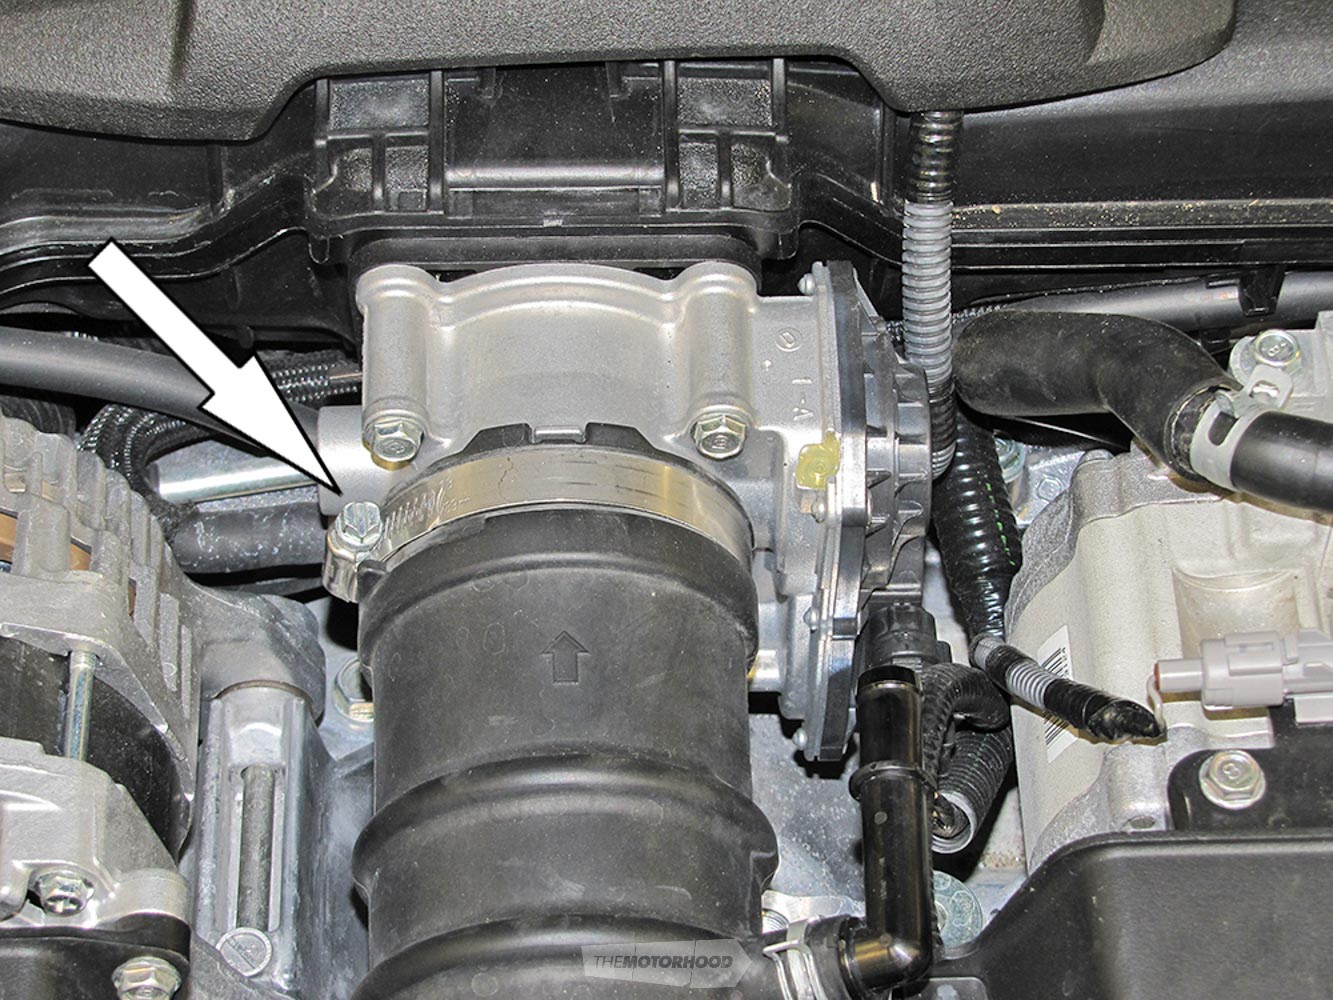
Use the Phillips screwdriver to loosen the hose clamp securing the intake hose to the throttle body.
Step 5
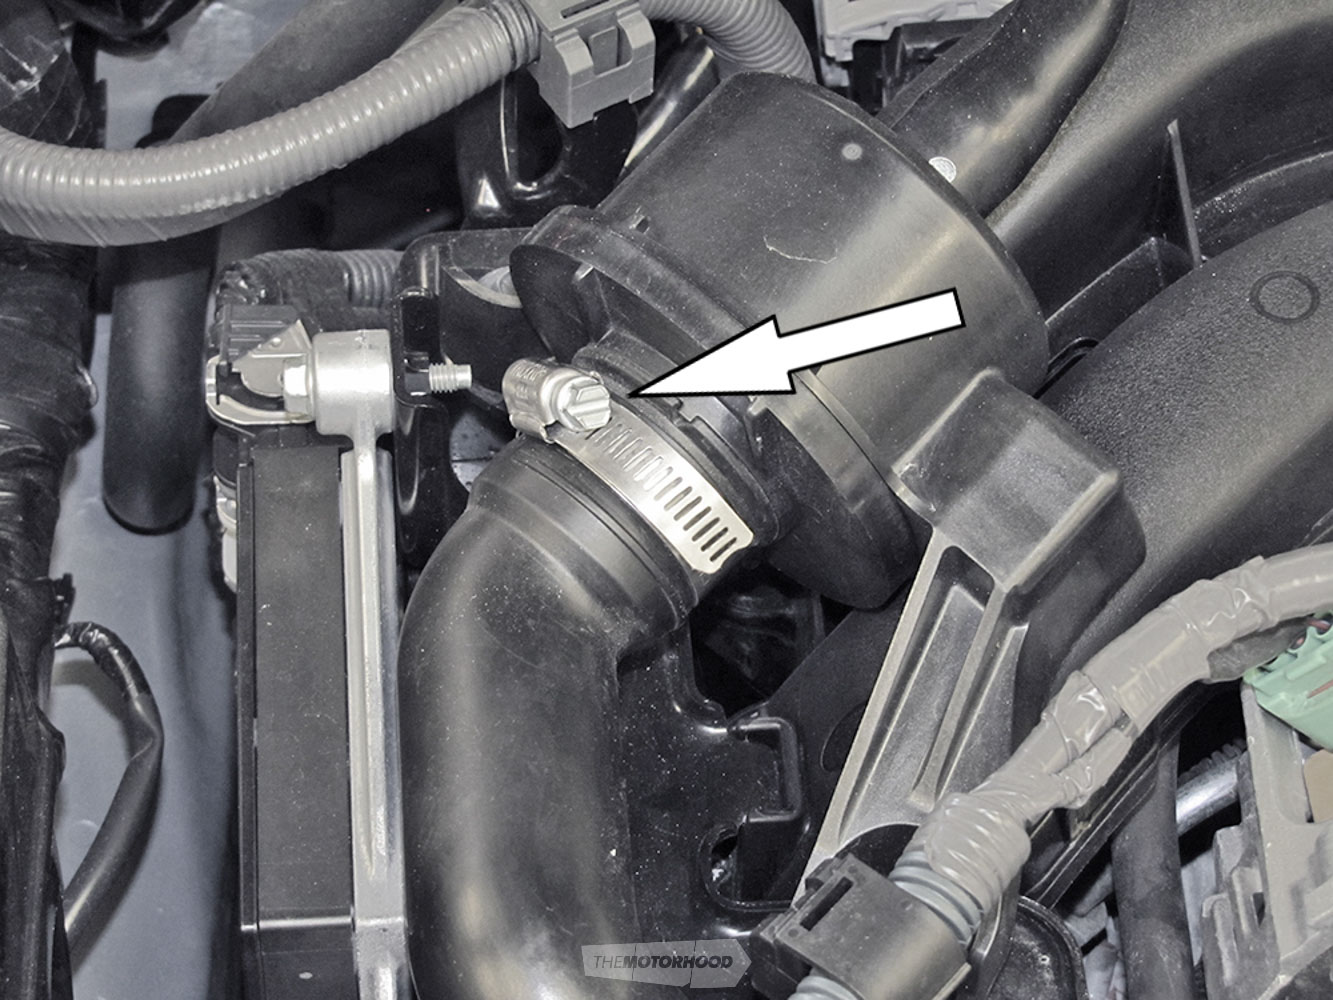
Use the screwdriver to loosen the hose clamp and disconnect the engine sound tube from the engine sound drum, located on the right side of the bay.
Step 6
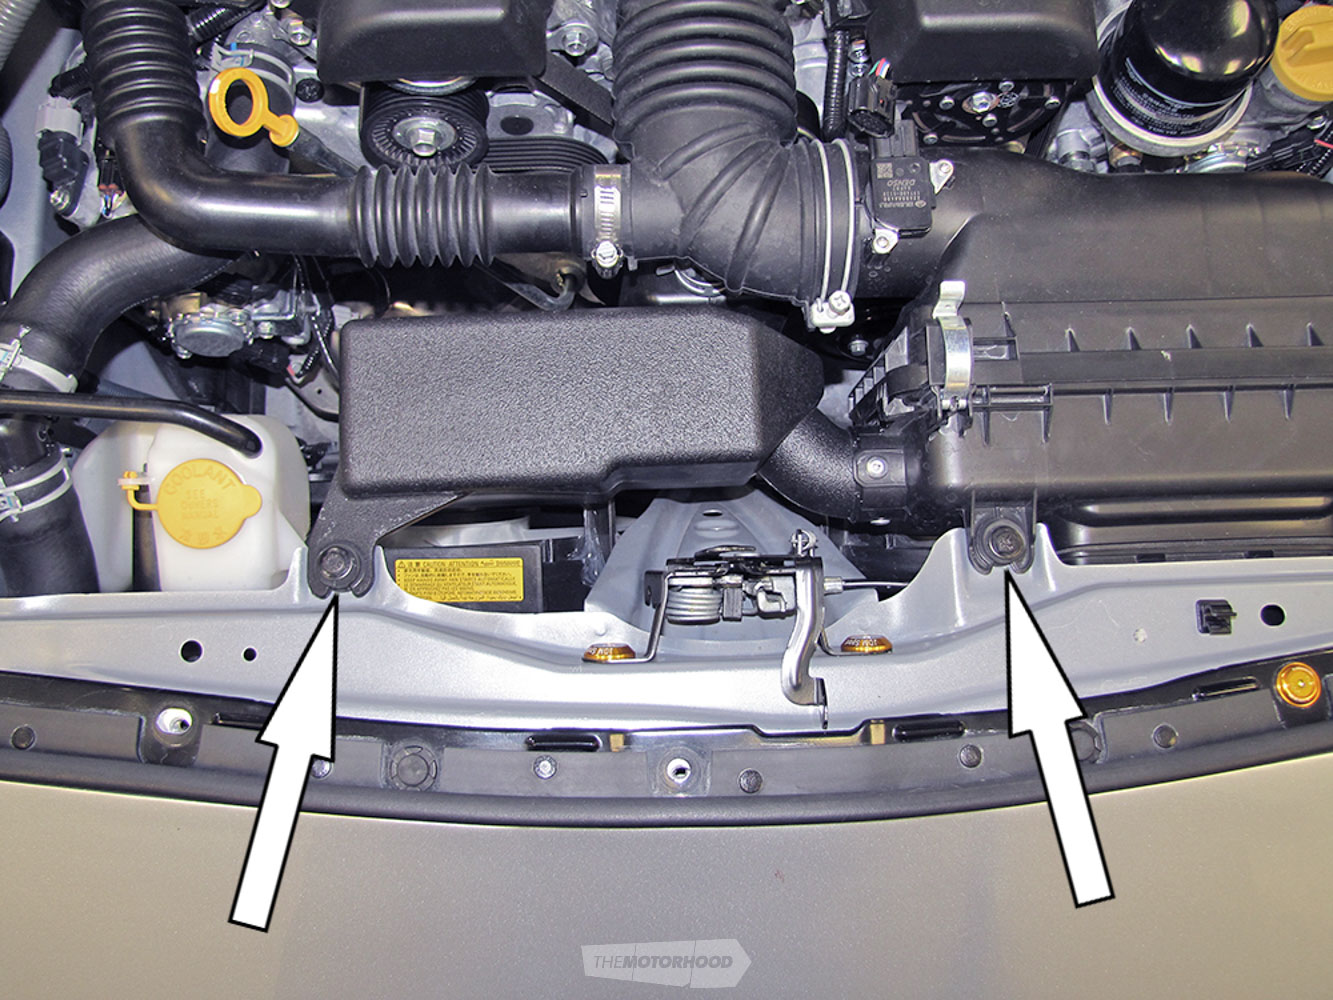
Remove the three bolts securing the resonator and air-box to the core support. NOTE: These bolts will be reused in a later step. Remove the entire assembly from the vehicle and store safely in case you want to revert the modification come sale time.
Stage Two: Installation
Step 7
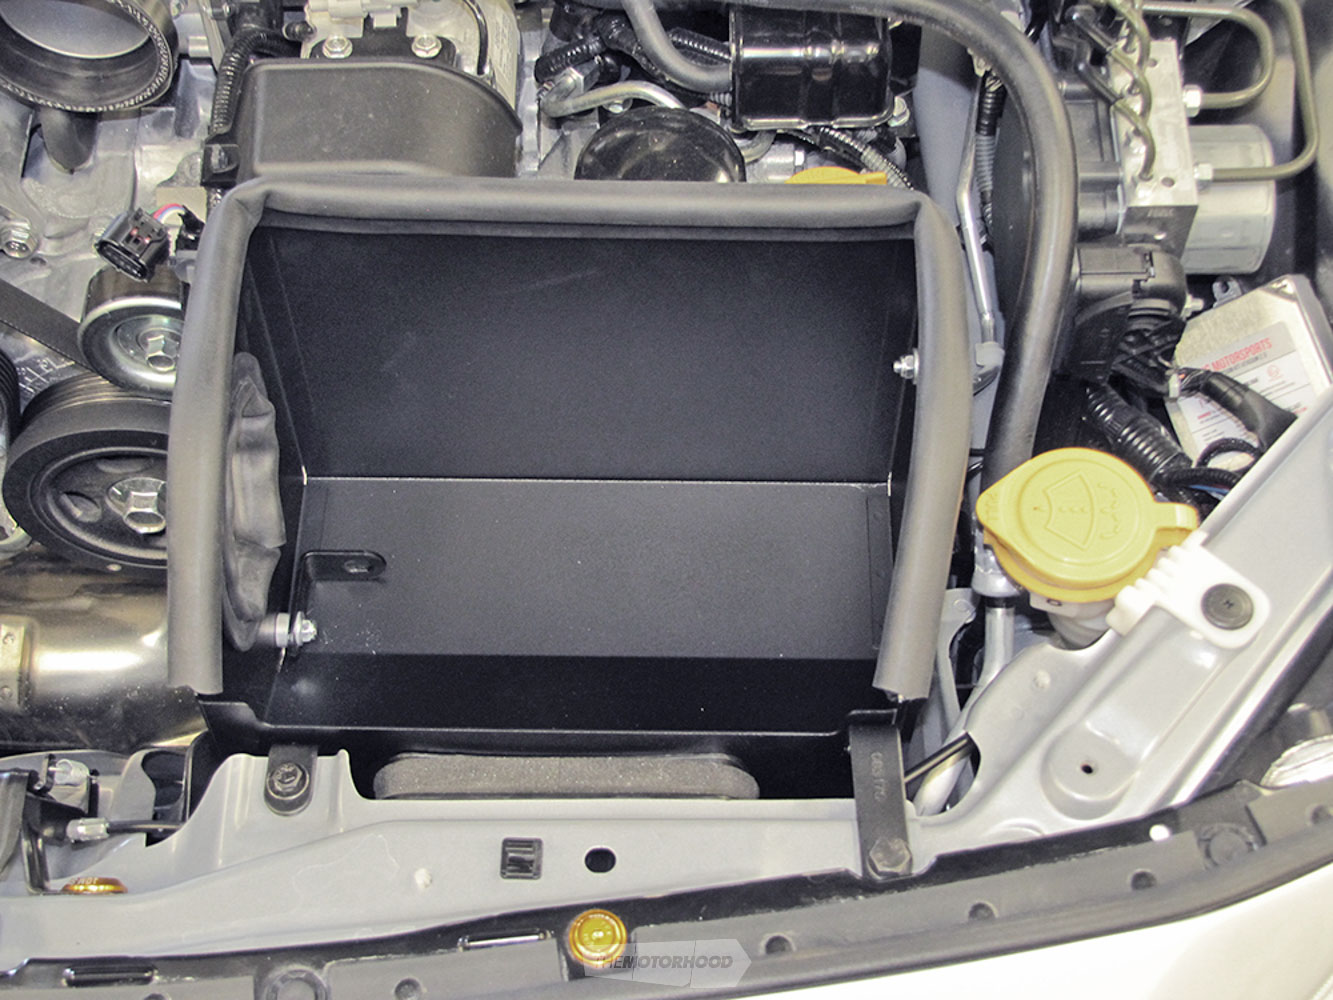
Using the factory hardware you just removed, install the provided heat-shield mounting bracket (070026) onto the lower air-box mount.
Step 8
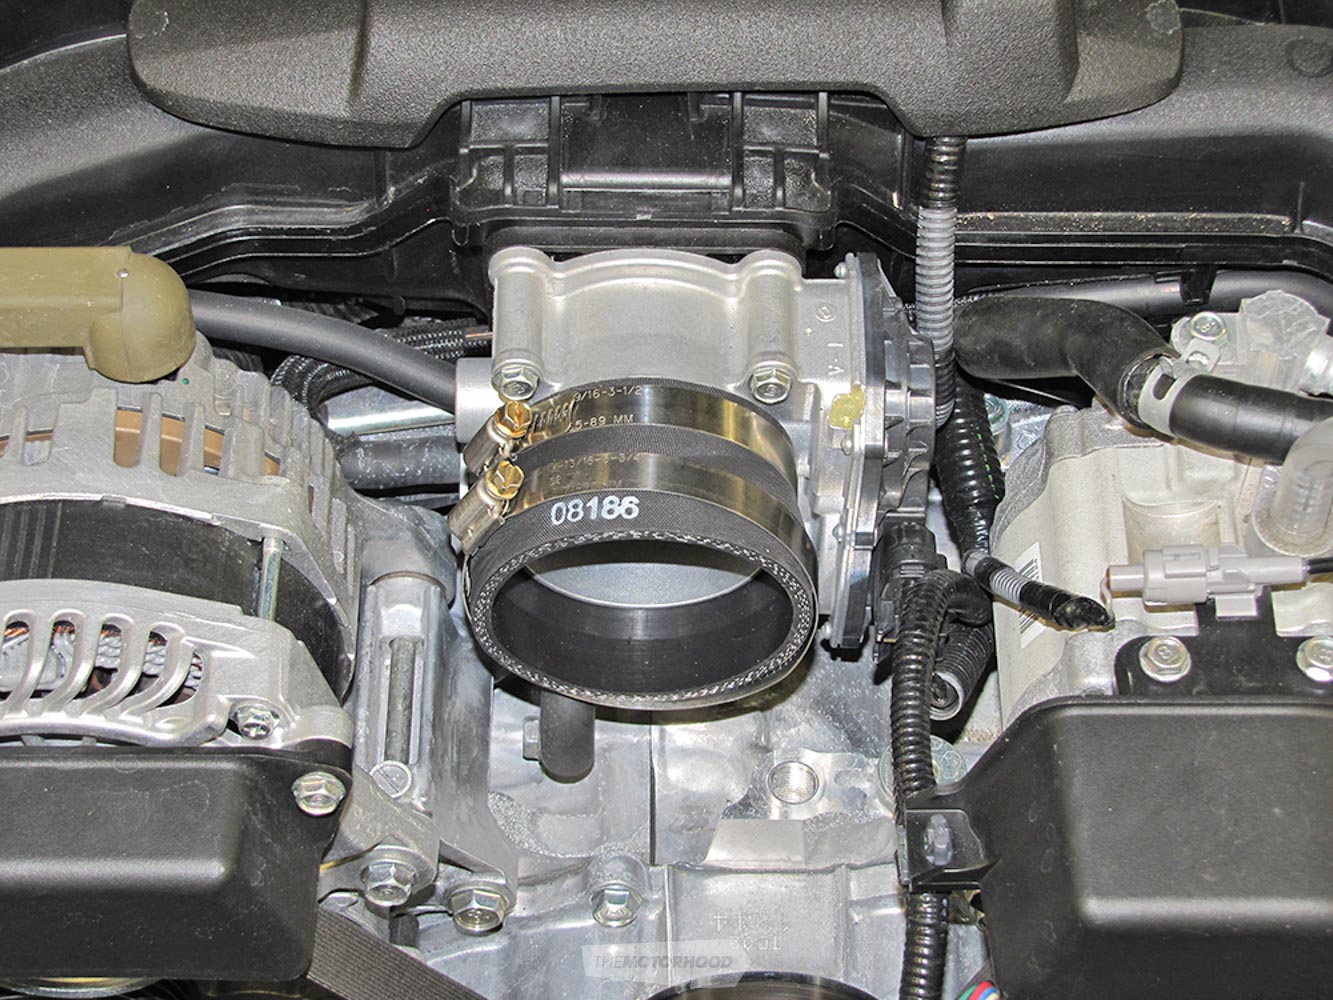
Install the provided three-inch to 3¼-inch silicone hose (08186) onto the throttle body and secure with the provided hose clamp.
Step 9
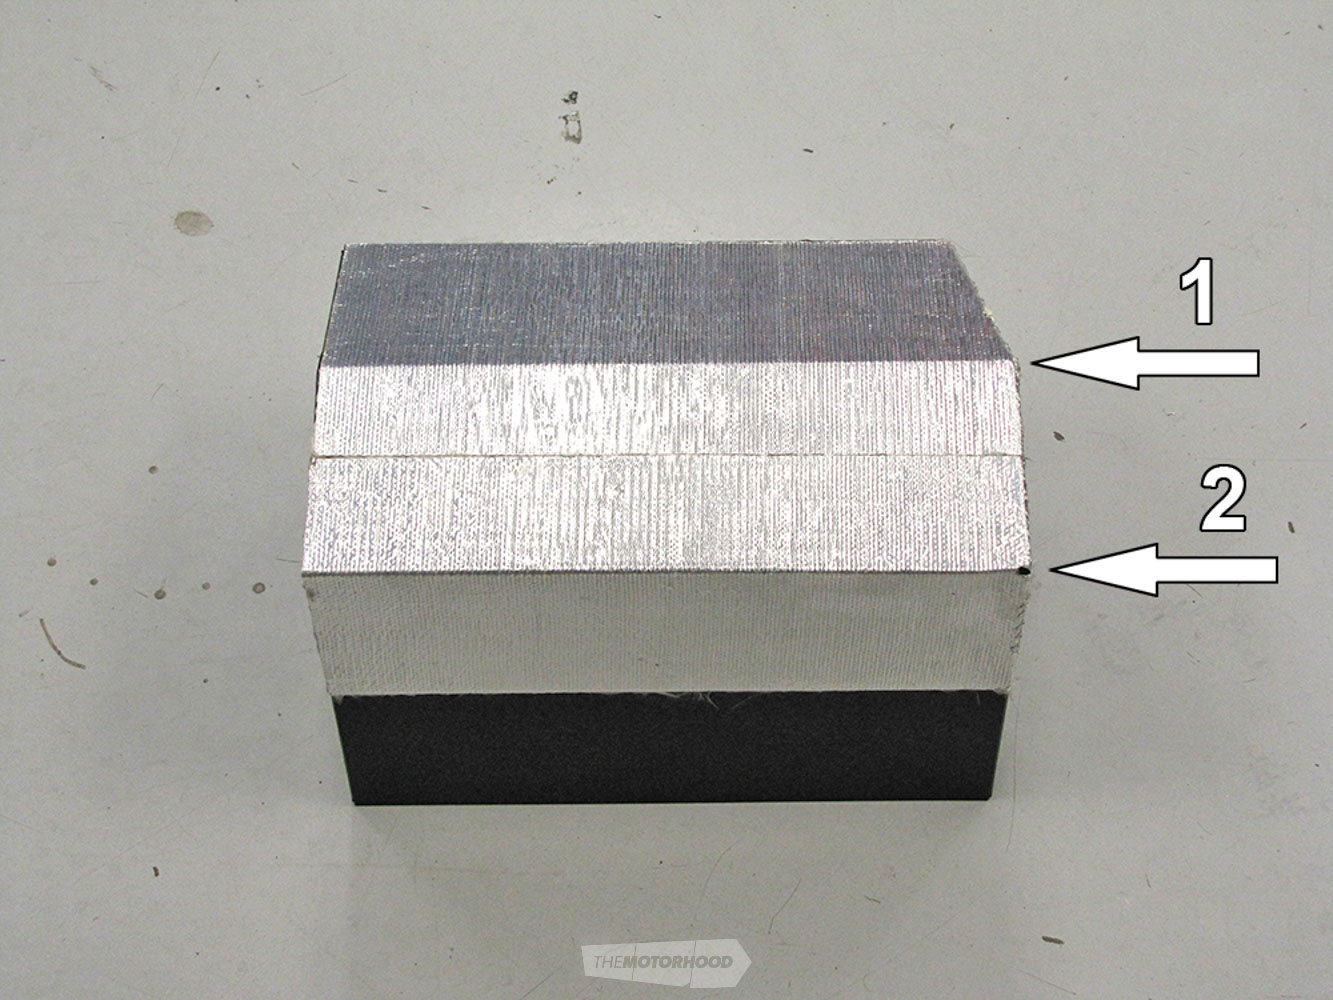
Prep the heat shield by applying the two insulation strips onto the bottom side of the shield. Trim to fit.
Step 10
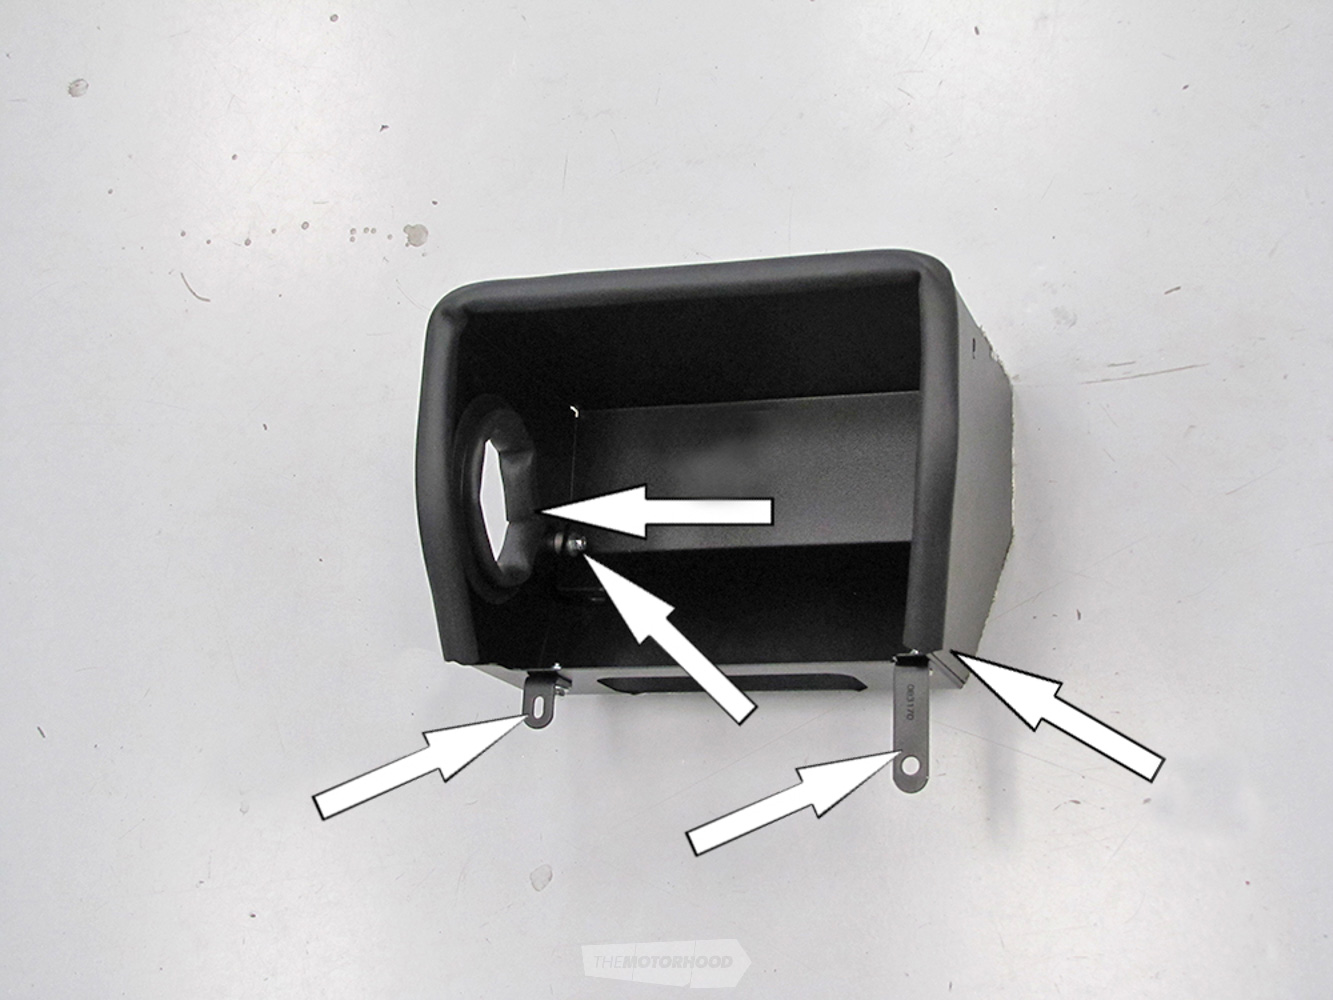
Three brackets need to be installed onto the heat shield, as shown, using the provided hardware — 083170, 070066, and 070015. (070015 uses a provided spacer and will need to be left loose for the time being.)
Step 11
The last addition to the heat shield is the edge trim. Cut into two pieces, one 685.5mm and the other 330mm. Install onto the exposed edges, the longer piece going along the top and the shorter piece around the pre-cut hole.
Step 12
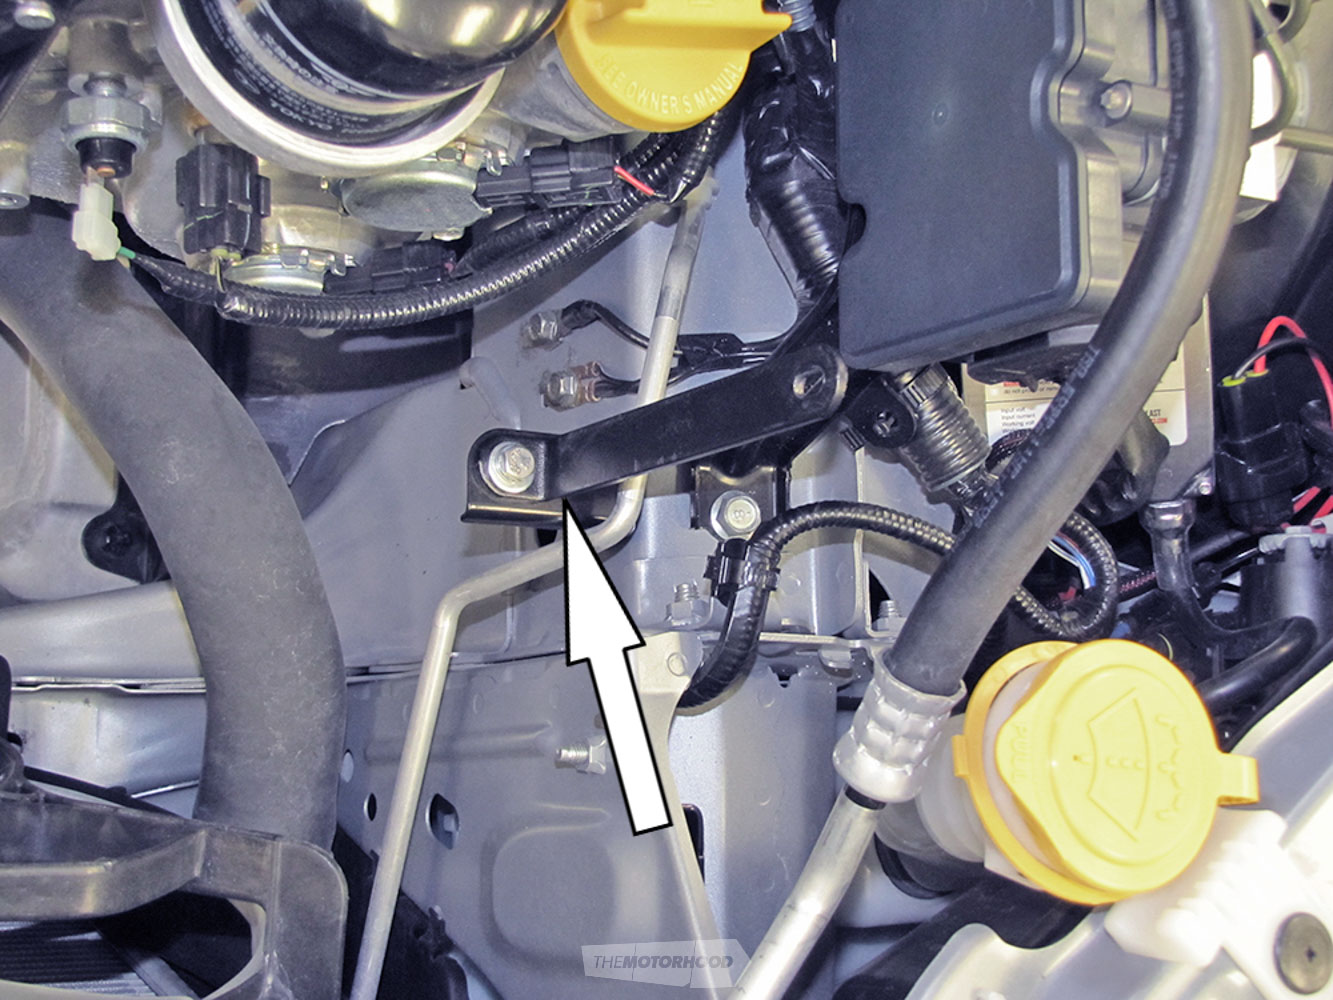
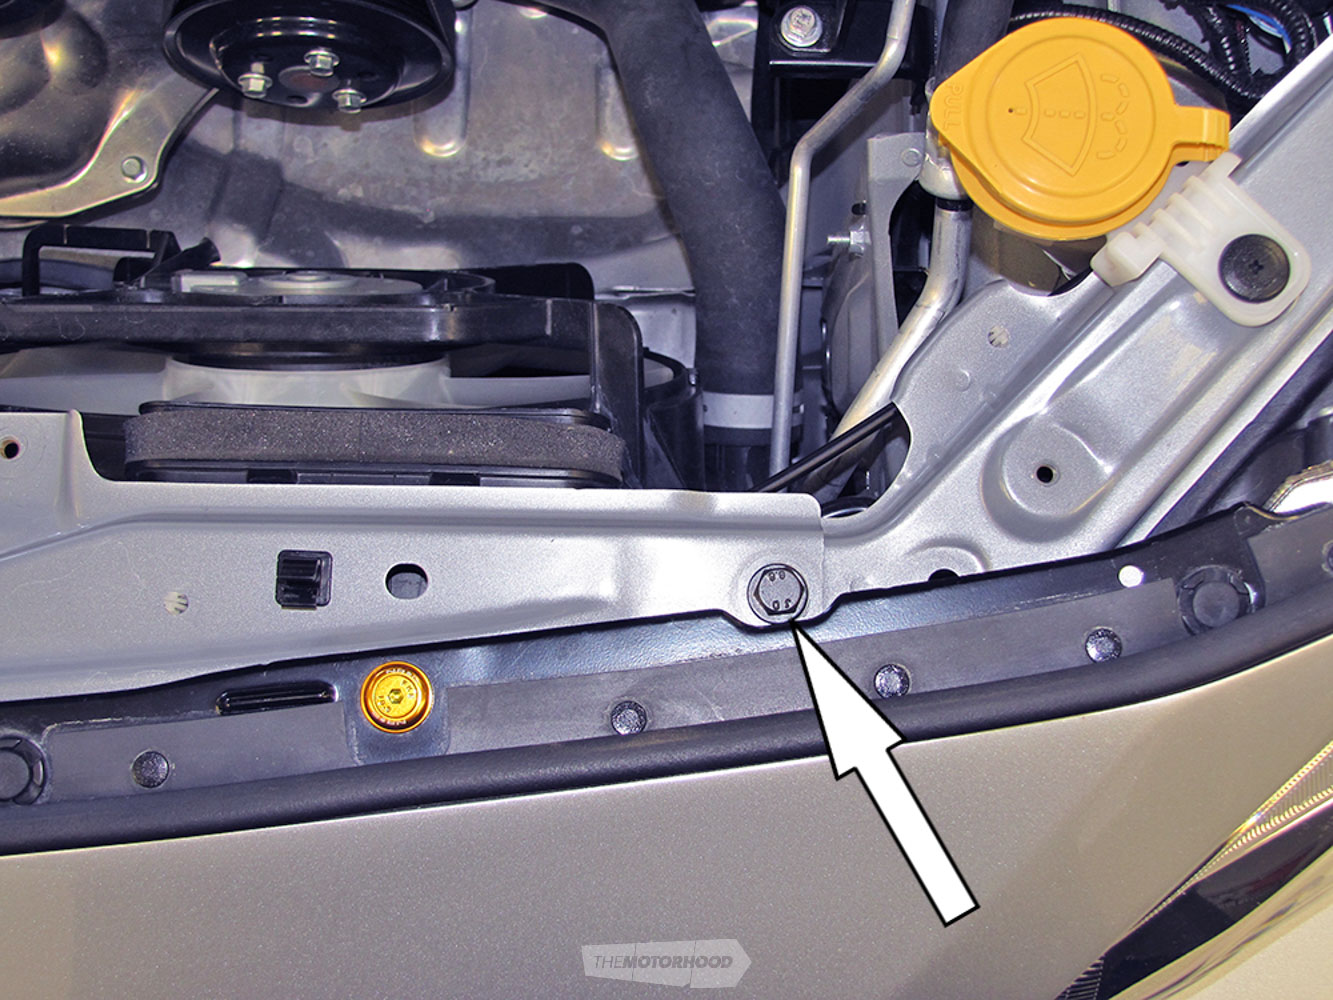
Remove the core support bolt shown. NOTE: This bolt will be reused.
Step 13
Bolt the heat shield into position, using the factory air-box mounts and the core support bolt you just removed.
Step 14
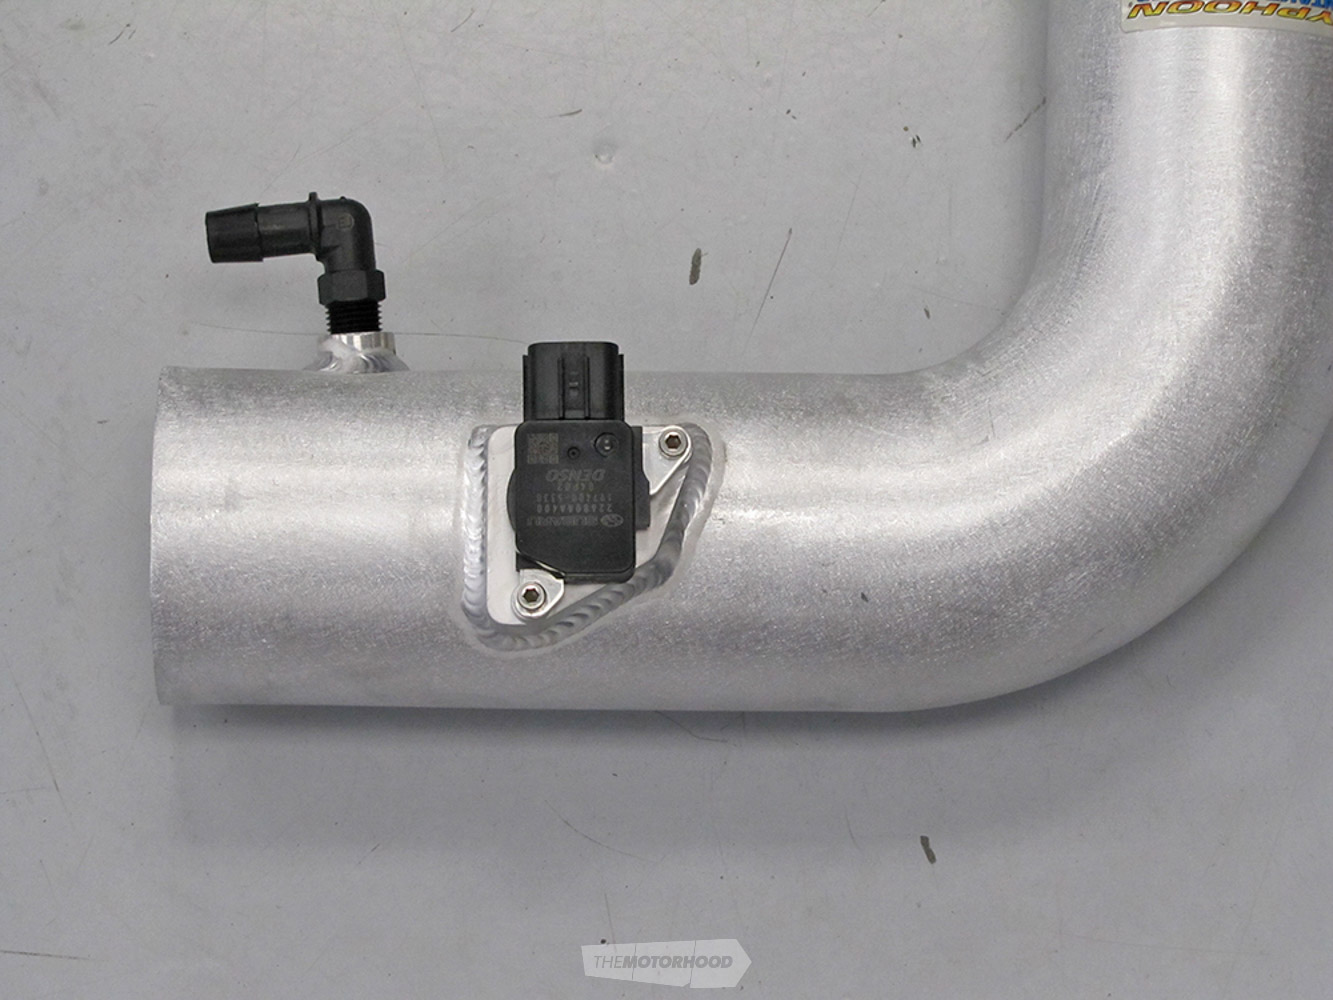
The next step is to prep the K&N intake tube for installation. First, thread in the plastic 90-degree crankcase vent tube, being careful not to cross thread. Install the vent fitting hand tight, then turn it two complete turns with a wrench.
Step 15
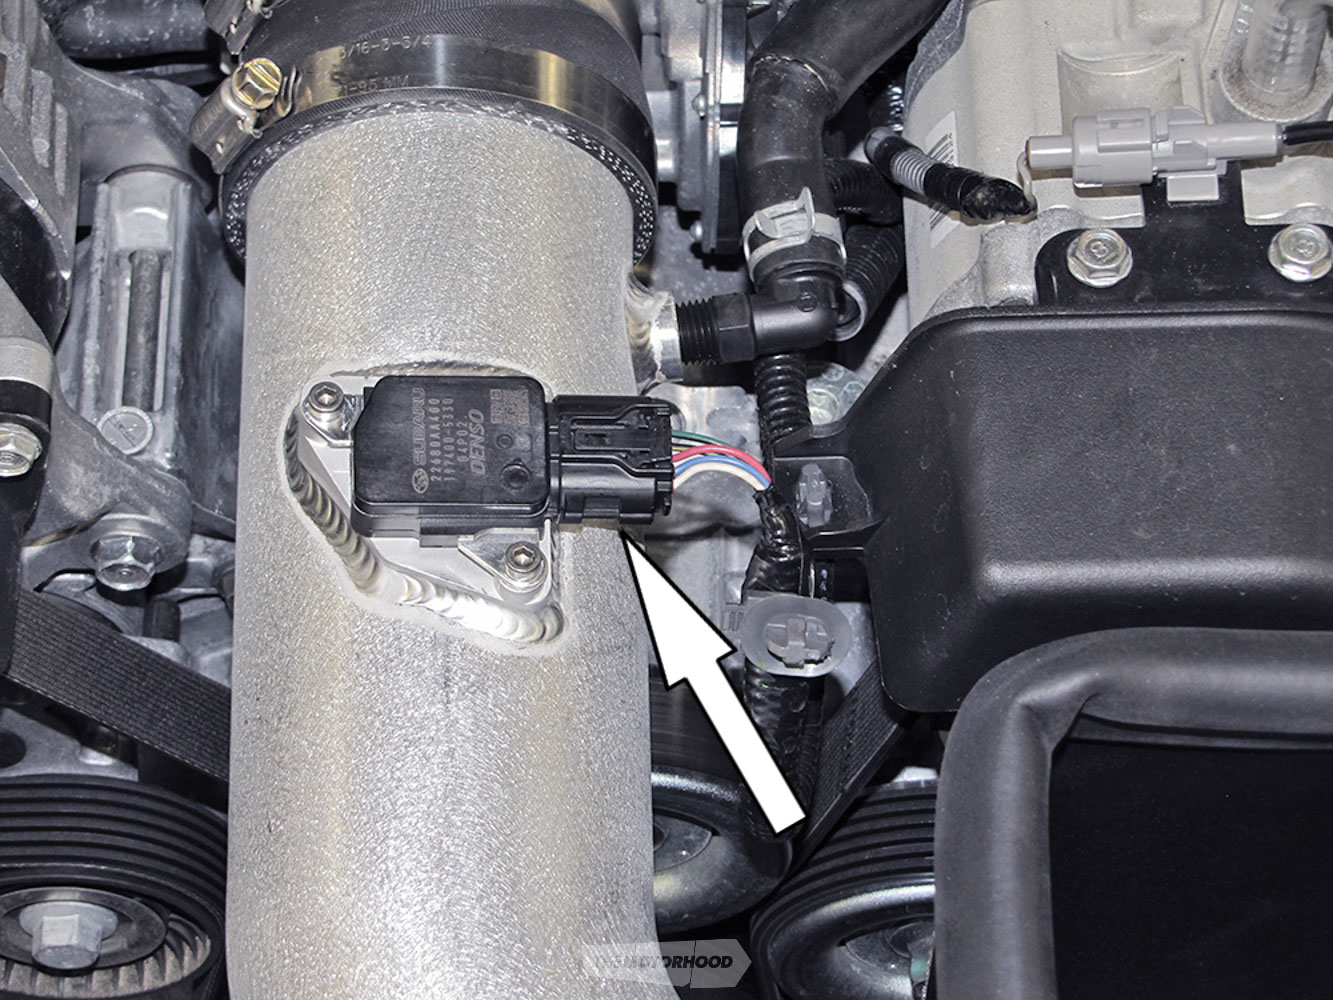
Remove the MAF sensor from the factory air-box and install it onto the K&N intake tube, using the provided hardware — not the factory bolts.
Step 16
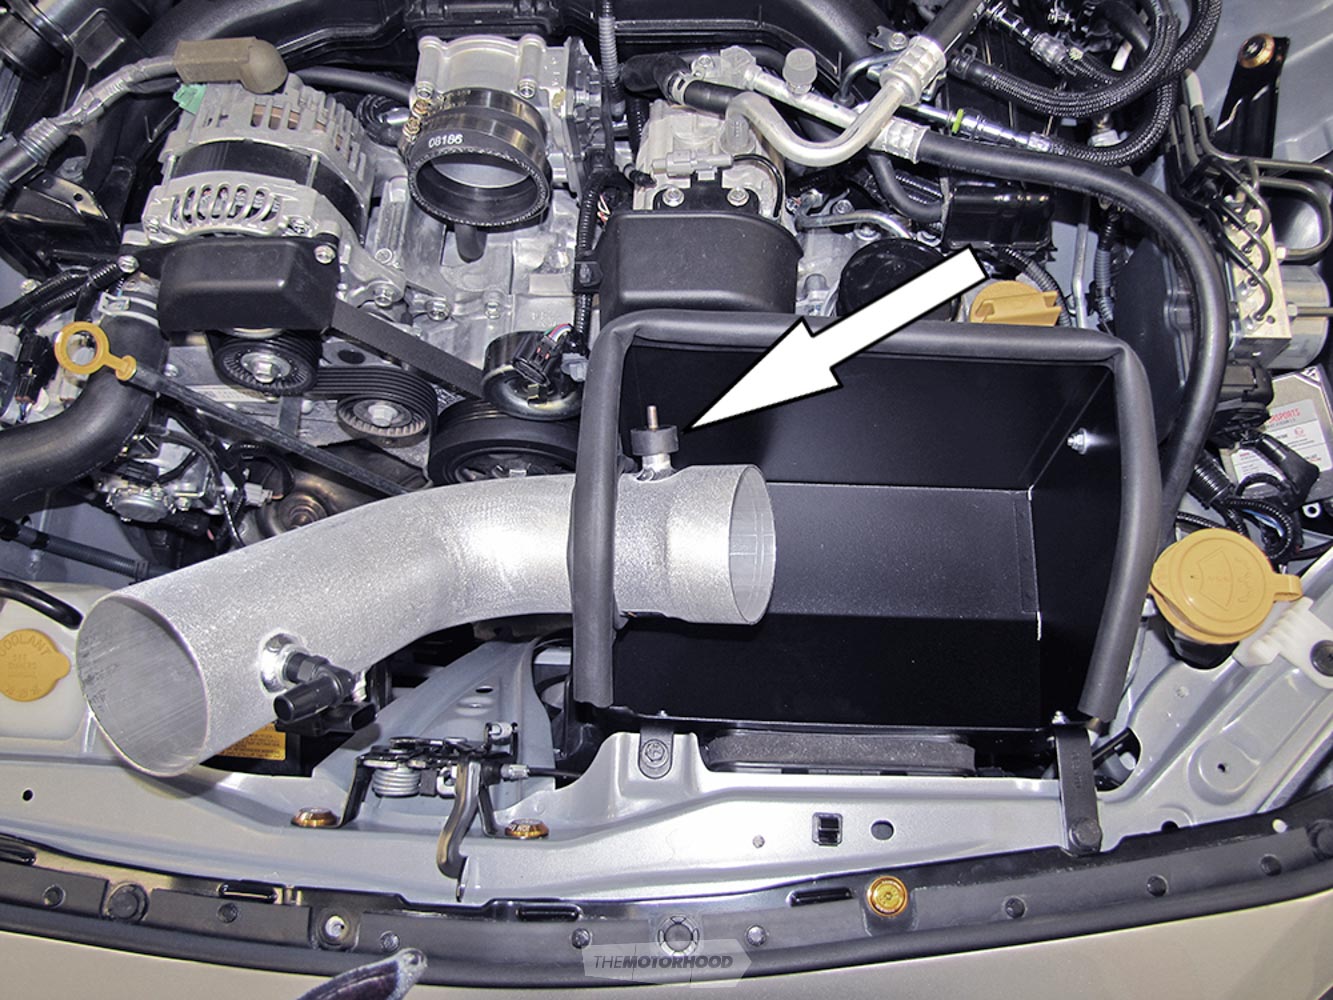
Install the K&N intake tube through the heat shield, being careful not to damage the edge trim as it’s a tight fit. You will also need to install the provided rubber mount before rotating into place.
Step 17
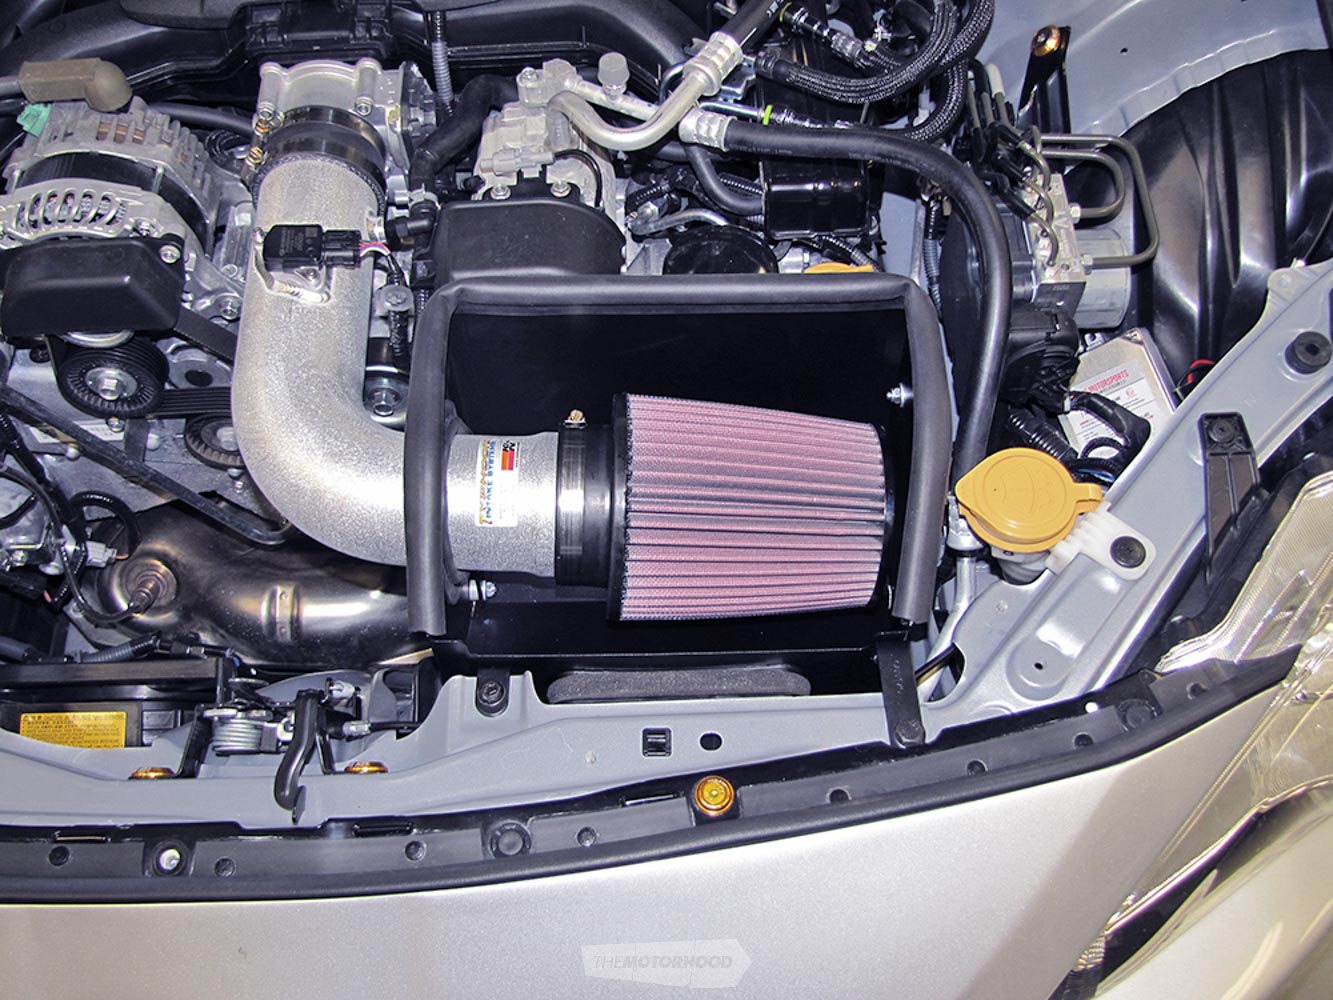
Insert the intake into the throttle-body silicone joiner and tighten the provided hose clamp. Ensure the rubber mount slots into the loose bracket in the heat shield. Tighten everything up.
Step 18
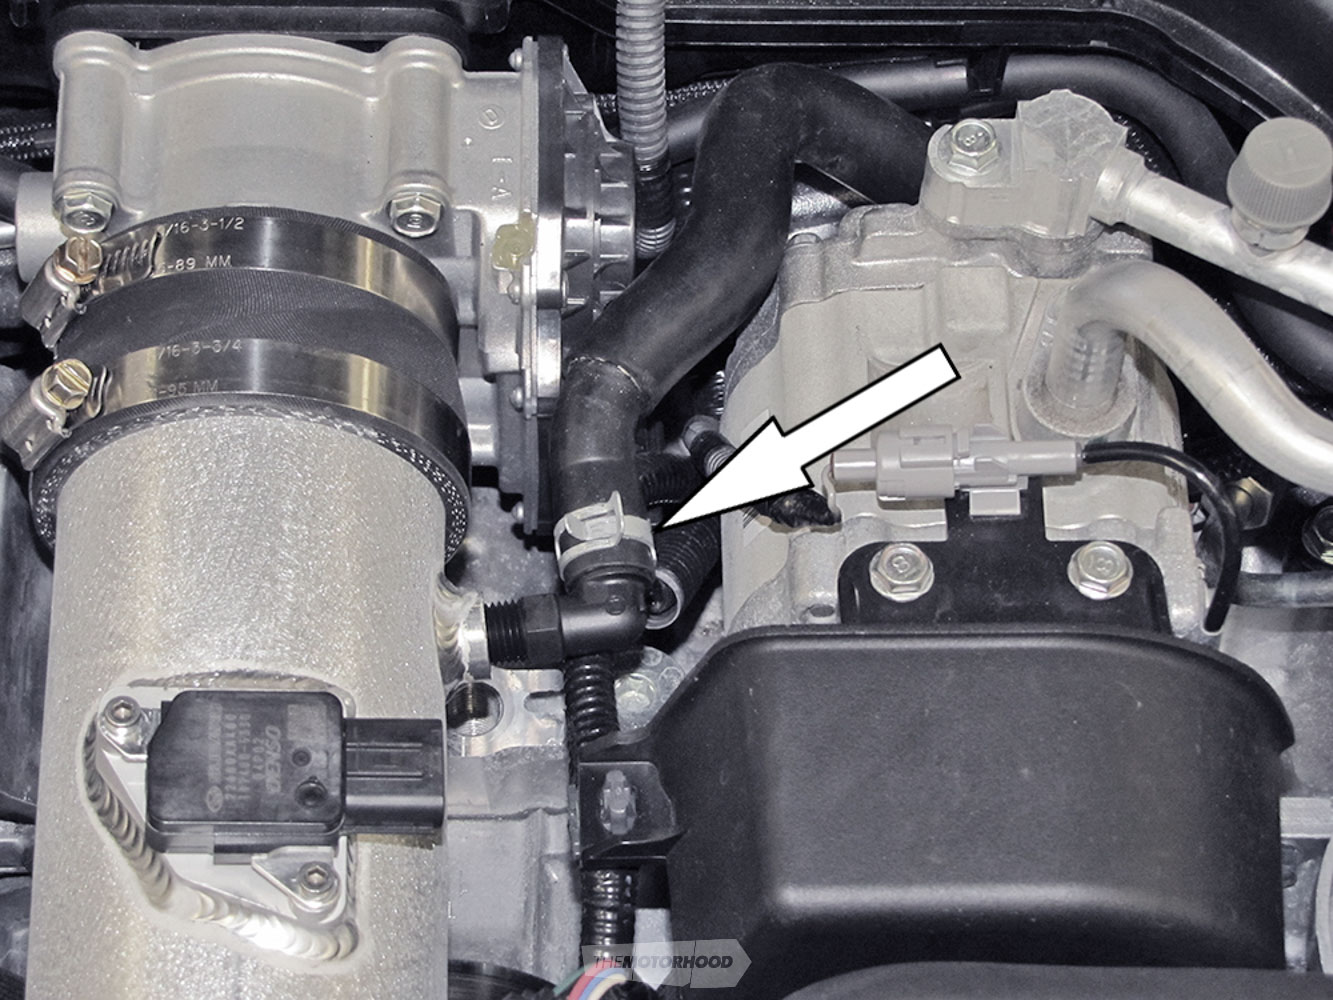
Connect the crankcase vent hose on the elbow and secure with the OEM spring clamp you removed earlier. You will also need to install the provided Caplug onto the engine sound drum, and reconnect the MAF sensor connector.
Step 19
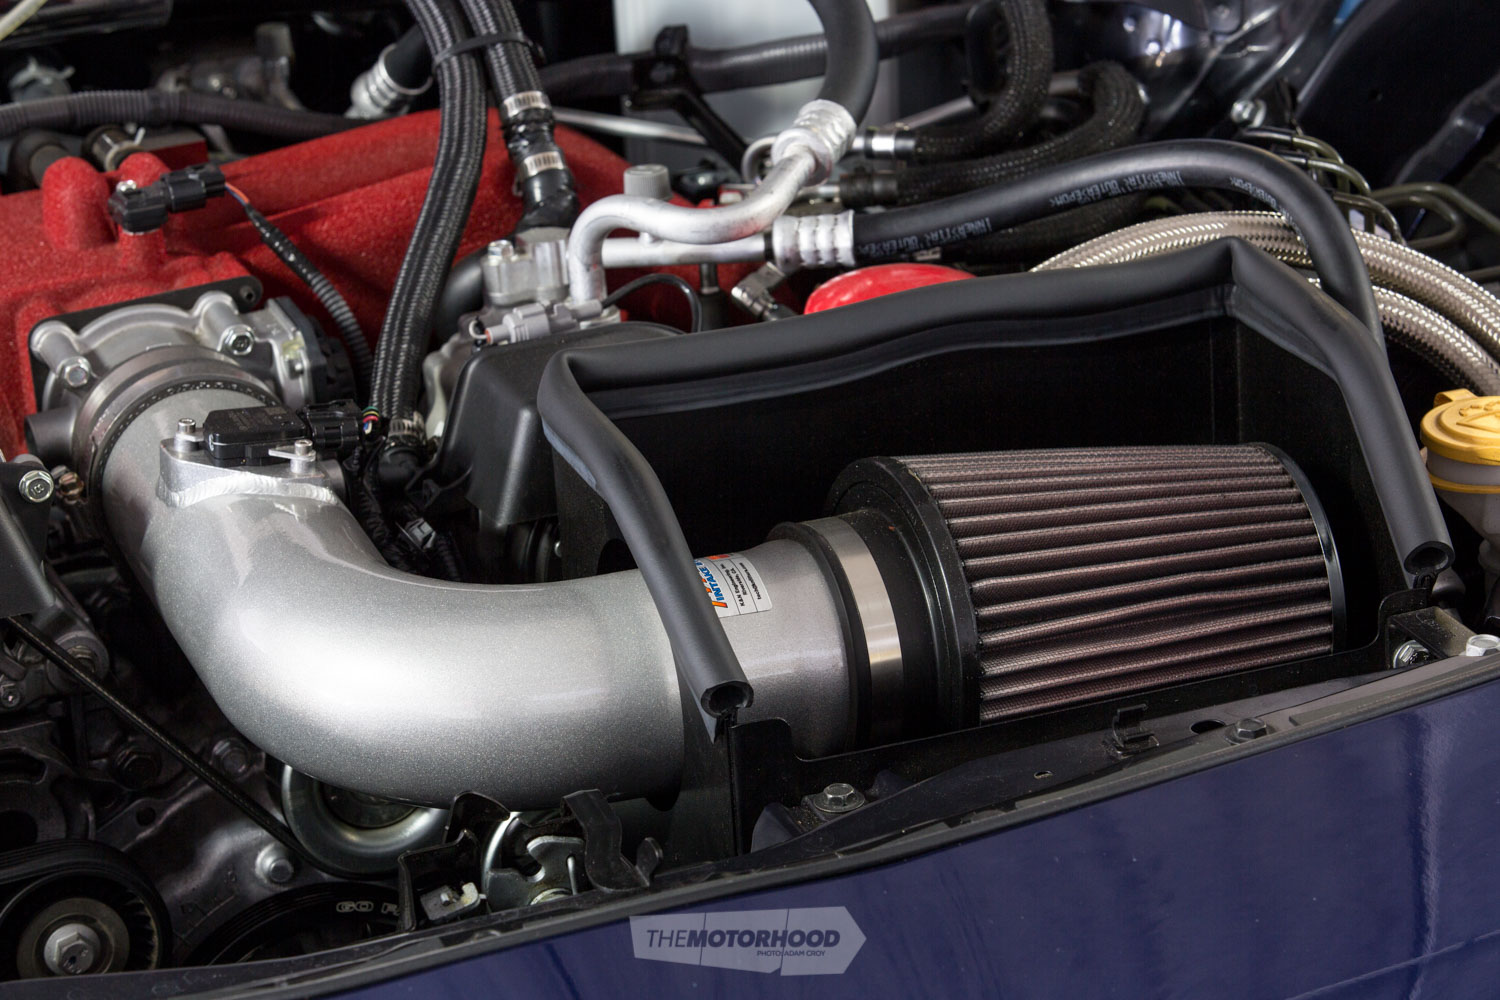
The final step is to install the K&N air filter and secure it using the provided hose clamp. Ensure that everything is tight, and reconnect the negative battery terminal.
*Added Protection
As added protection for your filter, a Drycharger air-filter wrap — Part No. RC-4630DK — can be purchased in a number of colours.


