data-animation-override>
“Nigel Petrie has dedicated the last two-and-a-half years to creating this home-built piece of art in motion”

If you’re reading this article, then chances are you love to build and modify cars to suit your own taste, style, and needs, no doubt pouring months or years worth of blood, sweat, and tears into the project — not to mention creating that black hole in your wallet that swallows every last cent you earn. But the fact is, when all is said and done and the project is complete, generally what you’re left with is just a modified version of a production car, something that was mass produced in a factory somewhere. This also means that at every turn during the modifying process, you are forced to deal with the limiting factors, which are the confines of the original unibody chassis.
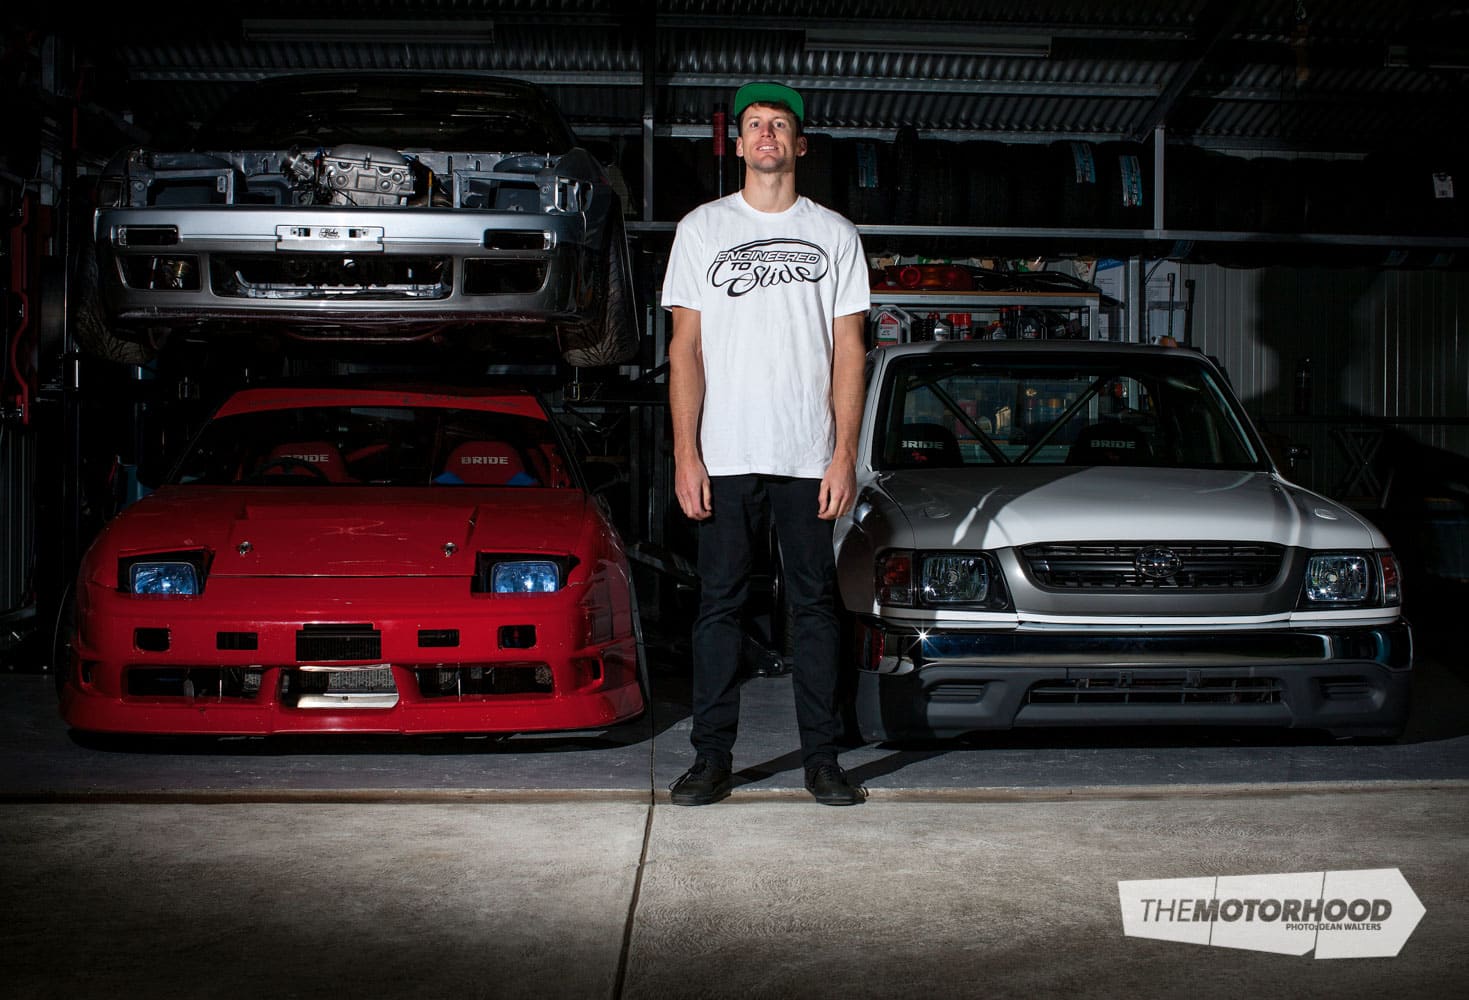
These two points have always bothered Australian Nigel Petrie from Engineered to Slide (ETS). Nigel has a long list of builds to his name, including many S-chassis drifters, but every one of his builds left him with this same feeling. That was until he decided it was time to act on his five-year dream, a dream that ended up keeping him awake at night and consuming every spare moment for two-and-a-half years years of his life. “In 2005 I built a bagged Toyota Hilux that served as a tow car for my 180SX drift car. Something happened in those years of ownership that I just couldn’t get out of my head; the thought of combining the two styles seemed to work perfectly for me.”
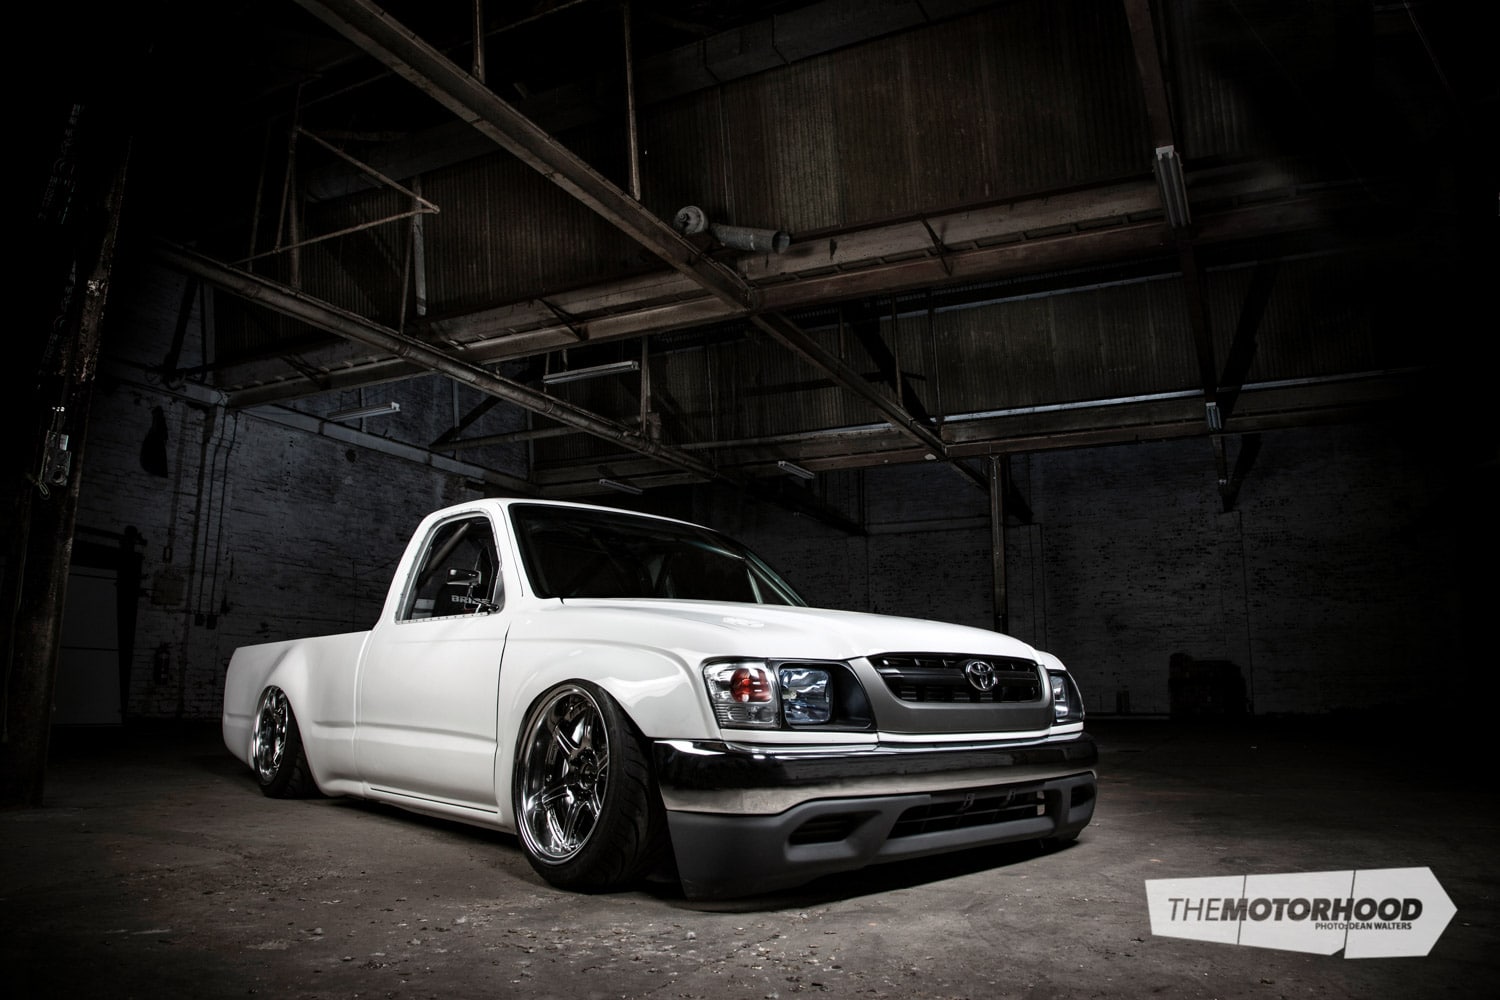
It was December 5, 2010, that Nigel hauled arse to Sydney from his home in Geelong, Victoria, and picked up a bare 2002 Toyota Hilux single cab. Only days later the floor was removed with an angle grinder and the fun could begin.
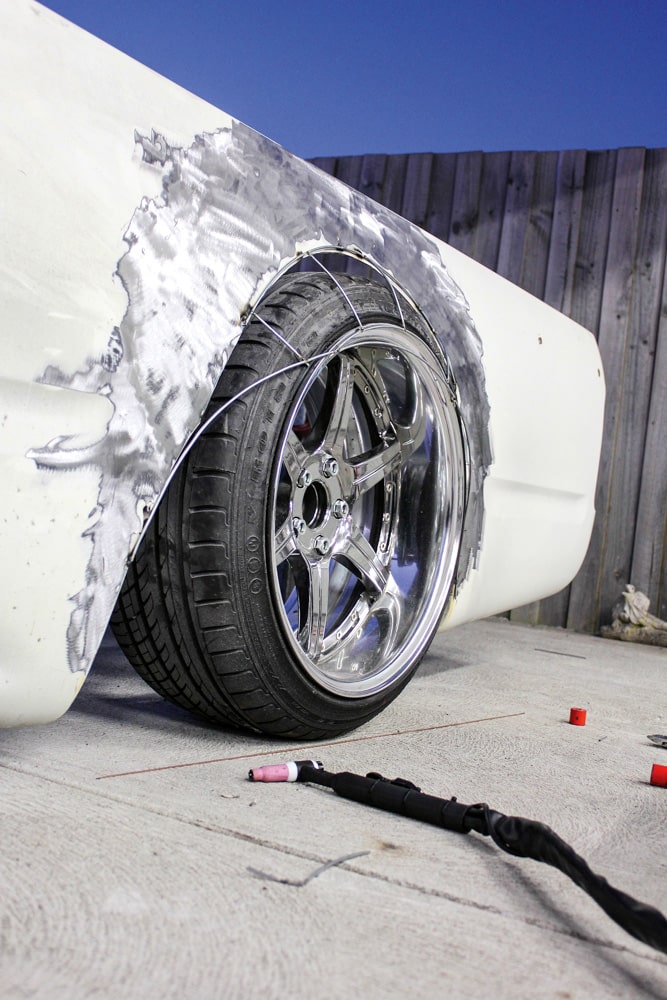
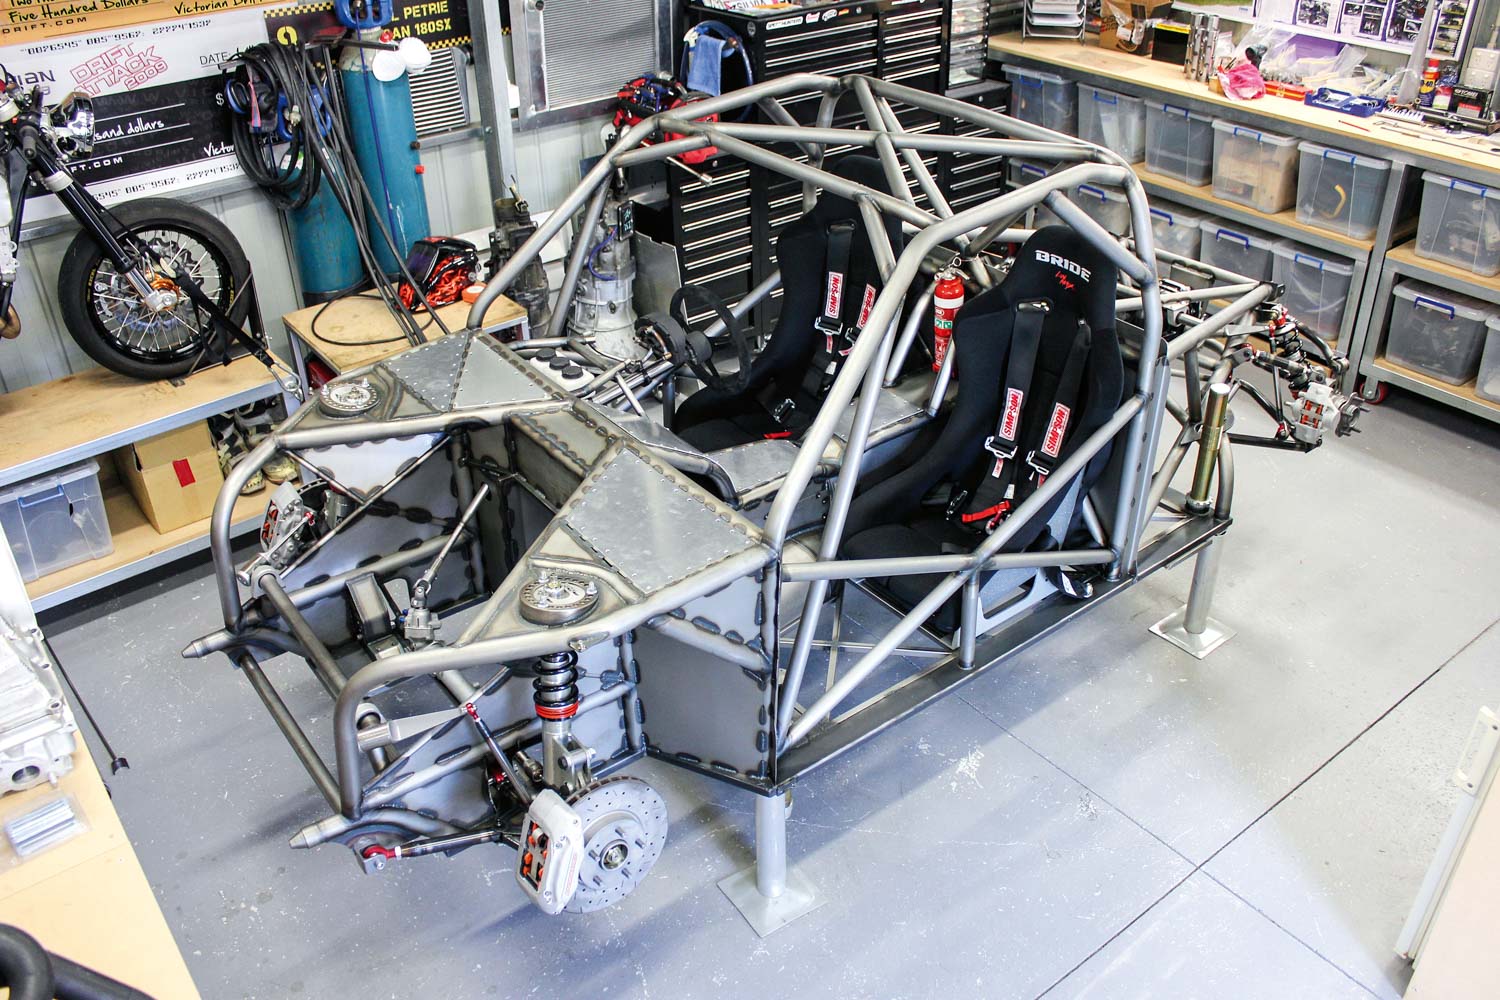
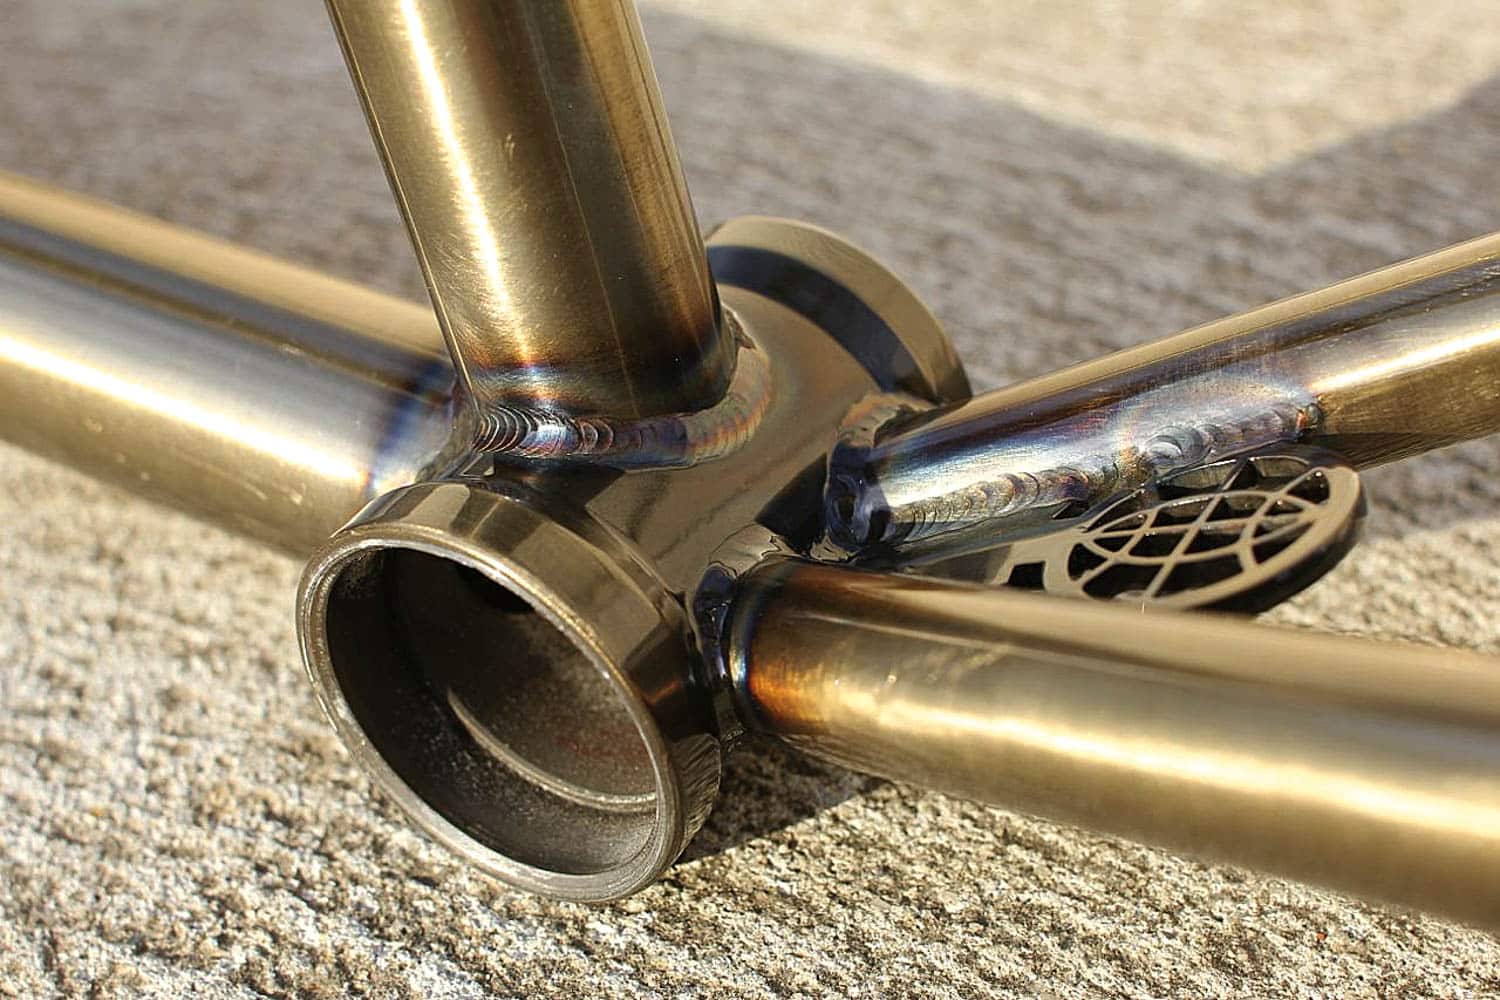
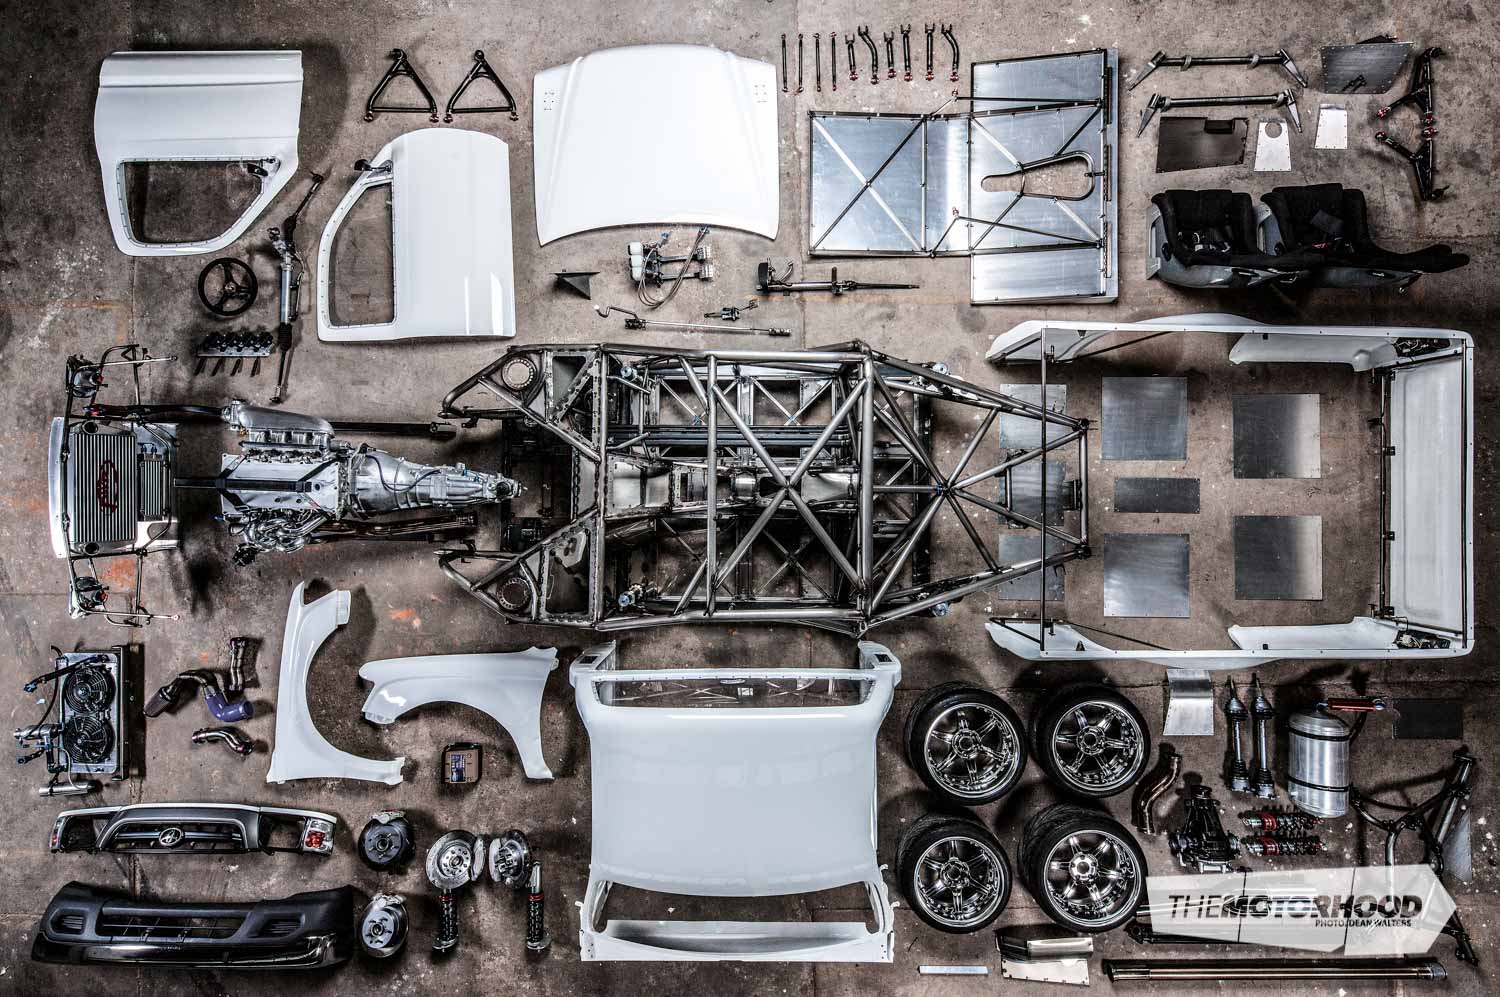
The first the world saw of the project was simply a gutted cab sitting on the ground, with a set of Volk TE37s jammed under the guards. Nearly three years on from that day, looking at the completed full-tube chassis, you would assume Nigel is a seasoned TIG welder, but the truth of the matter is that before attempting this build, he had never picked up a TIG torch or notched a piece of roll-cage tube.
By day Nigel worked as a fitter-and-turner for Ford Australia, but by night he would plug away at the project in his single garage.
It was in the early stages of the build process that those following the ETS blog got to learn about the type of guy Nigel is. We aren’t sure what our Aussie cousins call it, but here in New Zealand we call it good-old ‘Kiwi ingenuity’. Nigel didn’t have the $3000 required to obtain the pipe notcher, roll-cage bender, and TIG welder he needed to get started, so he purchased the TIG and built his own tube notcher and bender before ordering 48m of chromoly tubing, which would eventually become the chassis and roll cage. “I didn’t have any drawings, I didn’t have the necessary skills, money, or time to make this happen, but I knew that where there is passion, there will be a way to overcome any obstacles I might face,” Nigel said.

Photo: Nigel Petrie
He soon became an addict, searching for the perfect bend, the perfect notch, and the best way to achieve strength, all the while documenting the build in meticulous detail, with almost daily updates appearing on his blog. The project gained momentum, though at stages it felt like 10 steps forward and five steps backward, mainly because as progress ticked on, Nigel’s skill set increased. That meant things he had previously completed were now not up to spec, and on discovery, each was greeted with the grinder as he removed and reworked it. And we aren’t just talking about small details — the first rework involved removing the entire completed floor and front frame-rail sections that he had MIG welded in favour of a much simplier TIG welded design.
The engine/gearbox mounts also received constant attention, with no fewer than six different concepts worked on, implemented, and then scrapped in favour of a new, cleaner design — all just part of Nigel’s pursuit for home-built perfection. The first six-month completion date came and went, but by mid 2011 the chassis was rolling utilizing a bunch of S-chassis parts, like the rear diff cradle, that would all come to be removed later down the line.
The Hilux was towed back to Sydney for its first public showing as a work-in-progress at the 2011 World Time Attack Challenge (WTAC), where Nigel also drove his trusty 180SX competition car in the Tectaloy International Drift Challenge. The WTAC was to become the yearly showcase for the project, and it again showed at the 2012 WTAC in a far-closer-to-complete state, then very fittingly made its on-track debut at the 2013 WTAC event.

Photo: Nigel Petrie
It was between the 2011 and 2012 showings that the build really started to take shape. Nigel and his partner Celia left behind the one-car garage and moved to a new home, a property with a shed big enough to house all Nigel’s projects (he owns a few). Although this one was stalled for a few months, it was soon back into full swing.
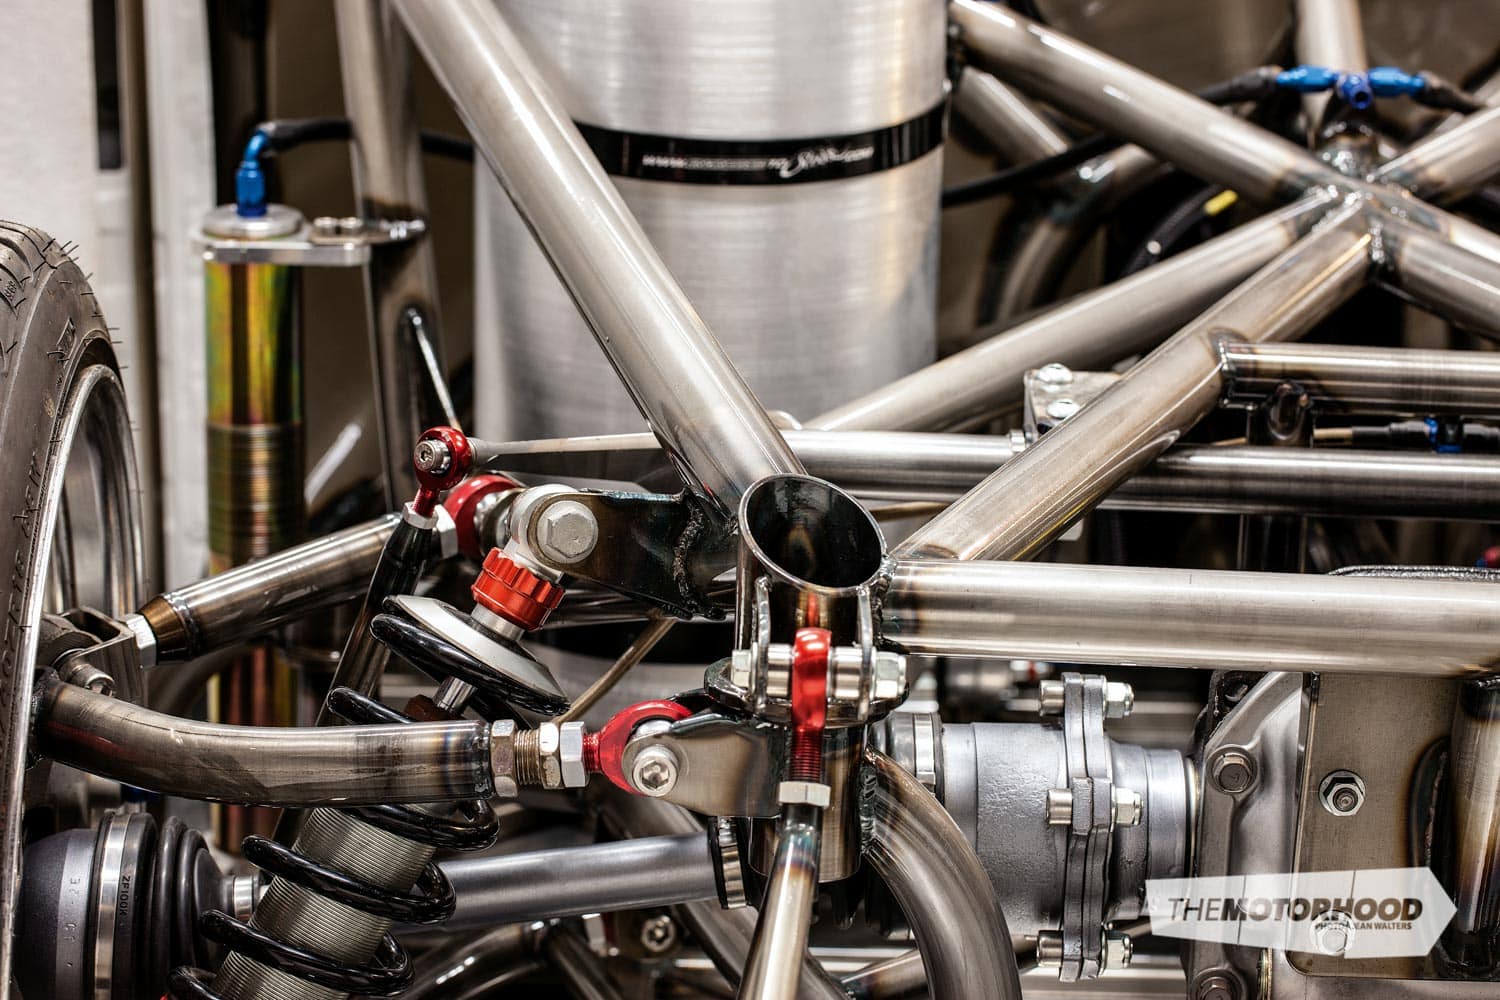
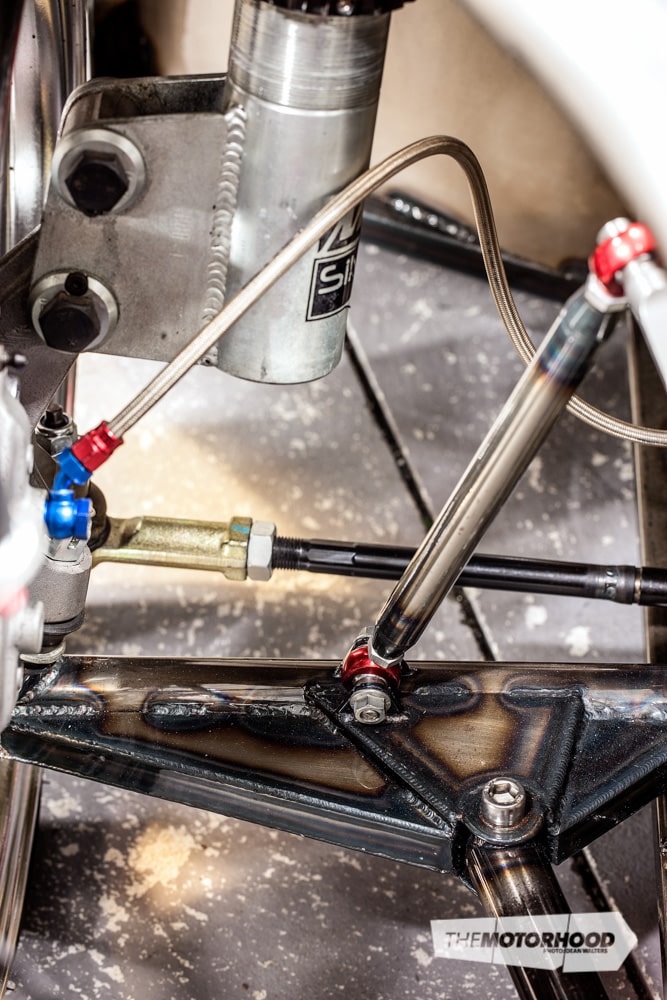
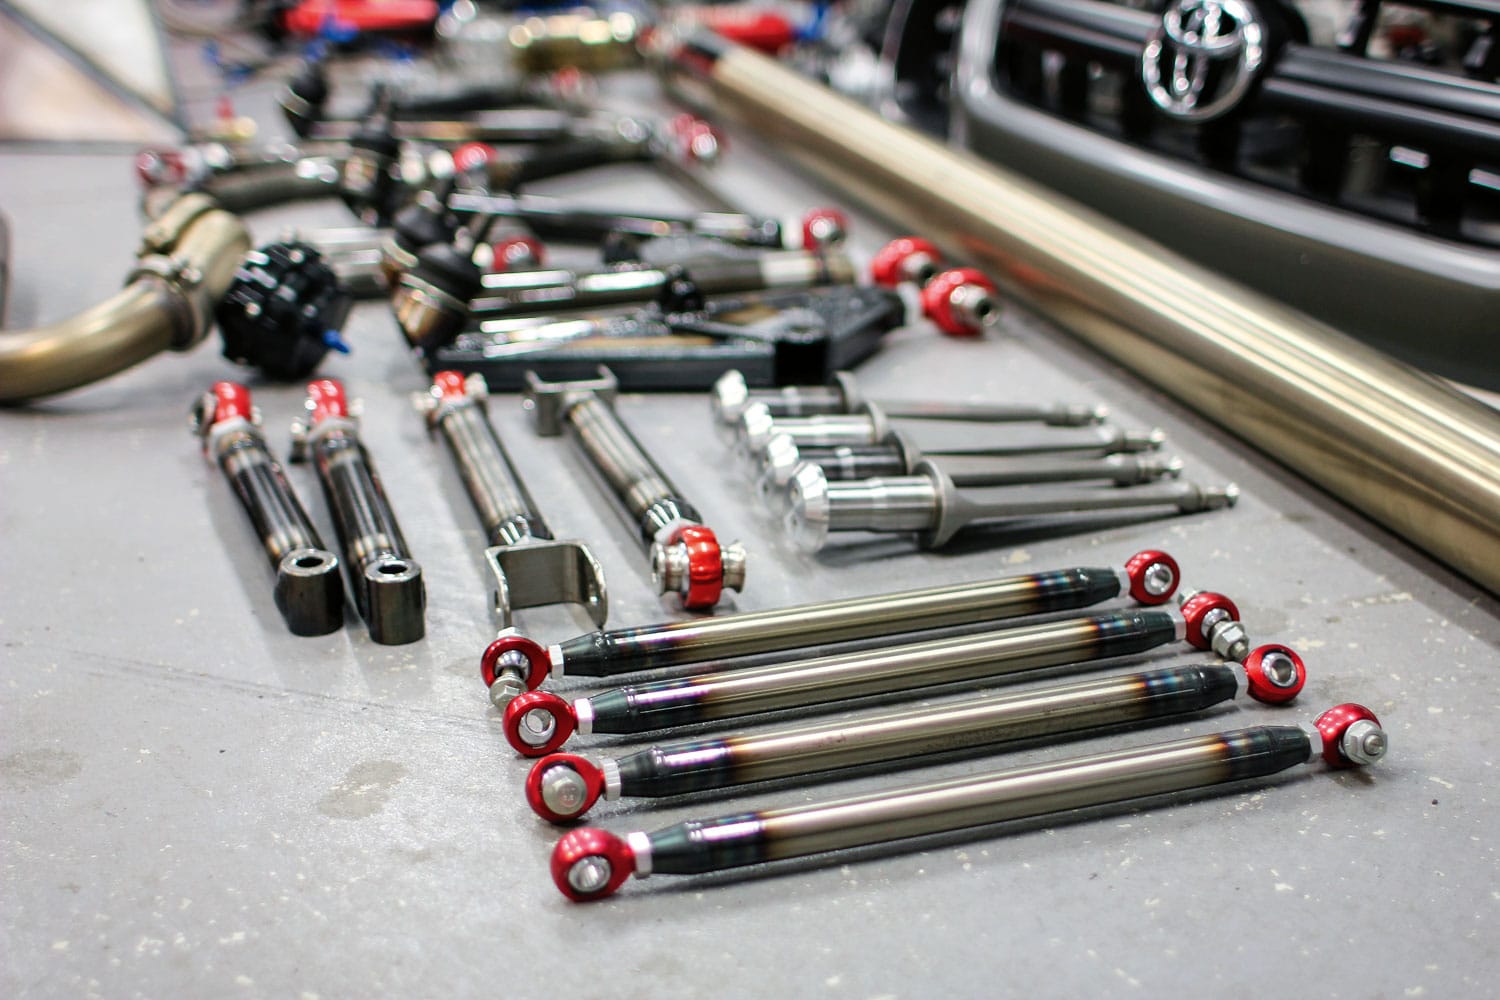
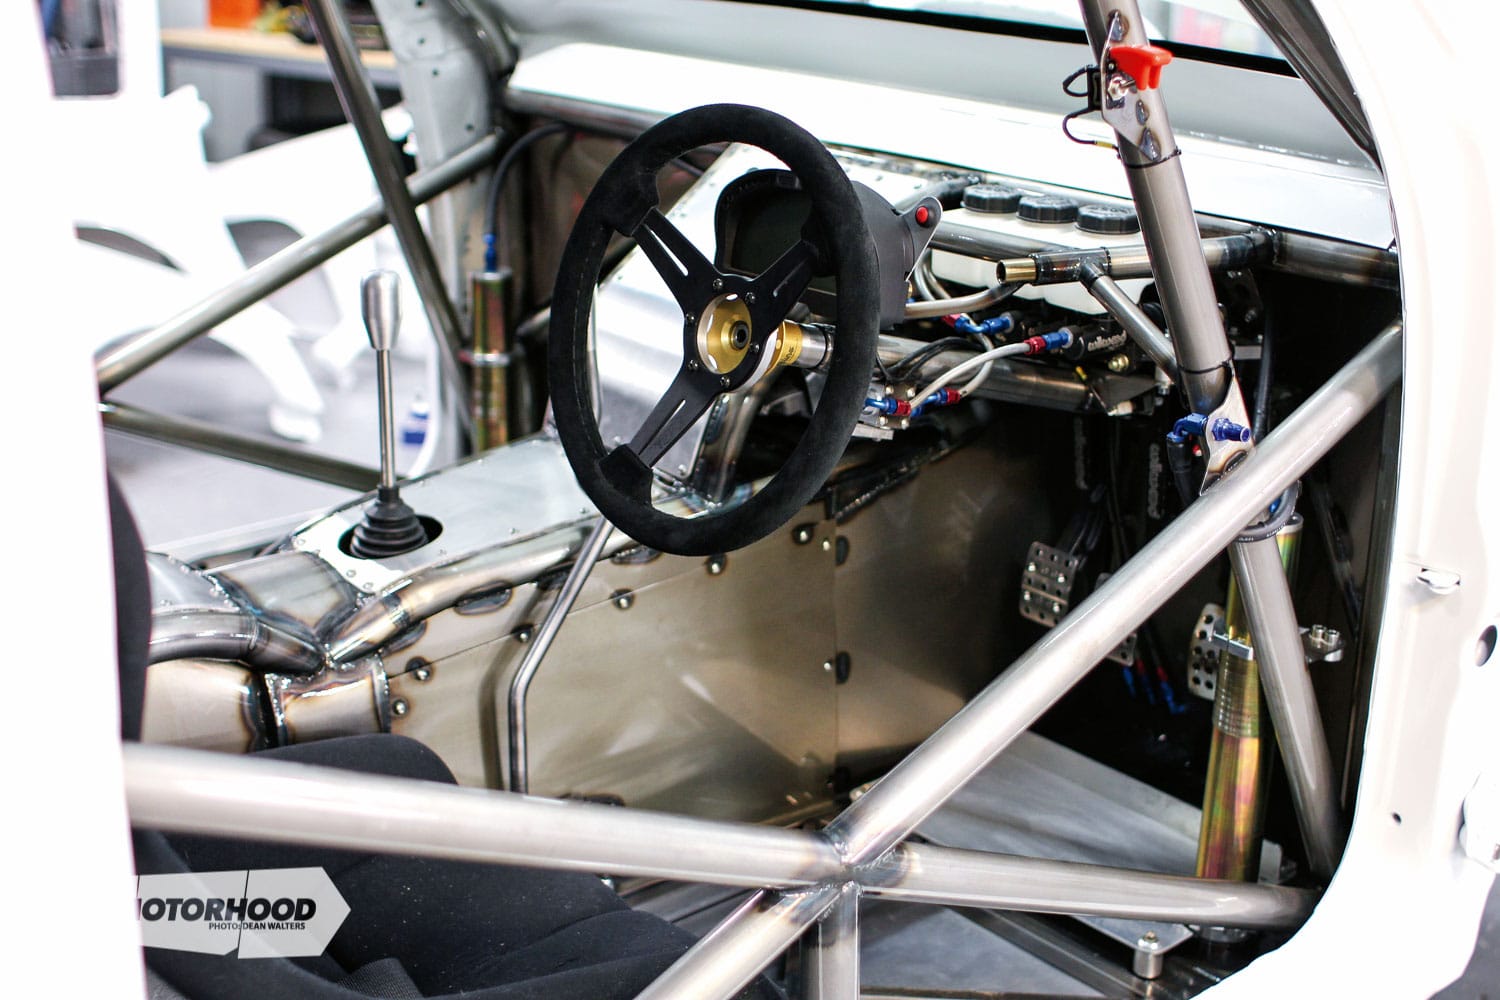
The final engine-mount design was sorted, the third gearbox tunnel was built, the entire dash section was sorted, the mounts for the tray were built, and the custom MCA suspension was installed. This wasn’t like building a unibody project, where most things are bolted to the factory sheet metal. In this project, Nigel had to carefully consider the location and mounting of each tiny component, first mocking up, then making a template — initially from cardboard and then from 1mm Lexan — to fine-tune it. Once he was 100-per-cent satisfied, the final part was produced and welded or bolted in. “I am truly surprised that this has become what you see here. Every step of the way I vowed to do each part better than the last.”
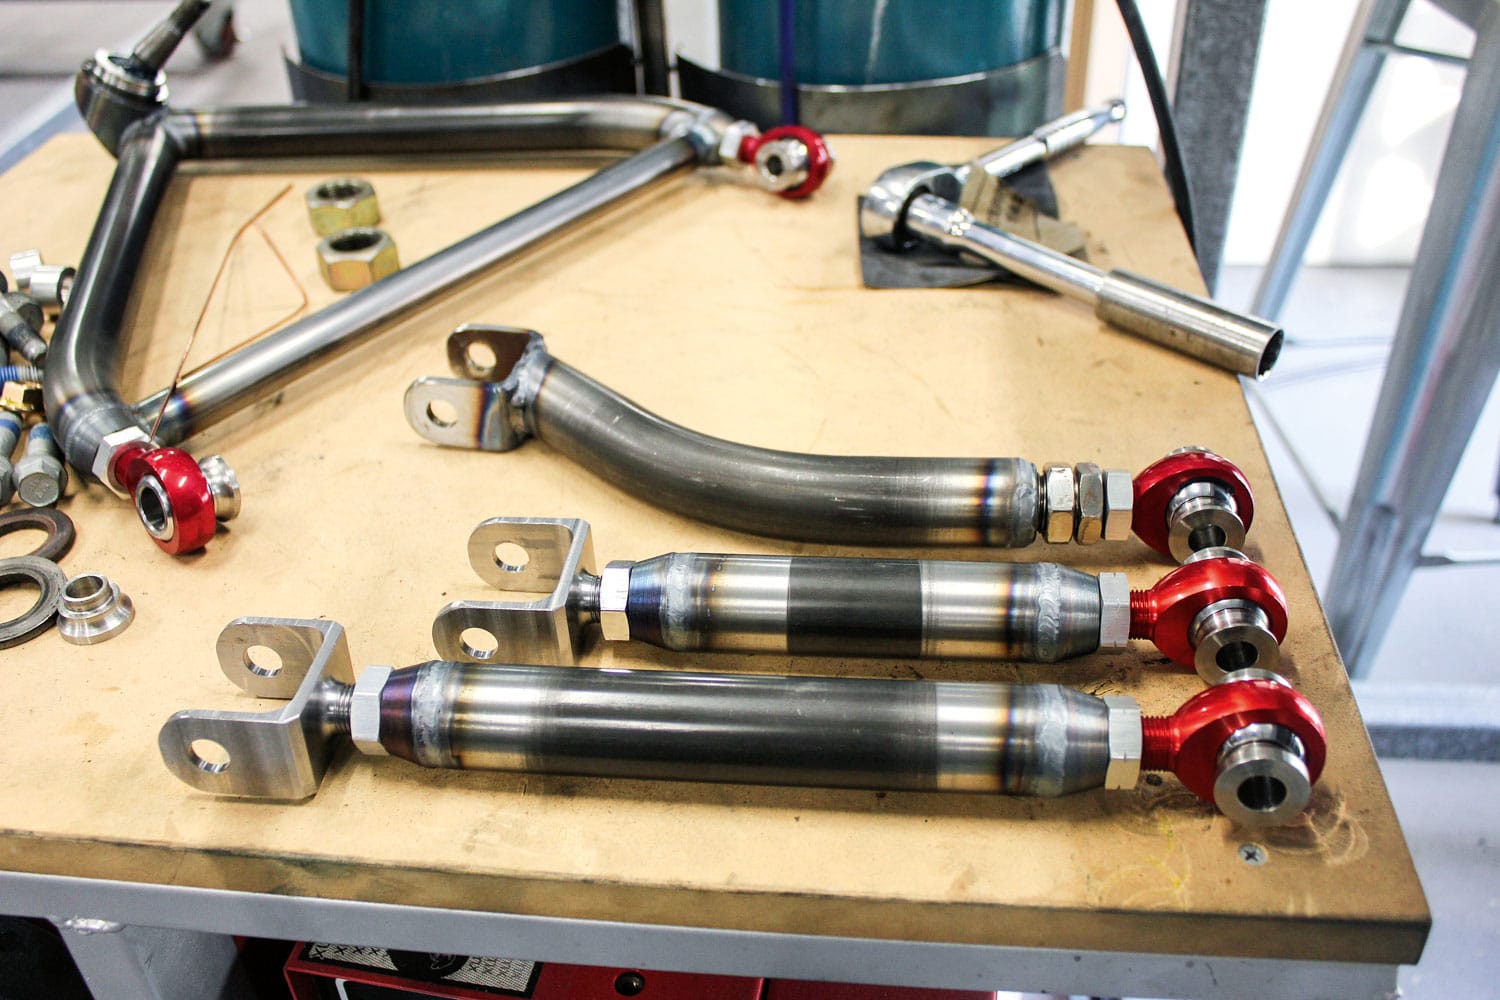
That was the case with parts like the rear cradle. Originally Nigel used a stock S15 cradle and an R200 diff housing and planned to run off-the-shelf arms, but you will notice the finished product is a bespoke chromoly cradle with handmade arms.

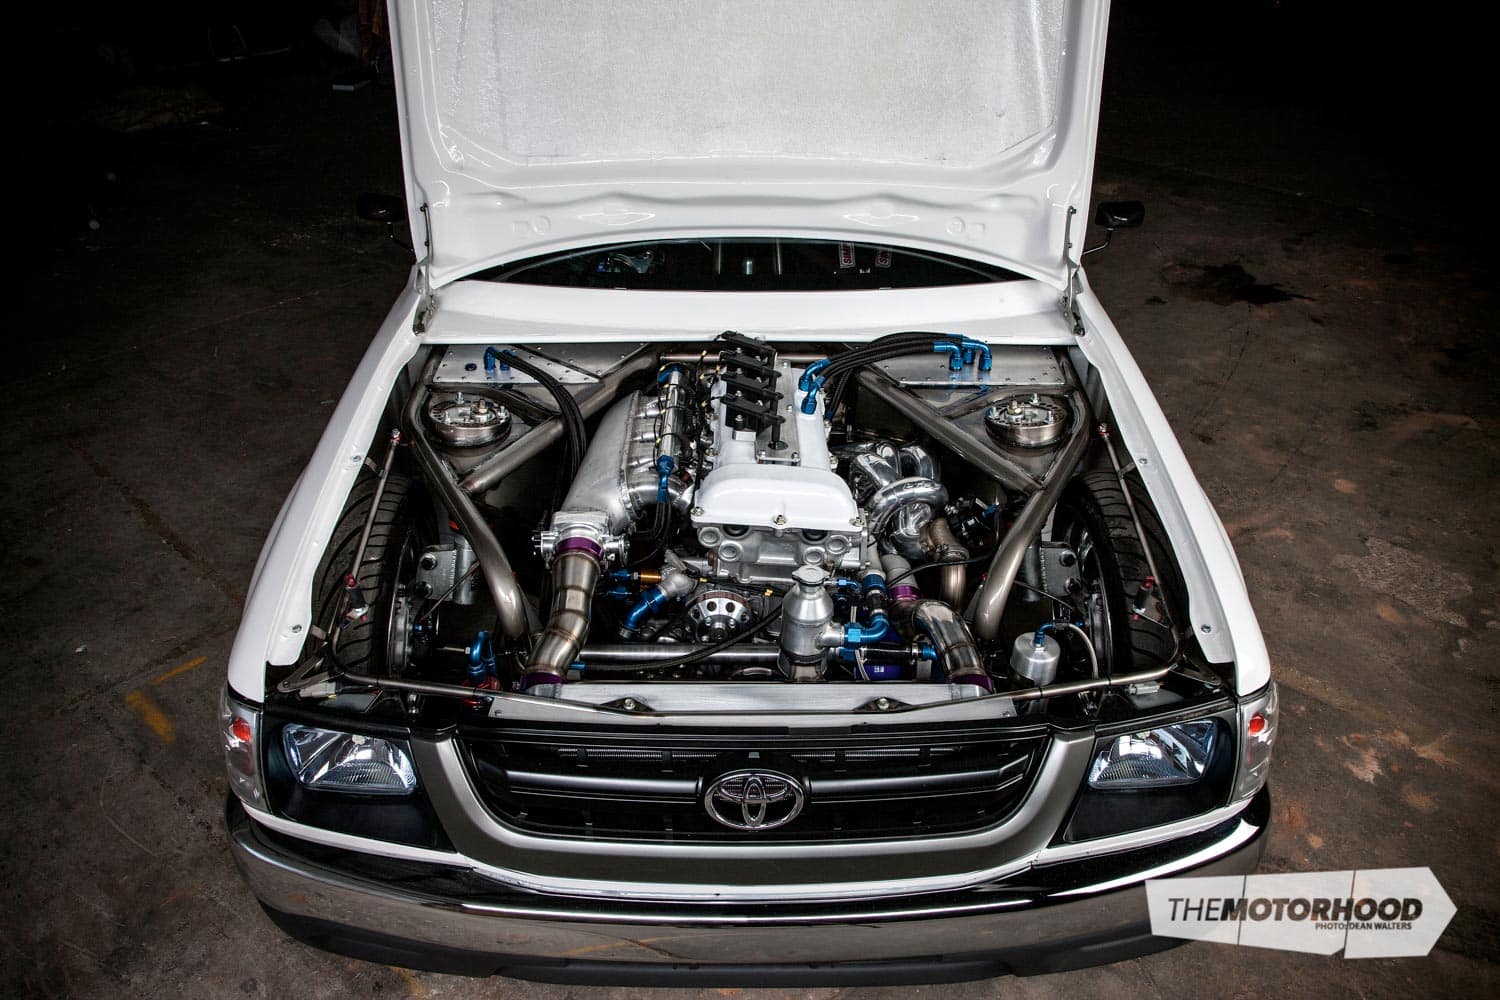
When it came to powering the lightweight chassis, Nigel only had to look across the shed to his beloved S13, which housed a fully built SR20DET with CP pistons, Eagle rods, HKS cams and a host of other tasty bolt-ons. It just made sense to use an already dialled engine and turbo combination, rather than reinventing the wheel with something he was not familiar with.
It got to the point at which Nigel started to think about wiring, and he put the call out over his blog that this was one area he needed help with. Andre Simon from HP Academy was more than happy to oblige, flying over from New Zealand to wire and tune the Hilux, as Nigel explains, “Once people see you are creating something special they tend to help you out a lot, people like Andre jumped on board in the final stages to lift the build up to that extra level that I couldn’t afford, and I am so grateful for this type of involvement.”
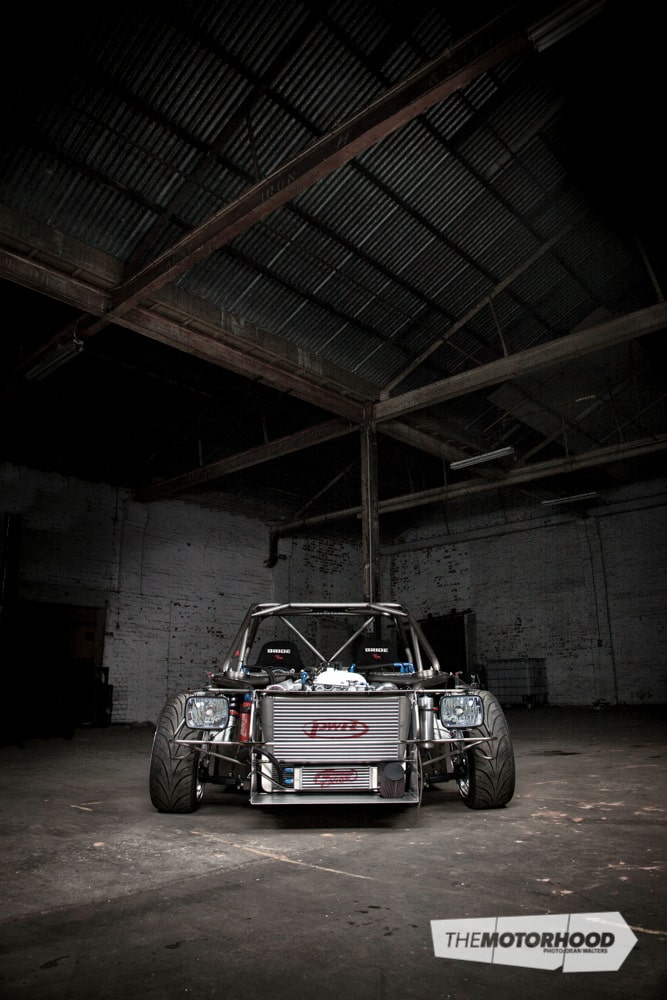
A Link Storm, Smart Wire, and Racepak dash were wired in using a Mil-Spec concentrically-twisted loom. The entire wiring process was documented for High Performance Academy and of course on ETS, with the actual tuning of the ute streamed live as Andre tweaked the Link to produce 287kW at the rear wheels. While this isn’t an earth-shattering figure, keep in mind this is in a chassis that weighs no more than 875kg wet. With the low centre of gravity and perfect suspension geometry that all adds up to one thing — home-built perfection.
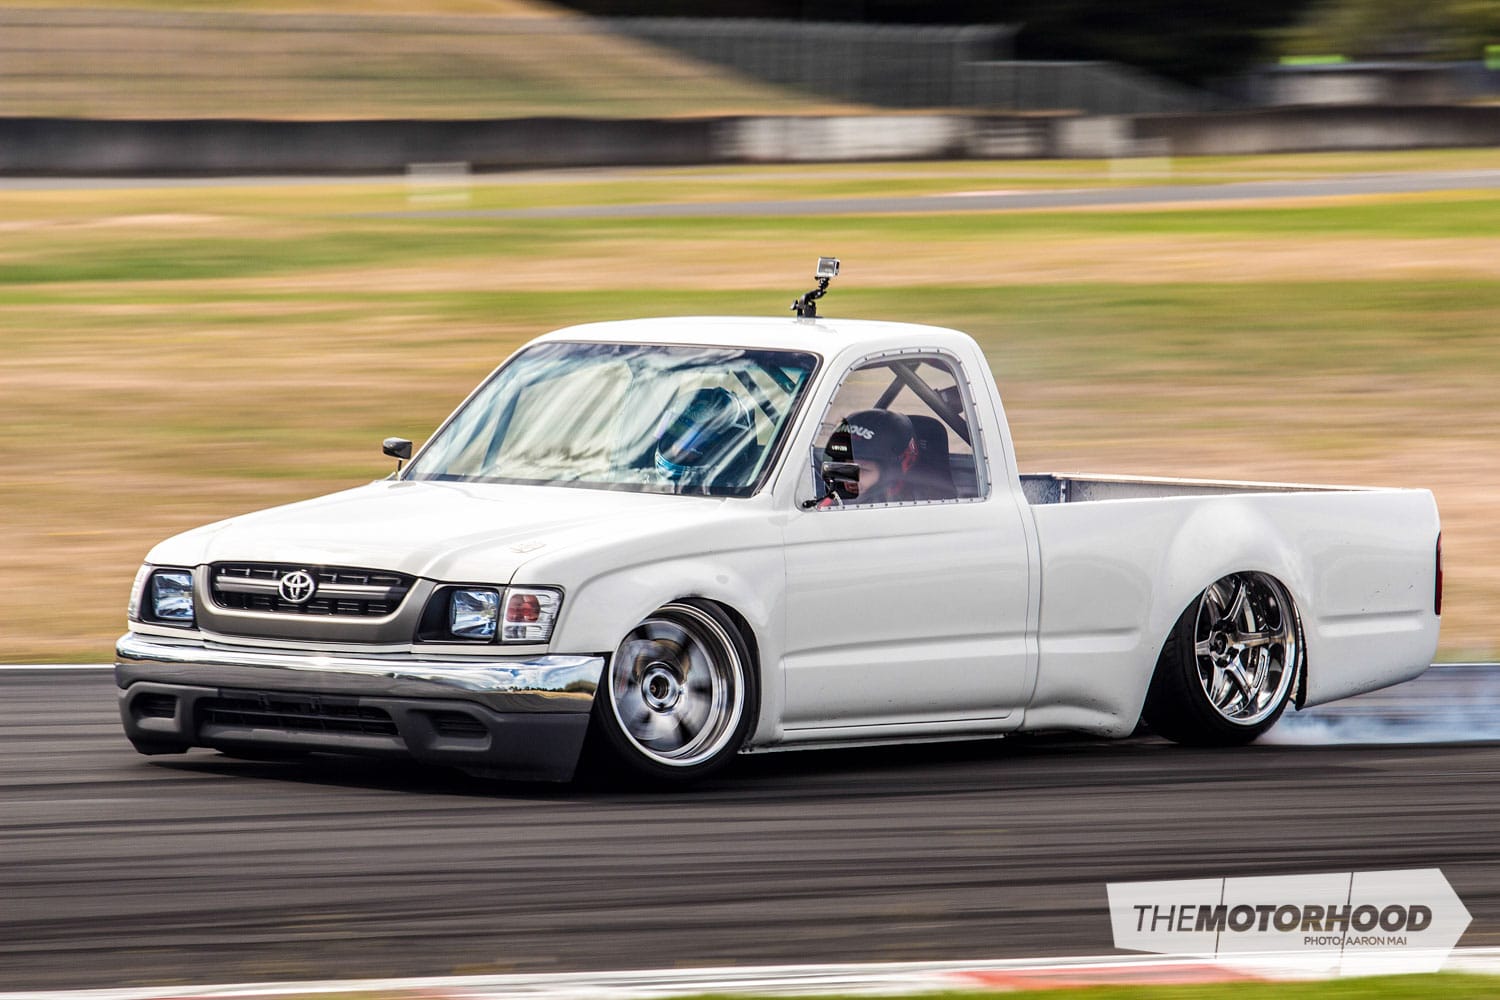
Understandably Nigel was eager to get the first drive under his belt and test this 100-per-cent home-built design, so he borrowed the keys to the local kart track for a shell-off bare-chassis shakedown. Just Nigel and his creation spending the day, in his words, “getting to know each other”.
There was no drifting, just testing the level of grip, the balance, and getting everything spot on, and spot on it was. “The first thing I noticed with this engine was its response and low-end tractability, it comes down to two factors. One is Andre’s tuning capabilities, and second is it’s 500kg lighter than anything else I had driven before. Suddenly it felt like this SR20 was an SR40, forget about on-boost grip, that is non-existent in any gear, on a large track I would be able to wind out each gear and work it into grip with easing off the throttle, but on this track it would just light up and then it would be time to brake. It’s ridiculously fast and I would one day love to fit up some full slicks and shoot for lap times. The confidence of each little area of the build, working the way it should to produce an overall effect, simply put a smile on my face.”
With the test run out of the way, the list of little jobs to complete before the final teardown was mapped out and slowly worked through, before it was stripped to a bare shell (only a few hours of work for one man). Everything was cleaned with thinners and then sent off to be powder-coated.
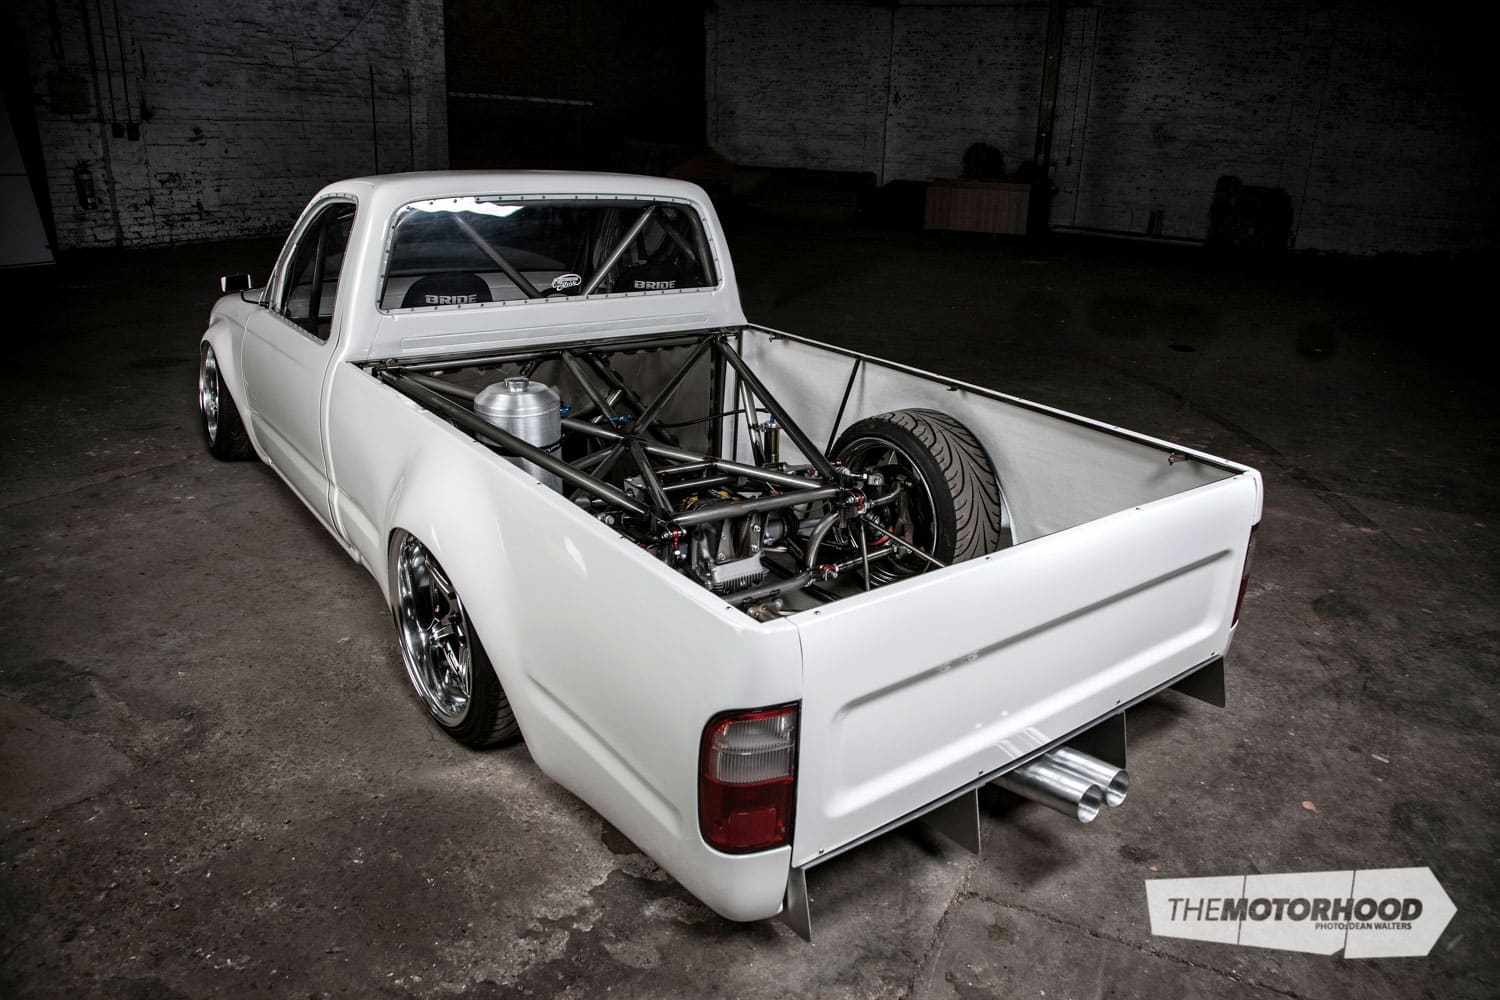
The original plan was to colour the chassis and associated components, but as the number of fabricated parts grew, and the hundreds of beautiful welds added up, Nigel realized it would be a shame to cover them up, so a clear powder-coat has been added to most parts, giving them a deep glossy sheen. We can probably never stress how many hours Nigel has devoted to this project over the past two-and-a-half years, and it’s something that unless you have completed a similar project you will never fully grasp, although we think that doesn’t matter to Nigel, he will always have it sitting in his shed as a constant reminder of his greatest personal achievement to date. It’s not just a vehicle or a race car, it’s a piece of beautifully crafted artwork.
We thought it fitting to end on a quote from one of the thousands of ETS blog posts documenting the build: “As soon as I start looking at this project as a whole, it scares me. As humans we question ourselves and think some things just aren’t possible, well I’m here to tell you they are, you just have to break things down. Nearly every project consists of small steps combined to make the final product: do every step to the best of your ability, and the final result may leave you astounded.”


2013 Engineered to Slide Hilux, chromoly chassis
Engine
- Model: Nissan S13 SR20DET, 2000cc, four-cylinder
- Block: CP 86.5mm forged pistons (9.0 compression), Eagle rods, ARP head stud kit
- Head: Tomei rocker arm stoppers, Trust cams (inlet 264, exhaust 272), GReddy valve springs, HKS 1.2mm head gasket
- Intake: Mazworx CNC lower intake runners, cast plenum, 75mm Plazmaman throttle body
- Exhaust: Custom BRAE steam-pipe manifold, three-inch 304 stainless straight-through exhaust system, twin 80mm alloy tips
- Turbo: GReddy TD06L2-20G, custom elbow-off compressor cover
- Wastegate: 46mm Precision Turbos
- Fuel: Spun alloy tank, Peterson fuel filter, Bosch 044 fuel pump, Aeromotive regulator, ANSU 1000cc injectors, -8 Earls Prolite hose, Earls Autofit crimp hose ends
- Ignition: High-energy coils, custom 8mm spark plug leads
- ECU: Link G4 Storm
- Cooling: Custom PWR alloy radiator, twin 10-inch thermo fans, custom PWR intercooler, custom PWR oil cooler, custom swirl pot, custom overflow can
- Extra: Autosport firewall Mil-Spec connector, custom Mil-Spec labelled and concentrically twisted loom, MAC boost control solenoid, custom rocker cover fittings, custom three-litre catch can, Denso mini alternator with custom pulley, custom billet and rose-jointed alternator mount, relocated S13 power-steer pump with custom pulley, all external water outlets blocked off, remote oil filter
Drive
- Gearbox: Quaife QBE69G six-speed sequential, Z32 bellhousing, custom adaptor
- Clutch: Exedy twin-plate
- Flywheel: Exedy
- Diff: R200 casing, ATS carbon two-way LSD, 4.1:1 gears, chromoly tubular cradle
- Support
- Struts: (F) MCA S13 front struts, 9kg springs; (R) Custom MCA uprights, 6kg springs
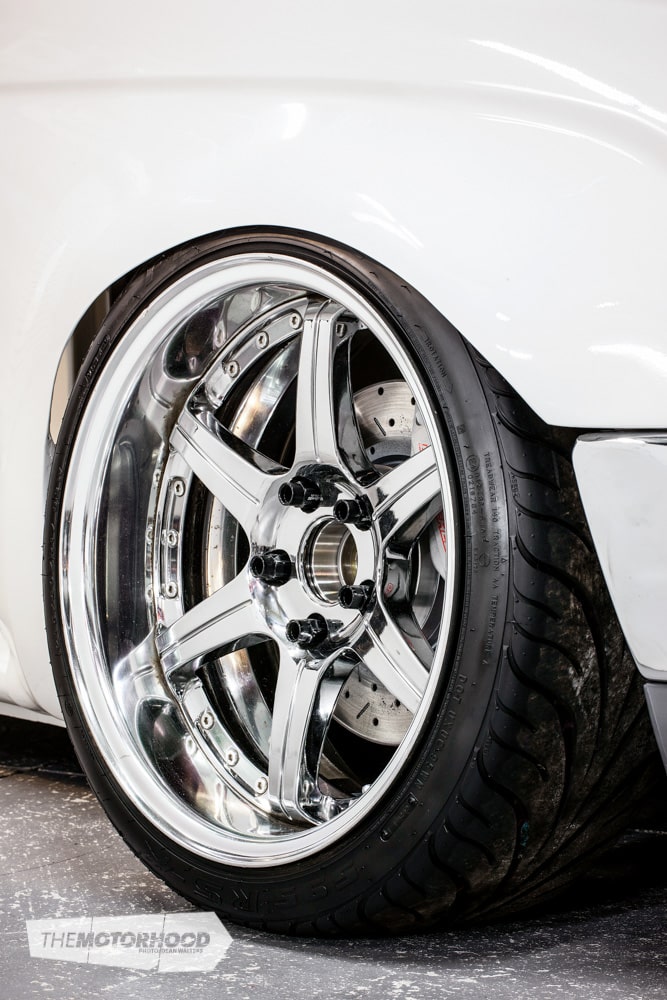
- Brakes: (F) 300ZX Z32 calipers, DBA drilled and slotted rotors, DBA pads; (R) 300ZX Z32 calipers, DBA drilled and slotted rotors, DBA pads
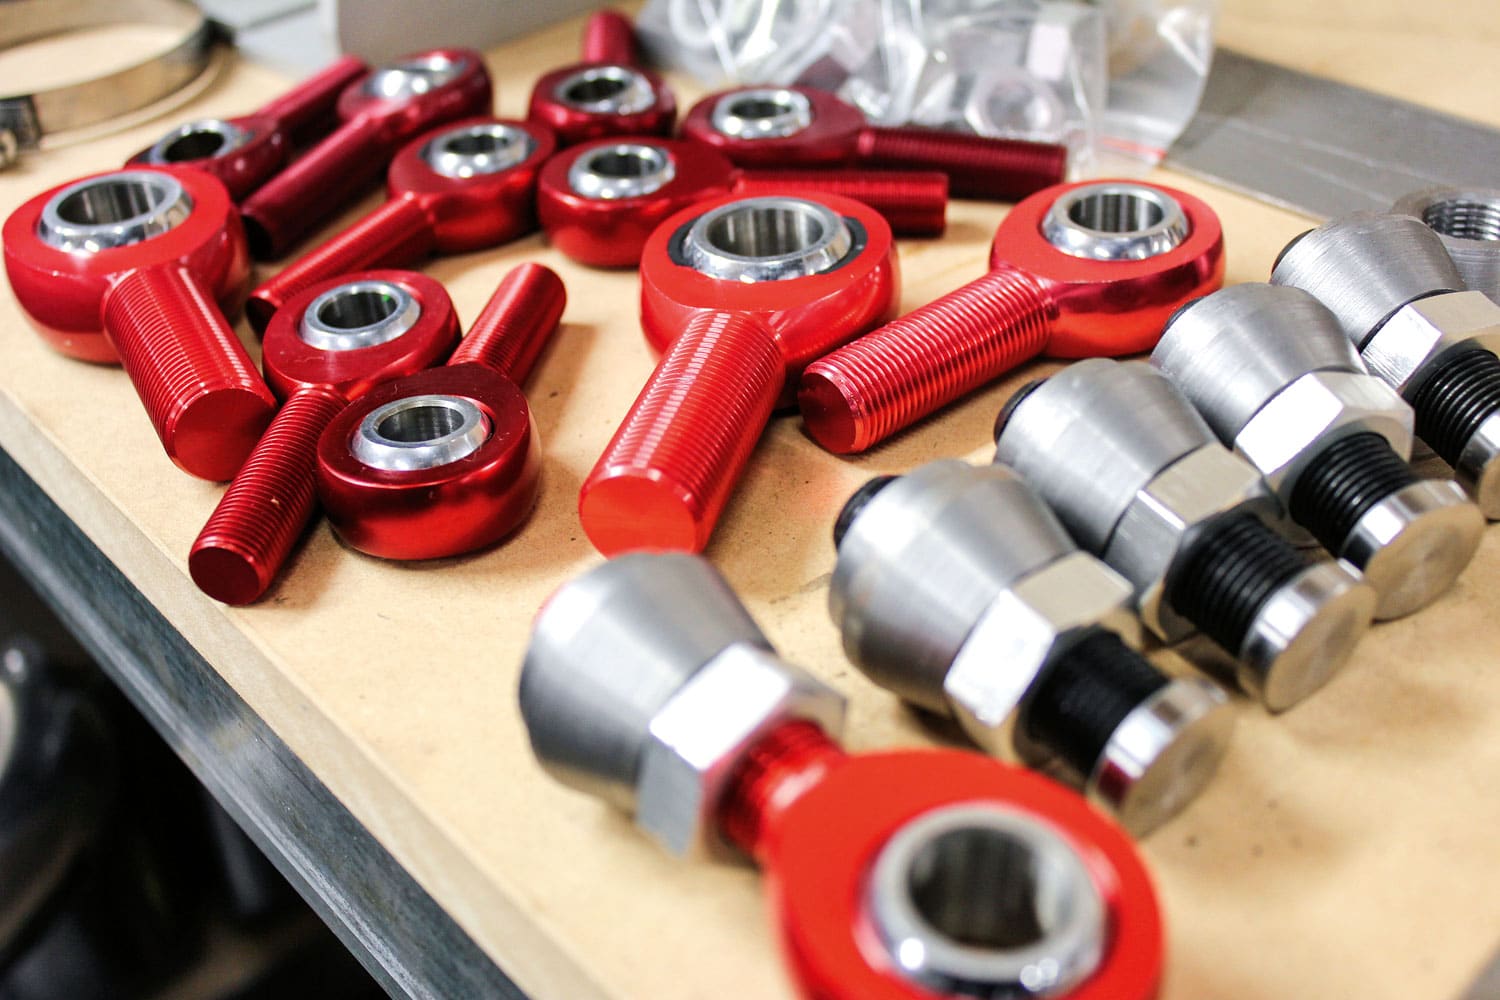
- Extra: Custom ETS S15 knuckles cut and shut to suit chassis, V8 Supercar adjustable blade–type sway bars with custom chromoly ends, custom chromoly adjustable arms, QA1 aluminium rose joints
Shoes
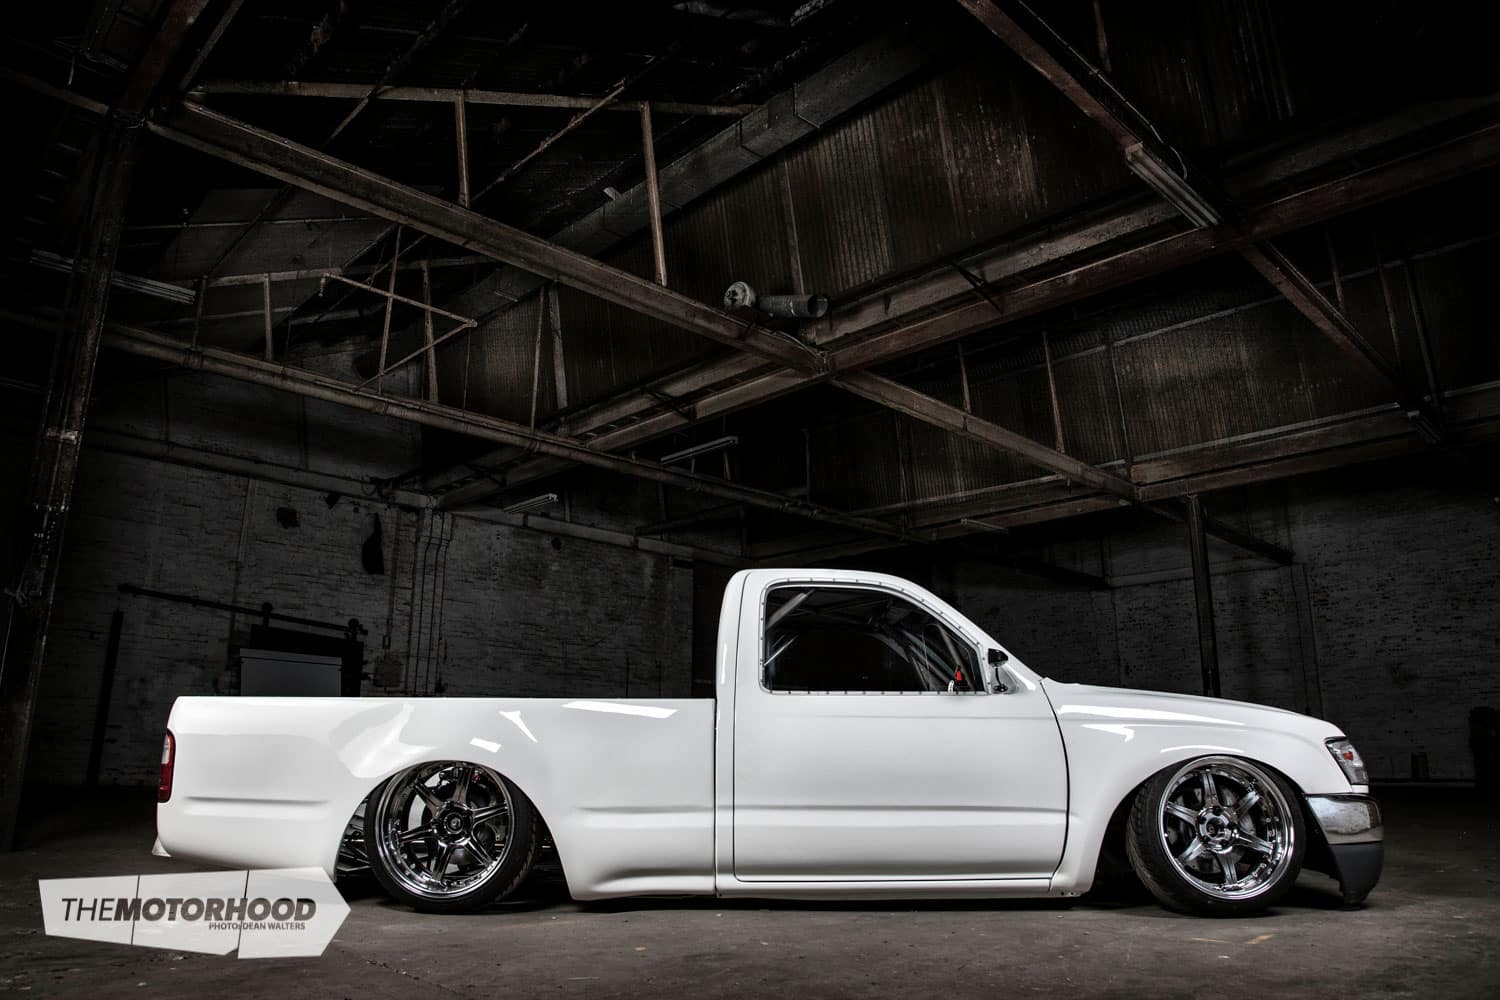
- Wheels: (F) 17×8.5-inch +5 BIM Driftmasters (R) 18×9.5-inch +0 BIM Driftmasters
- Tyres: (F) 214/40R17 Federal 595 RS-R (R) 225/40R18 Federal 595 RS-R
Exterior
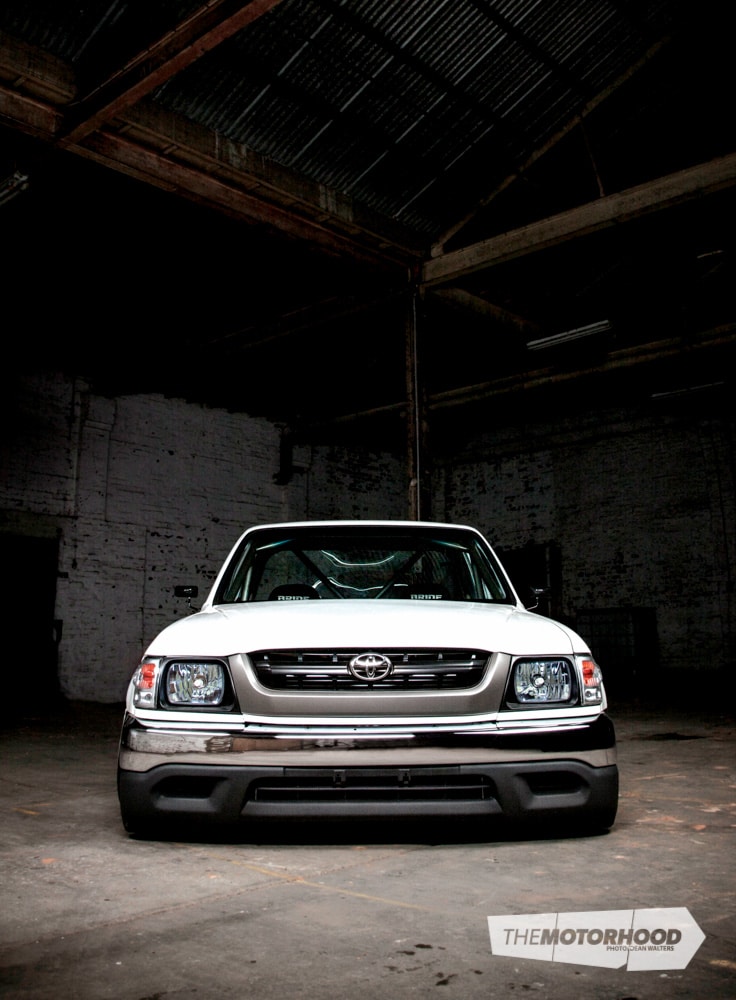
- Paint: Respray in 2002 Toyota White by Breakwater Panels
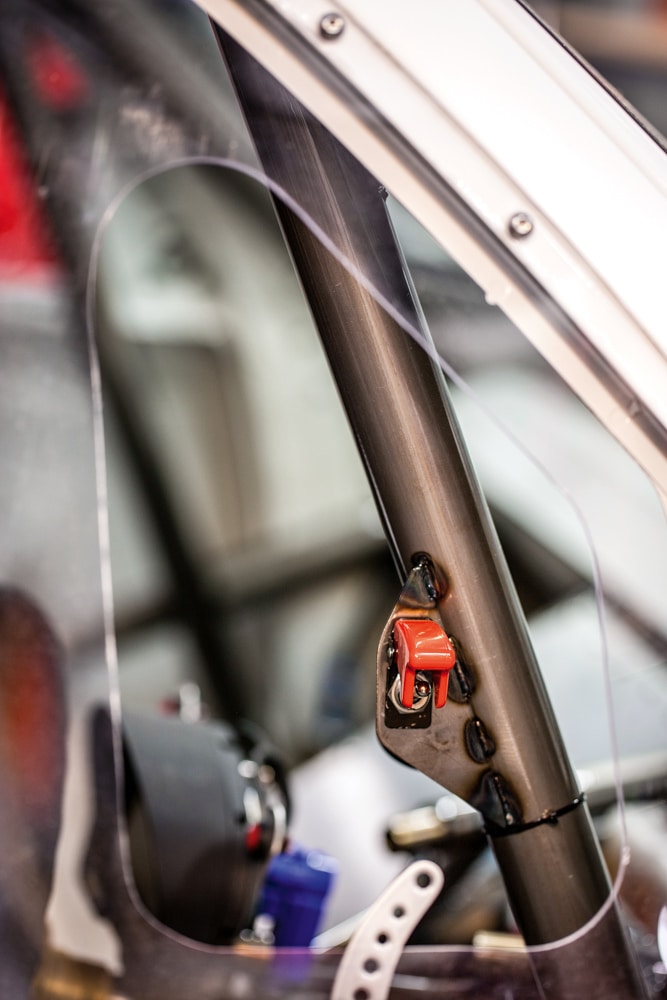
- Enhancements: 80mm custom-moulded FRP rear quarters (150mm shorter than single-cab tray) , FRP tailgate shaved, factory doors shaved and lightened, 3mm polycarbonate windows, factory steel cabin gutted, 80mm custom front FRP guards, shaved custom FRP 2002 Hilux bonnet, Aerocatch bonnet fasteners, stock bumper, stock grille, Raybrig headlights
Interior
- Seats: Bride VIOS 3
- Steering wheel: Nardi 330mm suede
- Instrumentation: Racepak IQ3 dash
- Extra: Racepak Smartwire, Racepak switch panel
Performance
- Power: 287kW at the rear wheels on 22psi
- Weight: 875kg
Check out the video below, featuring the first test of the Quaife QBE69G six-speed sequential, which recently replaced the RB25DET five-speed that the ETS Hilux had previously utilized.
Pick up the issue of issue of NZ Performance Car that this article was first published in: