

In NZ Performance Car Issue No. 208, we featured Max Flower’s mental ‘Mad Max’ 26B-powered RX-7. Following the shoot, Max had the car retuned and celebrated with his first burnout. Unfortunately, this blew one of his cheap-quality mufflers completely apart, ending his fun pretty quickly. Neither Max nor the NZ Performance Car team were baffled to see another cheap-quality item fail, though, and Max chose to replace the offending mufflers with a pair of the high-quality mufflers produced right here in New Zealand by Adrenalin R.
We set out to investigate what exactly goes into the building of such a high-quality sports muffler with high power capability, and so we followed the build of one of the mufflers destined for a life spent attempting to muffle Max’s four-rotor.
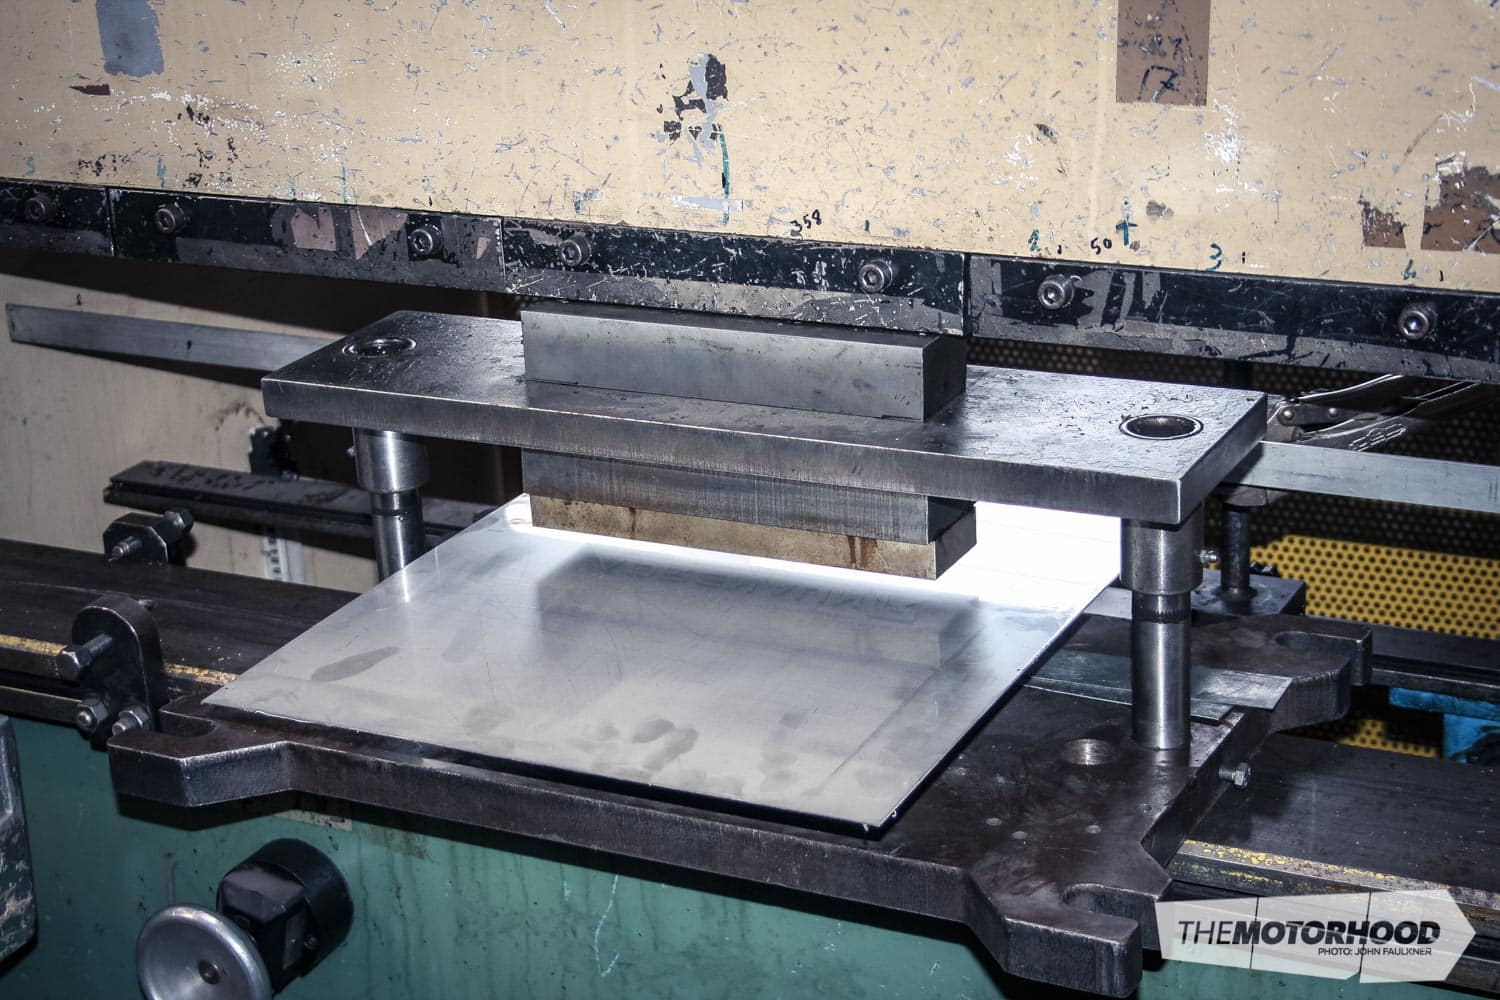
Sheet metal
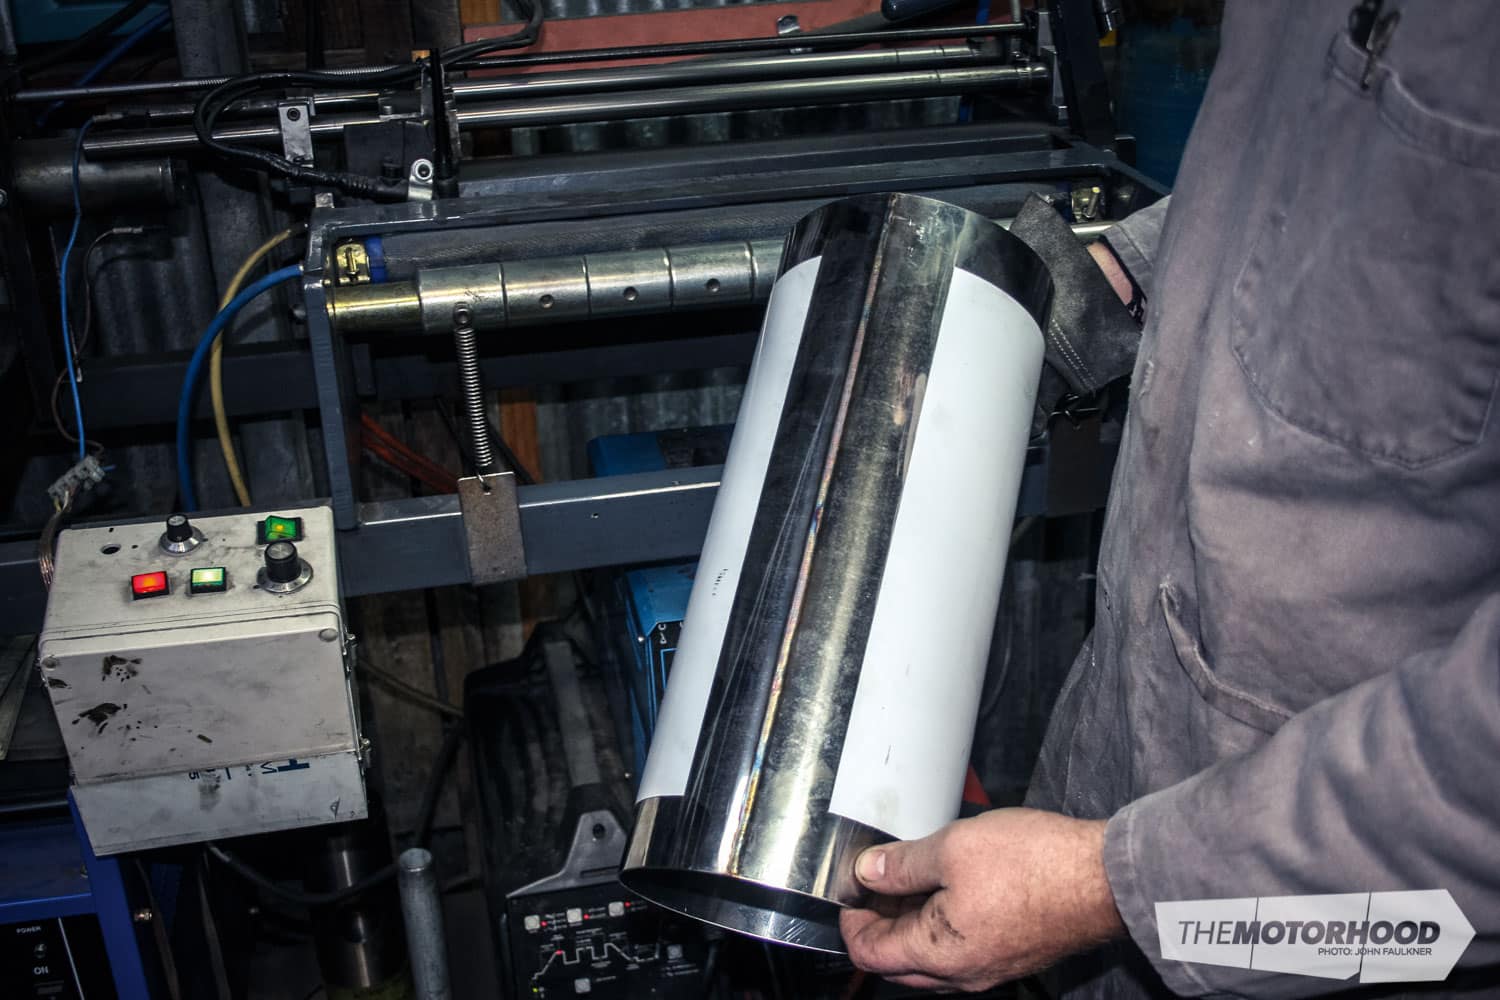
Built entirely in-house, an Adrenalin R muffler begins life as sheet metal. T304-grade stainless is used throughout the construction, and it’s first used to form the outer casing. The sheet metal gets cut down to the necessary dimensions, dependant on the chosen size of the muffler, using a guillotine, then is hauled over to the hydraulic press. Next, the ‘Adrenalin R’ logo is embossed into the flat sheet metal — a process that requires 40 tonnes of pressure to achieve the desired effect. The steel is then passed through a rubber-coated one-pass rolling machine to form the sheet into a cylinder.
Seam welding
Before the muffler body can be shaped, it first needs to have its seam welded together. One of the staff strategically tack-welds the seam before it is sent over to one of the workshop’s coolest gadgets — the robotic automated TIG welder to be ‘TIG fusion welded’. The process involves placing a water-cooled heat-sink copper bar under the weld to prevent any of the weld from penetrating through. This process produces a consistently strong weld.
Oval shaping
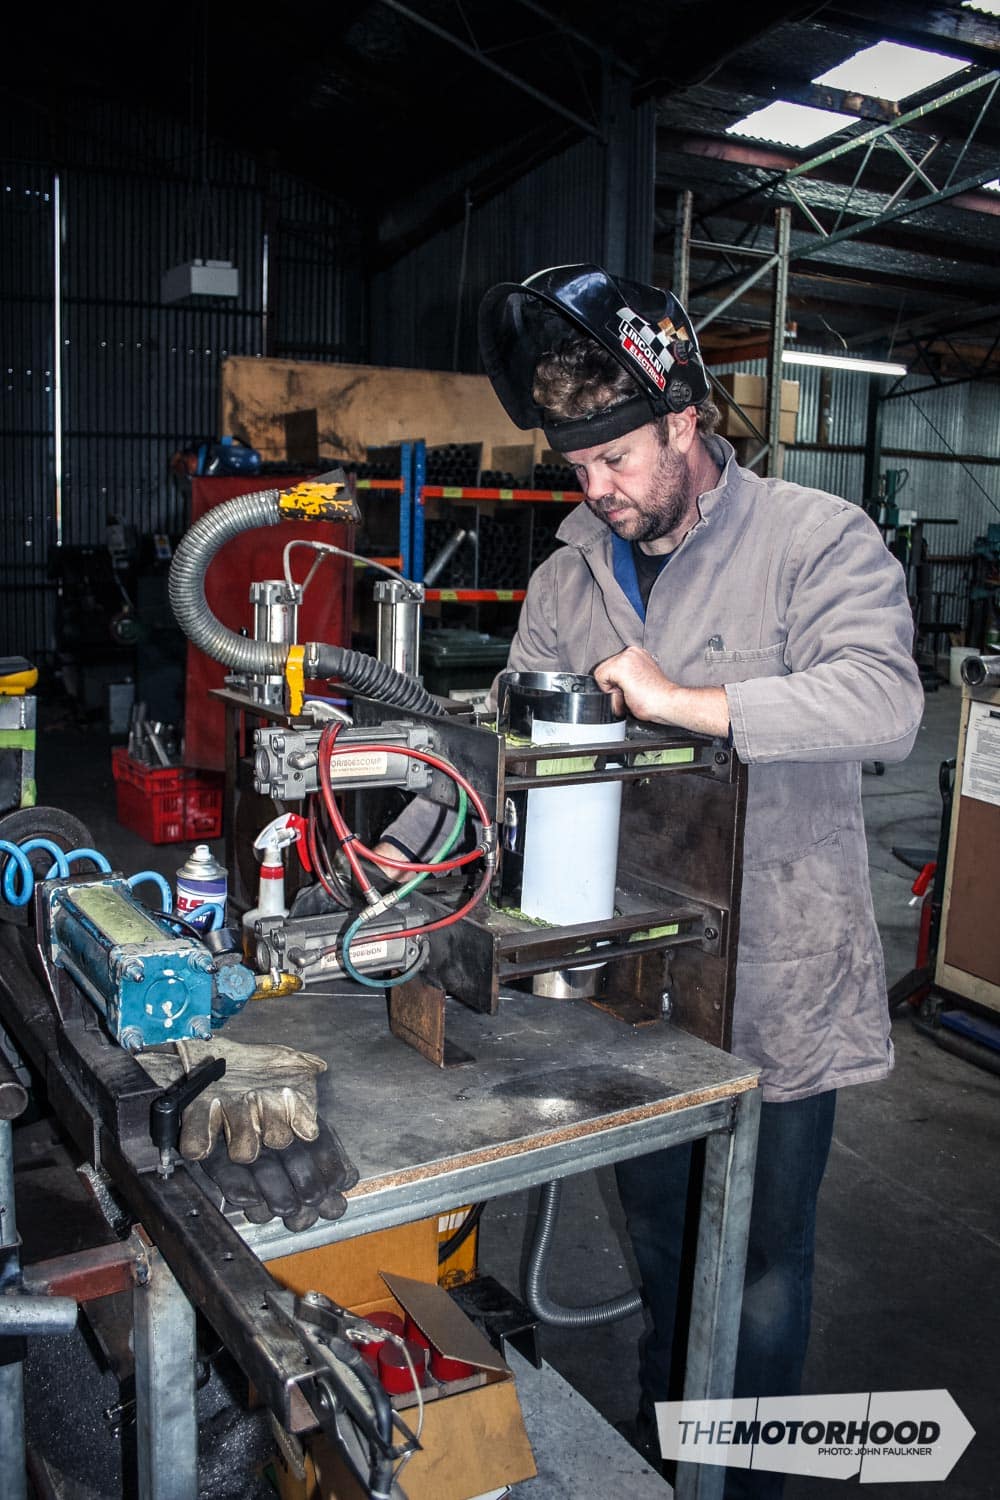
Step three is when the final muffler body shape is produced. The cylindrical muffler body is placed in a set of pre-shaped moulds that rest in the pneumatic press. Air pressure is used to clamp the moulds down on to the muffler body to produce the final shape.
Muffler end caps
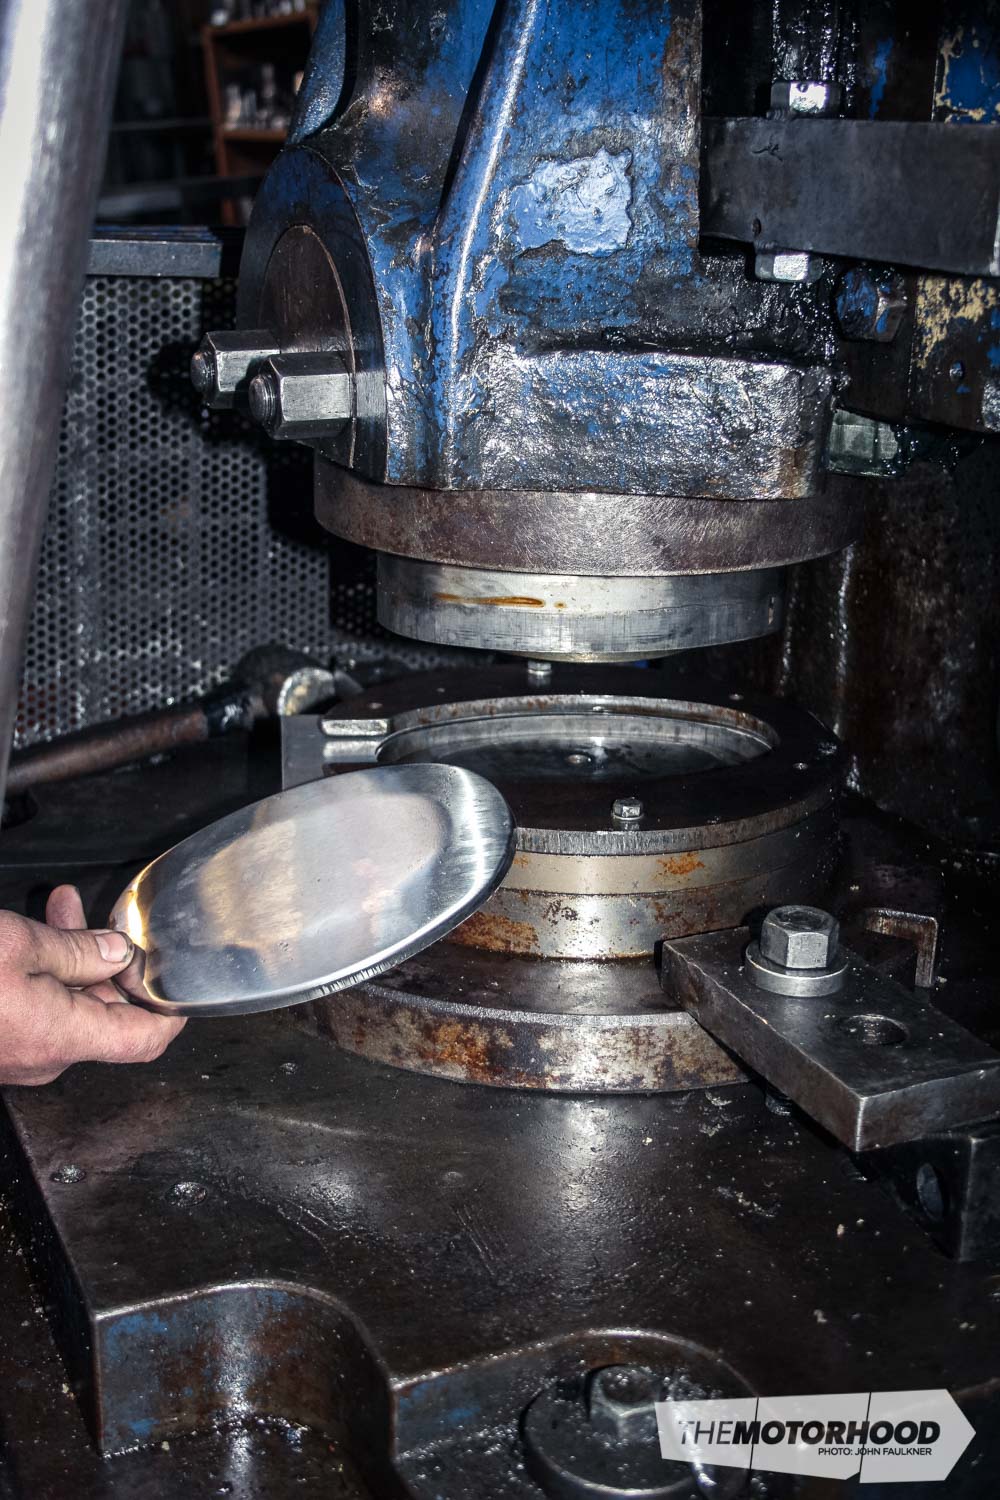
The muffler end caps are shaped using a production press, which exerts a massive 80 tonnes of pressure to shape, then cut the end caps in one motion. The same press is used again, with another press tool, to cut the hole through which the baffle pipe will run.

Baffle construction
Before the muffler process can progress any further, the internal baffle — one of the key components — must be constructed. The required sheet metal is put into the CNC turret-punch machine, which punches hundreds of perforations into the sheet metal. Like the muffler body before it, the perforated baffle is now cut to size, rolled, and then welded using the robotic automated TIG welder.
Depending on the muffler design, louvred baffles are an option — Adrenalin R has the only louvre-baffle cutting machine in New Zealand.
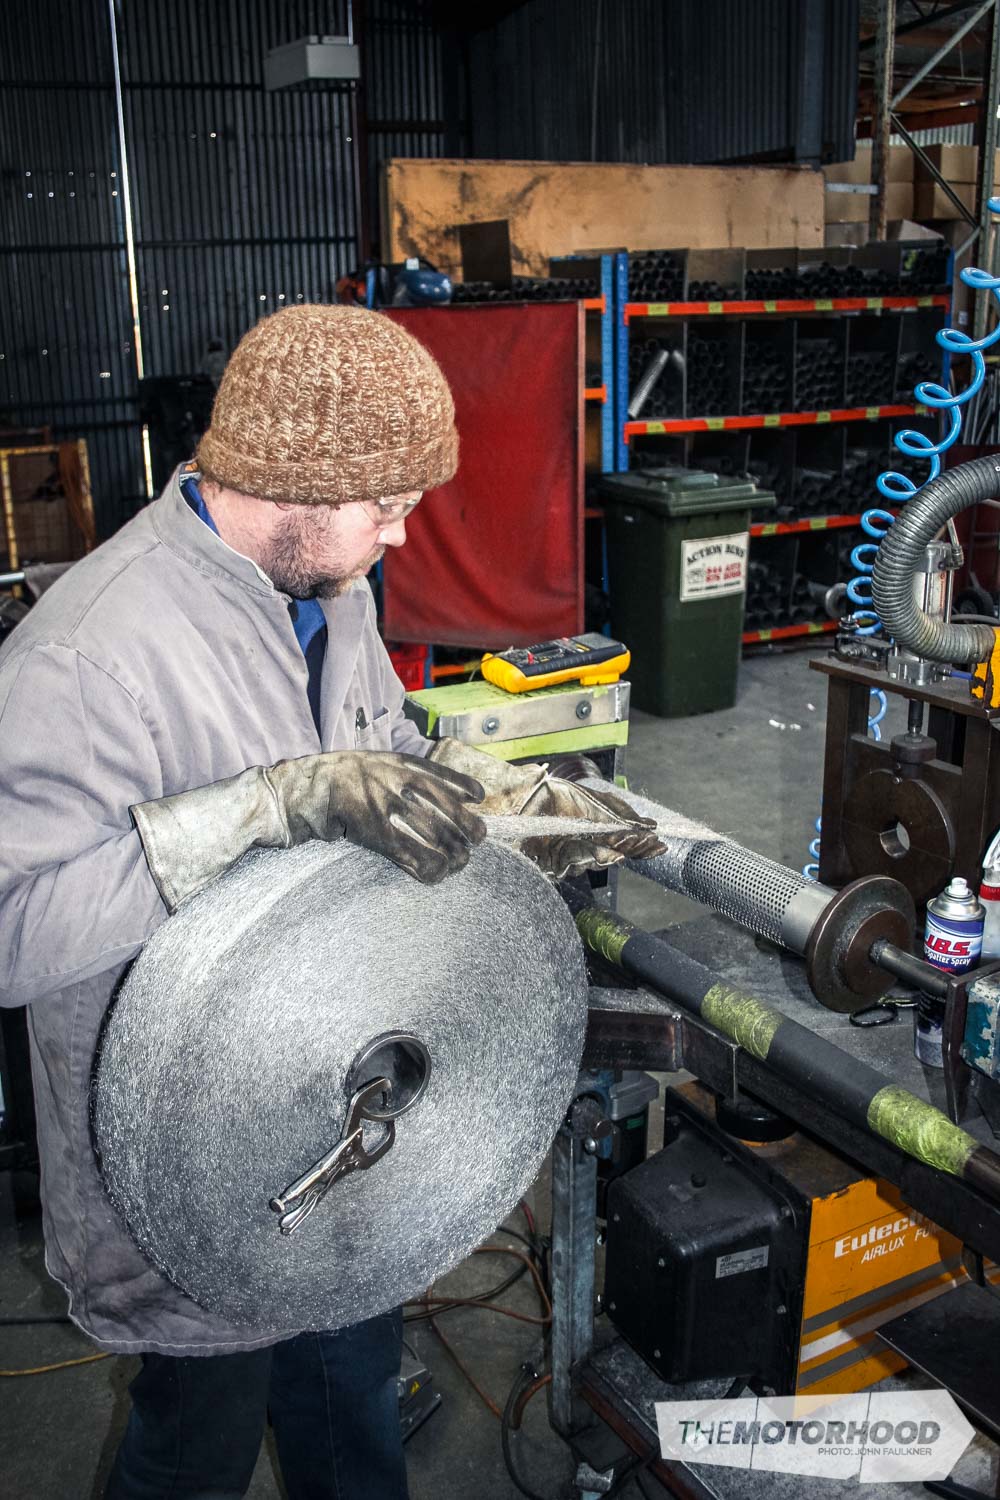
Sound-deadening material
Once the baffle is complete, it is placed onto a rotational welding machine for two different types of sound-altering material to be tightly wrapped around it.
Four layers of stainless-steel wool are machine woven onto the baffle — using a machine for this process ensures durability and maximum protection. Then comes a layer of ceramic composite material, which can handle up to 900 degrees, that ensures the next layer won’t cook.
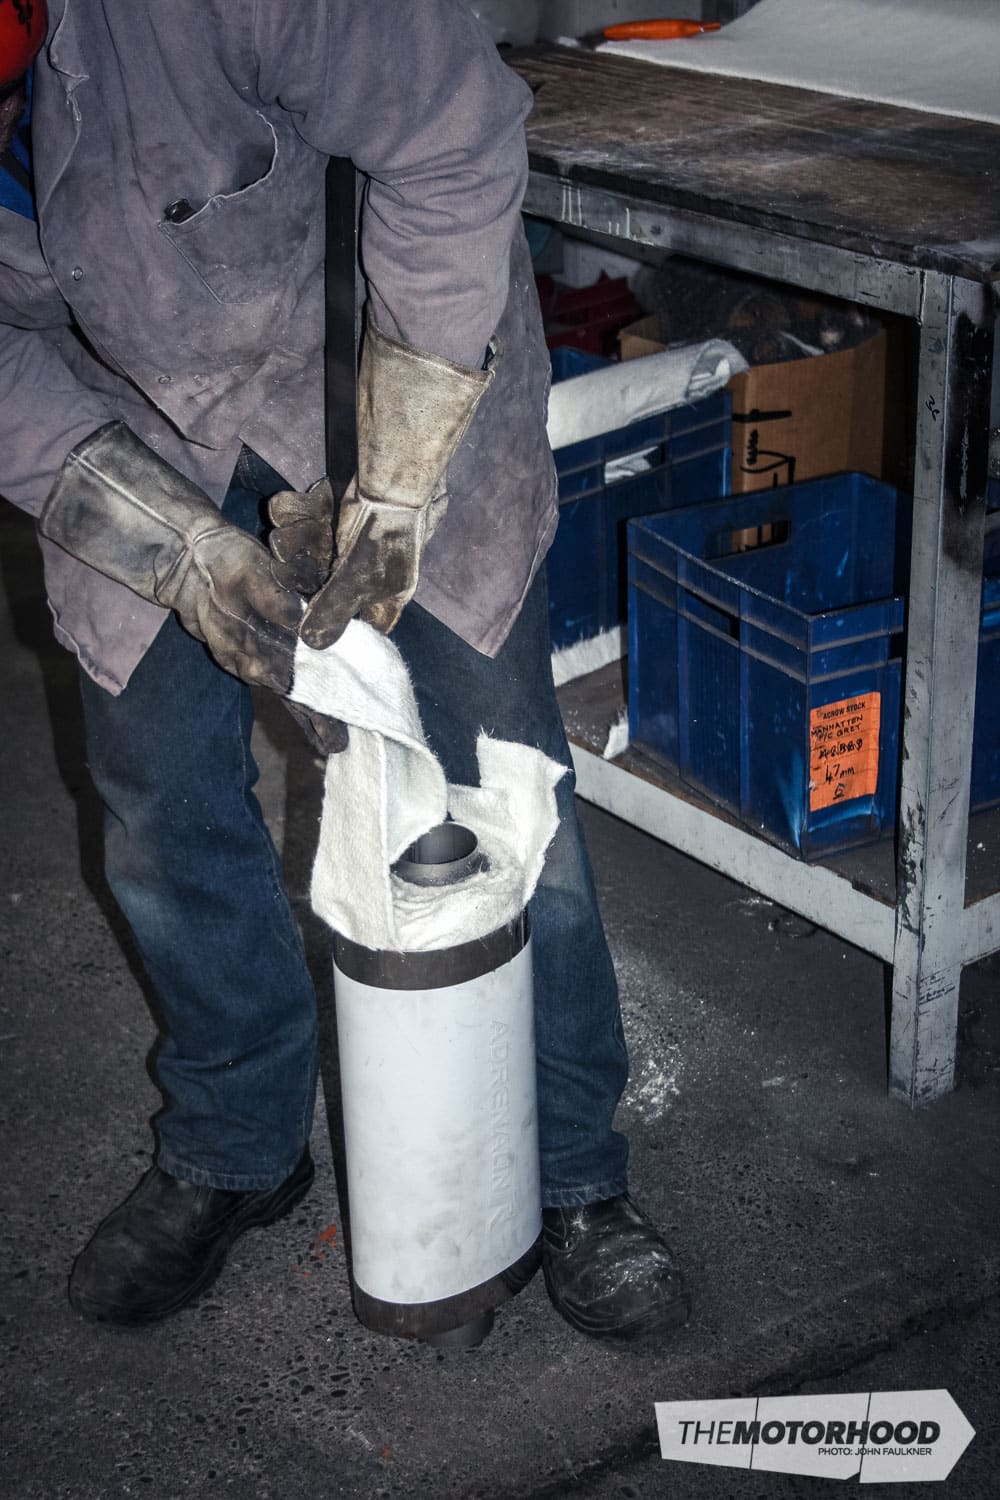
Baffle fitting and final packing
Once the baffle is fully wrapped in its layers of stainless steel and ceramic composite material, it is almost time to install it into the muffler body. A final layer of fibre needle mat, a sound-deadening material, is wrapped over the baffle for ultimate sound deadening. This also provides another layer of heat resistance of up to 600 degrees. The baffle is now ready to make its way into the muffler body.
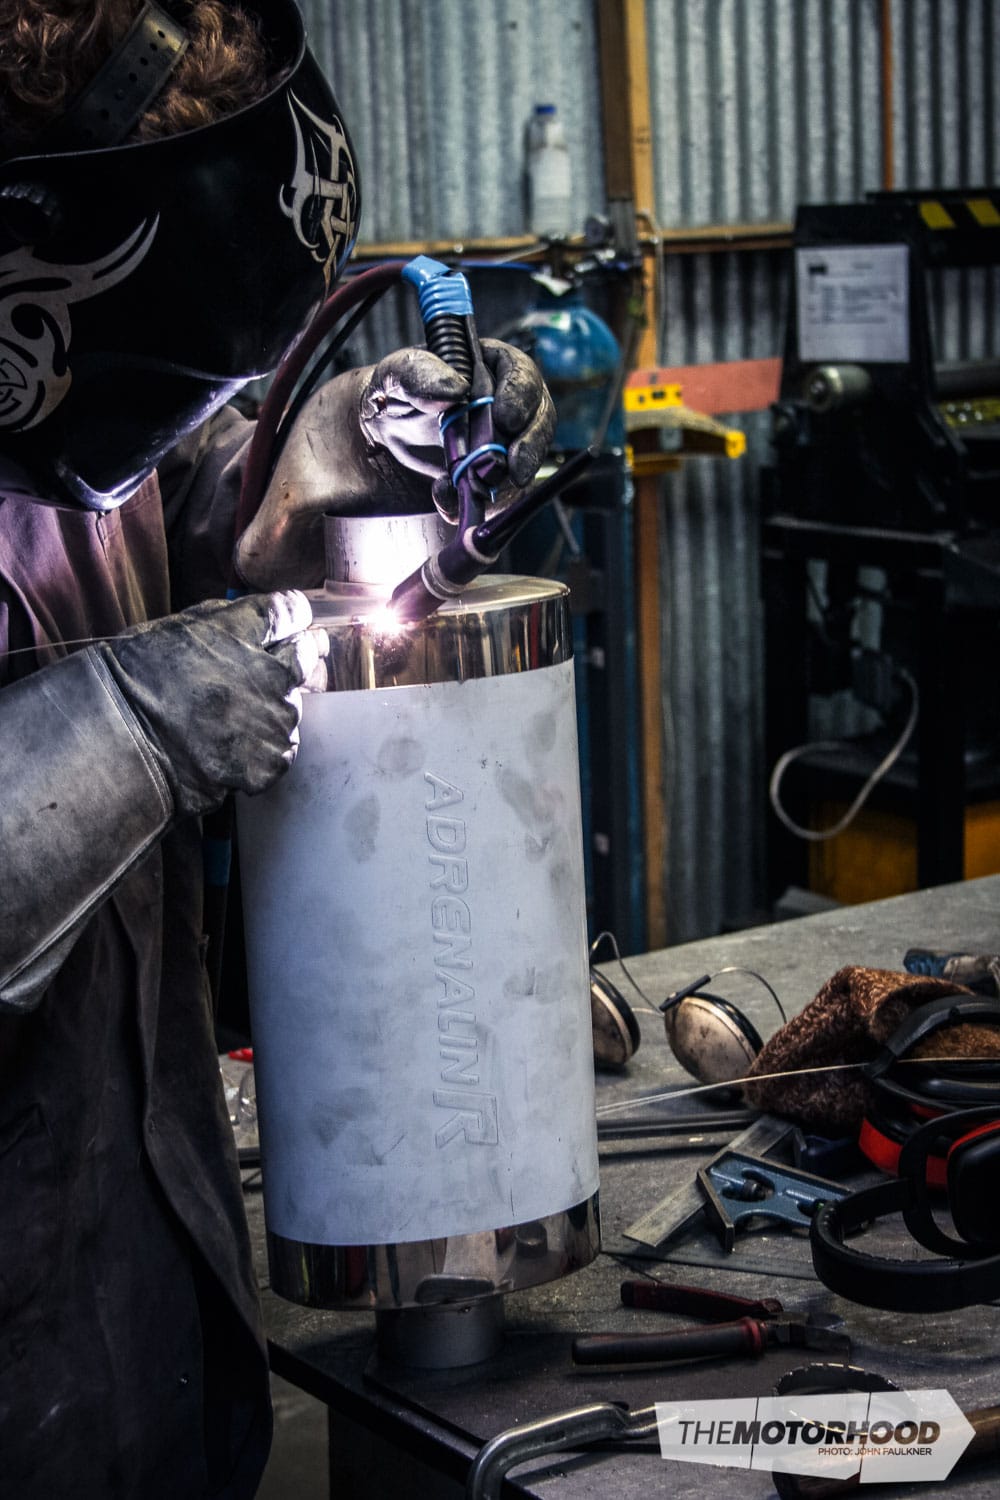
End-cap installation
With the baffle now in place and the muffler well packed with all the required sound-deadening material, it is time for the end caps to be installed. A straight-peen finishing hammer is used to carefully tap down the end cap so it is just inside the muffler body. Once it’s in place and all the edges are set correctly for maximum weld penetration, a TIG welder is used to tack-weld the end caps into position. Once that’s done, the muffler is placed onto the rotational welding machine. Rotating the muffler allows the welding operator to keep the welding tip steady, resulting in a much cleaner, more precise weld. The baffle is thus welded to the end cap, then the end cap is welded to the muffler body. After that, the muffler is flipped around, and the same welding process is completed on the other end.
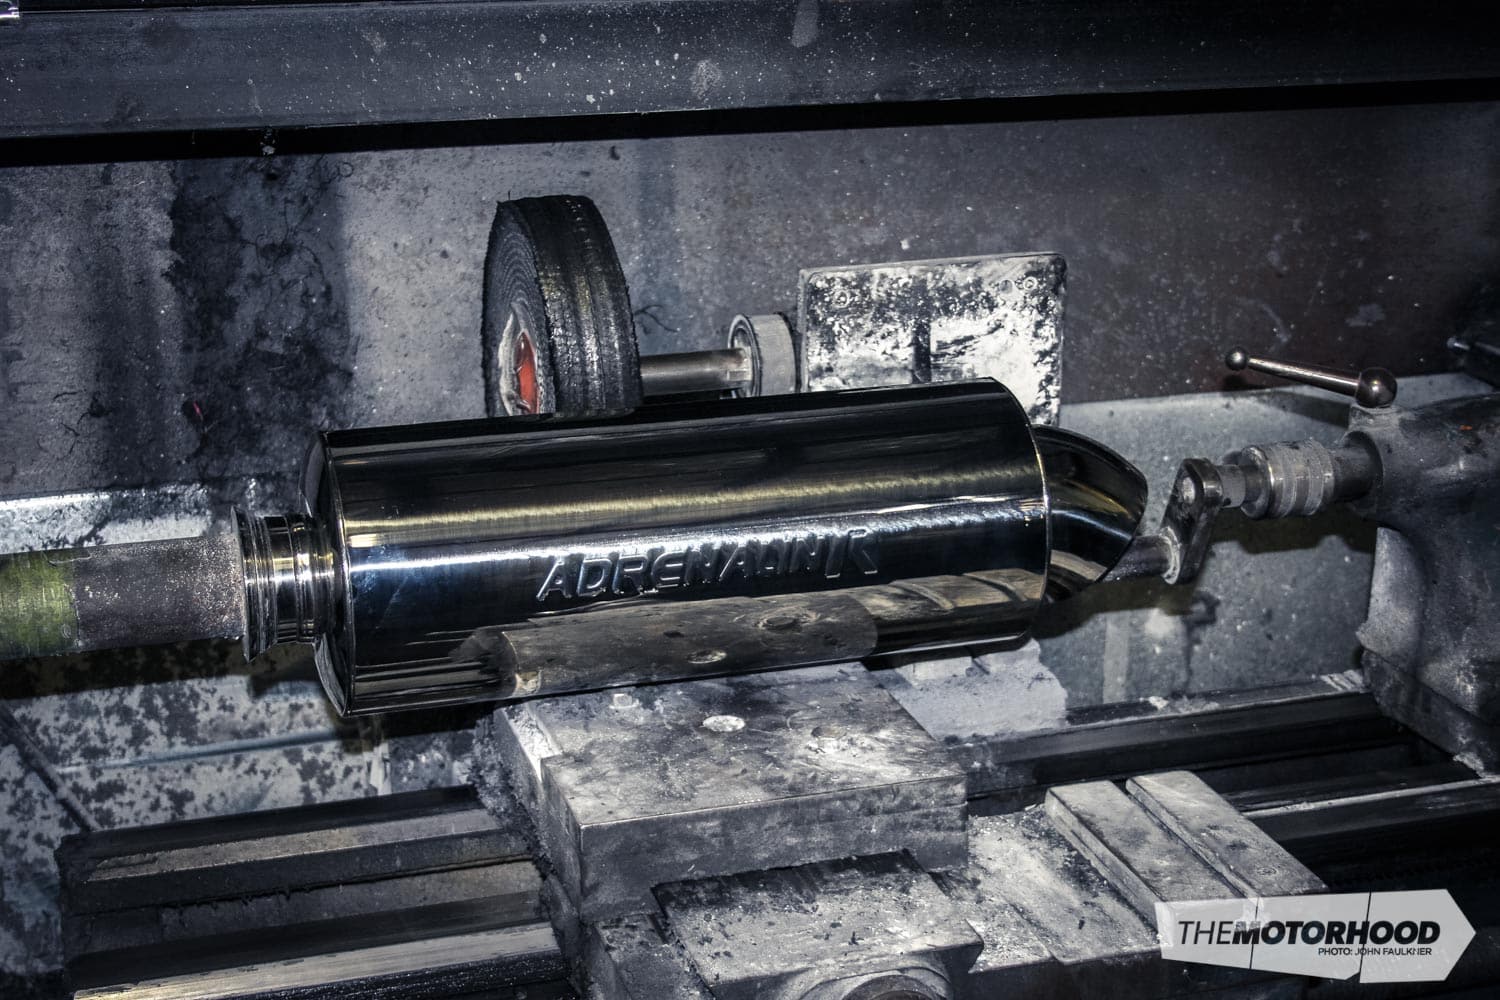
Final polish
With the muffler construction finally complete, it is time for the last detail that sets an Adrenalin R muffler out from the rest. The muffler is installed onto a large lathe-style machine. A large-diameter polishing wheel works its way from side to side as the muffler rotates. Having the two components move in unison means every last millimetre of the stainless steel gets polished. Oval mufflers are manually polished by a large, pedestal mop polisher, to ensure every nook and cranny is polished.
This article originally appeared in NZ Performance Car Issue No. 214. You can pick up a print copy or a digital copy of the magazine below: