Welcome to the Weekend Workshop, a place where you can save some cash by getting your hands dirty. These tech guides aim to arm you with the necessary info and knowledge to get out there and give it a go yourself, with no professionals needed and at a price that won’t break the bank.
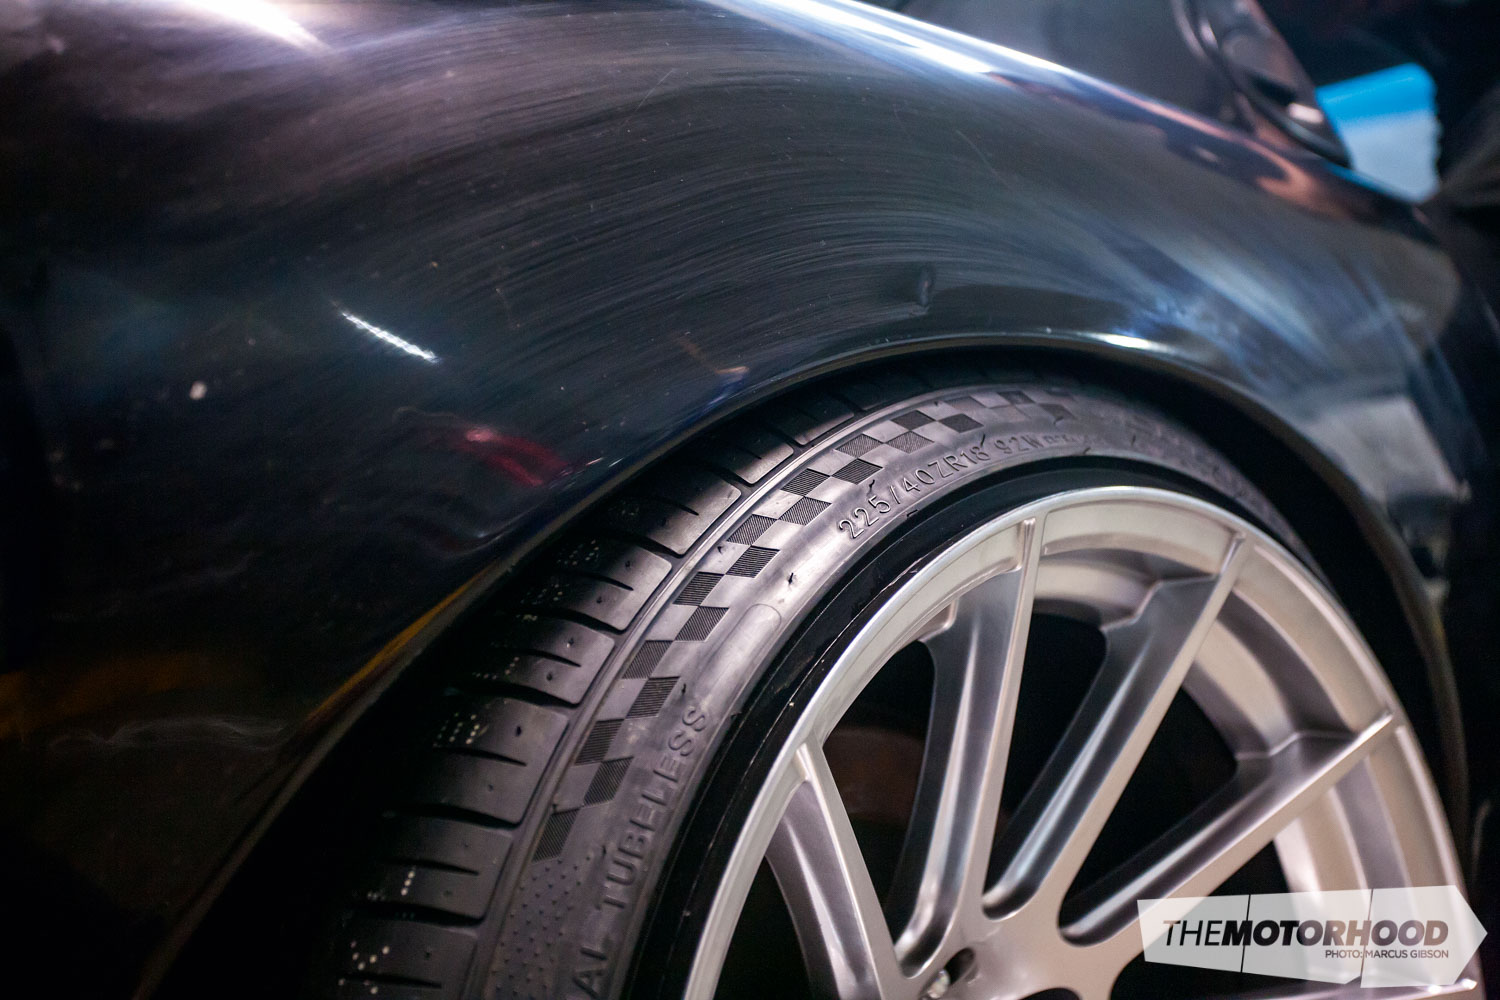
This month, we delve into guard rolling, something most of us will have dealt with from time to time when fitting a new set of wheels. The lip that runs along the inside of the guard where the outer and inner steel skins meet will generally be a right angle or U-shape, and can play havoc by rubbing off the tyre’s sidewall or, worse, cutting into either the sidewall or tread.
Guard rolling is without a doubt one of those seemingly simple projects that can very quickly turn into a horror story, with cracked paint and creased or dented guards. The main problem is people attempting to push the guard too far. There is a difference between guard rolling and pumping. So, trying to fit oversized or ridiculous offset wheels is unlikely to be solved as easily as via four passes with the roller. This process of guard rolling will generally only give you about 10mm of extra clearance before you start to run the risk of blowing out paint and deforming the guards.
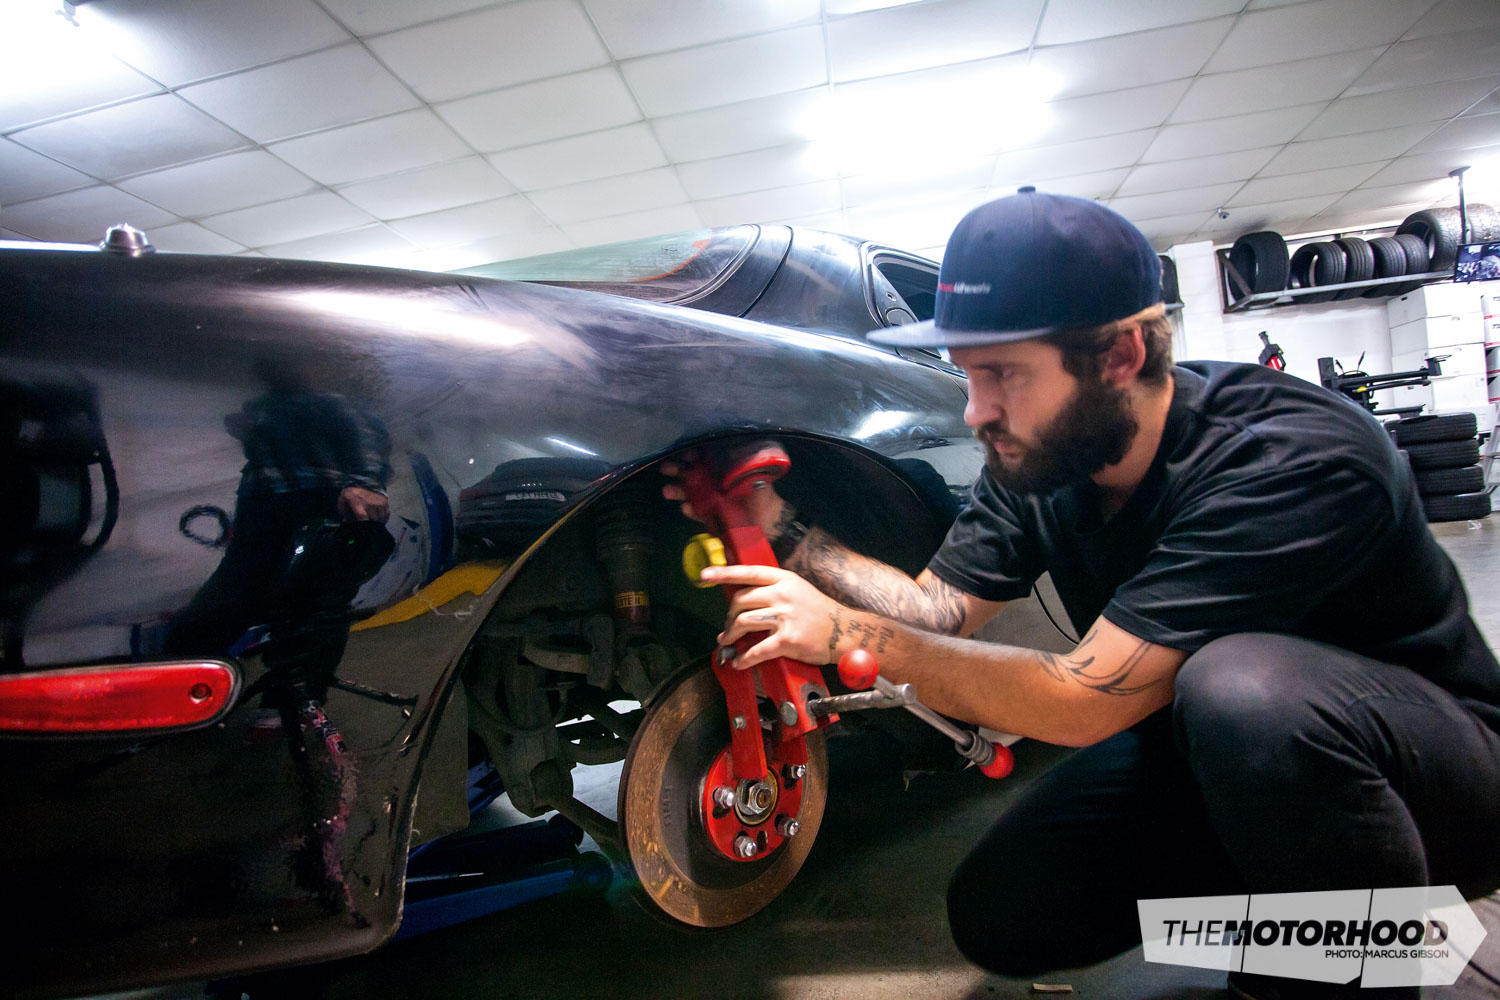
We must give the team at Precision Wheels a big thanks for letting us tag along as they worked on a customer’s RX-7 to fit a set of their concave 18×10.5-inch (+6) wheels fitted with a 225/35R18 tyre.
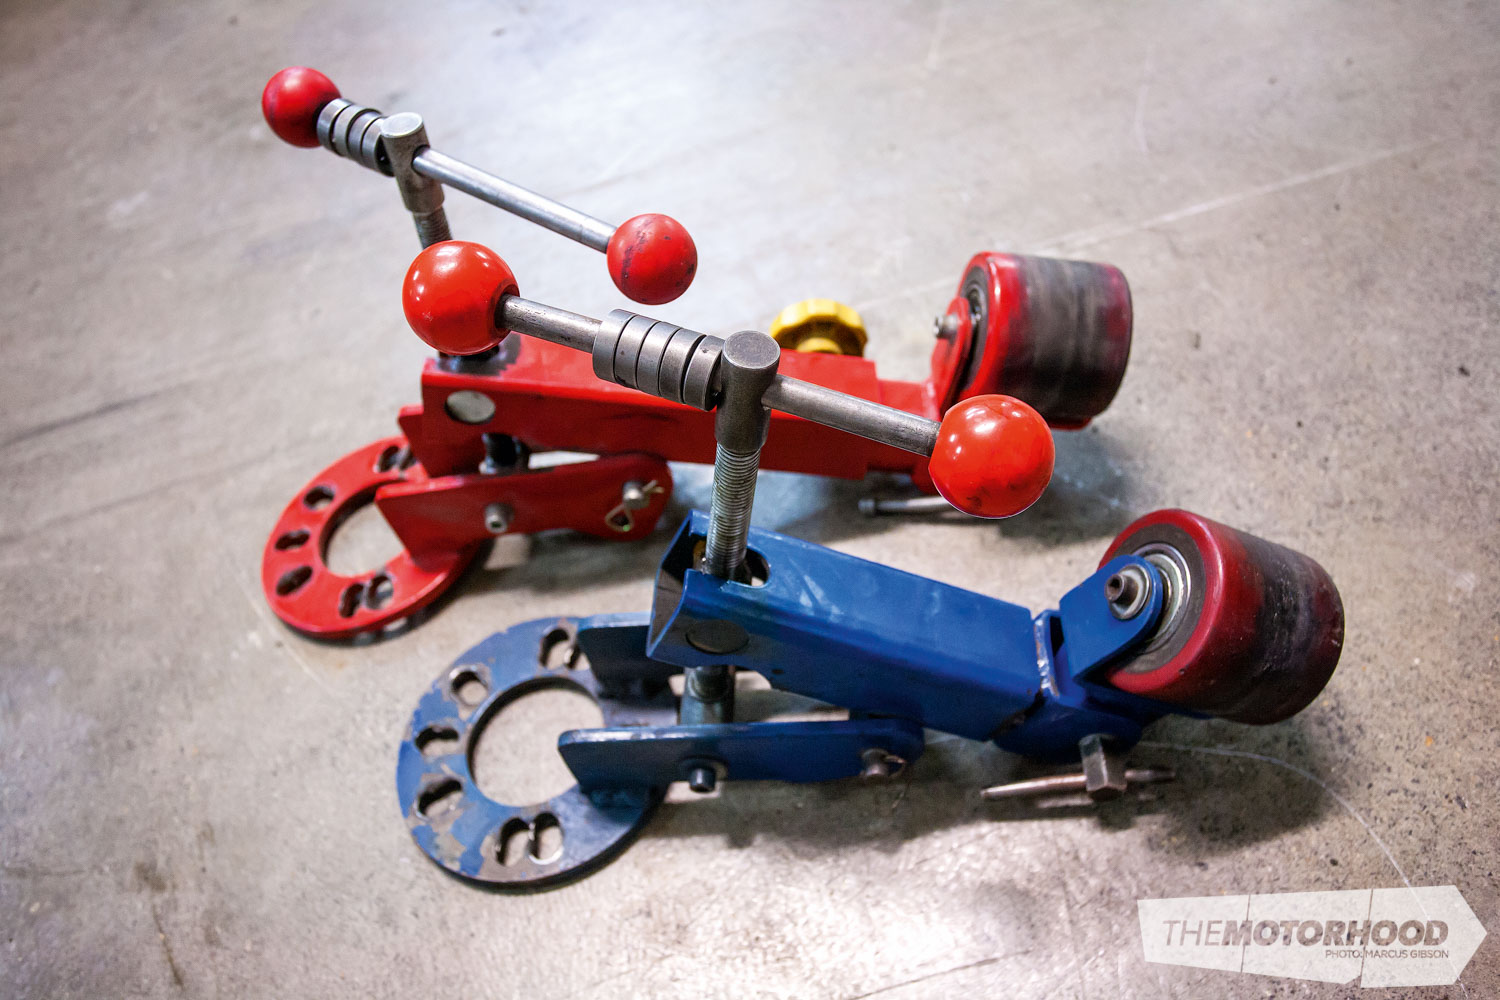
Tools of the trade
There are a few ways you can do this job. Here, we will show you the way to use a specific rolling machine. These can be purchased for under $180 from plenty of places in New Zealand. They do have their limitations, as the boys at Precision Wheels found out. If the car is way too low, it simply won’t fit, and the only way around this is to shorten the main shaft, like the second roller pictured. You will also need a jack, two jack stands, and a heat gun. If you don’t have access to a heat gun, steal a hair dryer from the house, but don’t tell its owner you’re taking it into the shed, and wipe your greasy handprints off after you have finished.
Don’t want to buy a roller?
The alternative, if you don’t want to spring for a roller, is to use a steel pipe. This doesn’t require removing the wheel — you simply drive the car backwards and forwards with the tube between the tyre and guard. Even some pros use this technique. But, be warned, extreme care must be taken here when driving backwards and forwards, as there will be a lot of pressure on the tube, and it can end up punching holes through inner guards — not an ideal situation. The ed. used pipes to roll his rear guards, pushed them too far, and was then left with a bill to have them repaired and repainted. So don’t tell us we didn’t warn you.
Time: 15 minutes per guard
Cost: Most shops charge between $30 and $60 per guard

Step one — get it lifted
Jack up the car and place jack stands on each side. It is important the car is lifted evenly on both sides to avoid the sway bar playing havoc with the angles of the hub. This is more important with live-axle cars. If you’re lucky enough to have access to a hoist, this is even better. Once you have the car up in the air, remove the wheel.
Step two — clean and inspect
Before you go crazy with the roller, ensure the lip inside the guard is completely free of dirt, grime, and stones. This is the most important step in the process, because, if you don’t, hidden stones can and will dent the panel steel in a very bad way — outwards! You should also be wary of any trim clips for the inner guards, as these are very common and will have the same effect if not removed. The third thing to check for is bog — all too often there are big piles of bog hidden under the paint, so grab a magnet and check the guard before even starting!
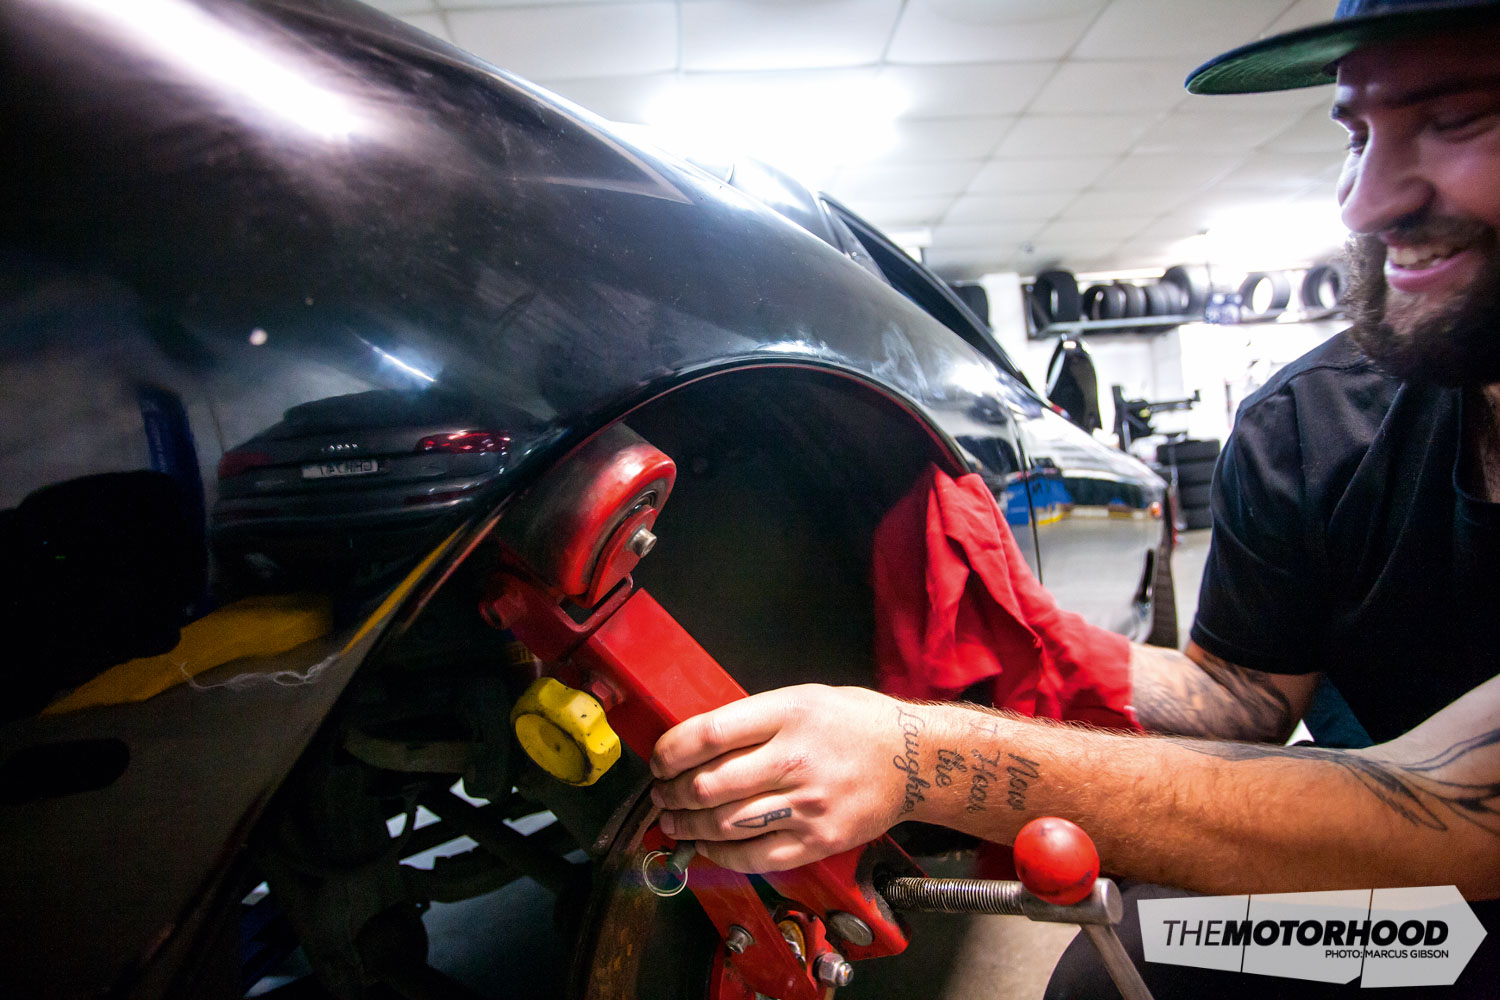
Step three — bolt it on
All rollers are multi stud, so it shouldn’t be a problem bolting it on. Depending on the style of wheel nut you have, the included nut spacers might need to be used. If you have big fancy brakes, you will also run into problems with clearance. You can either employ a bolt-on wheel spacer or remove the caliper. On the FD, we didn’t have this issue, as they had been previously removed for a burnout comp.
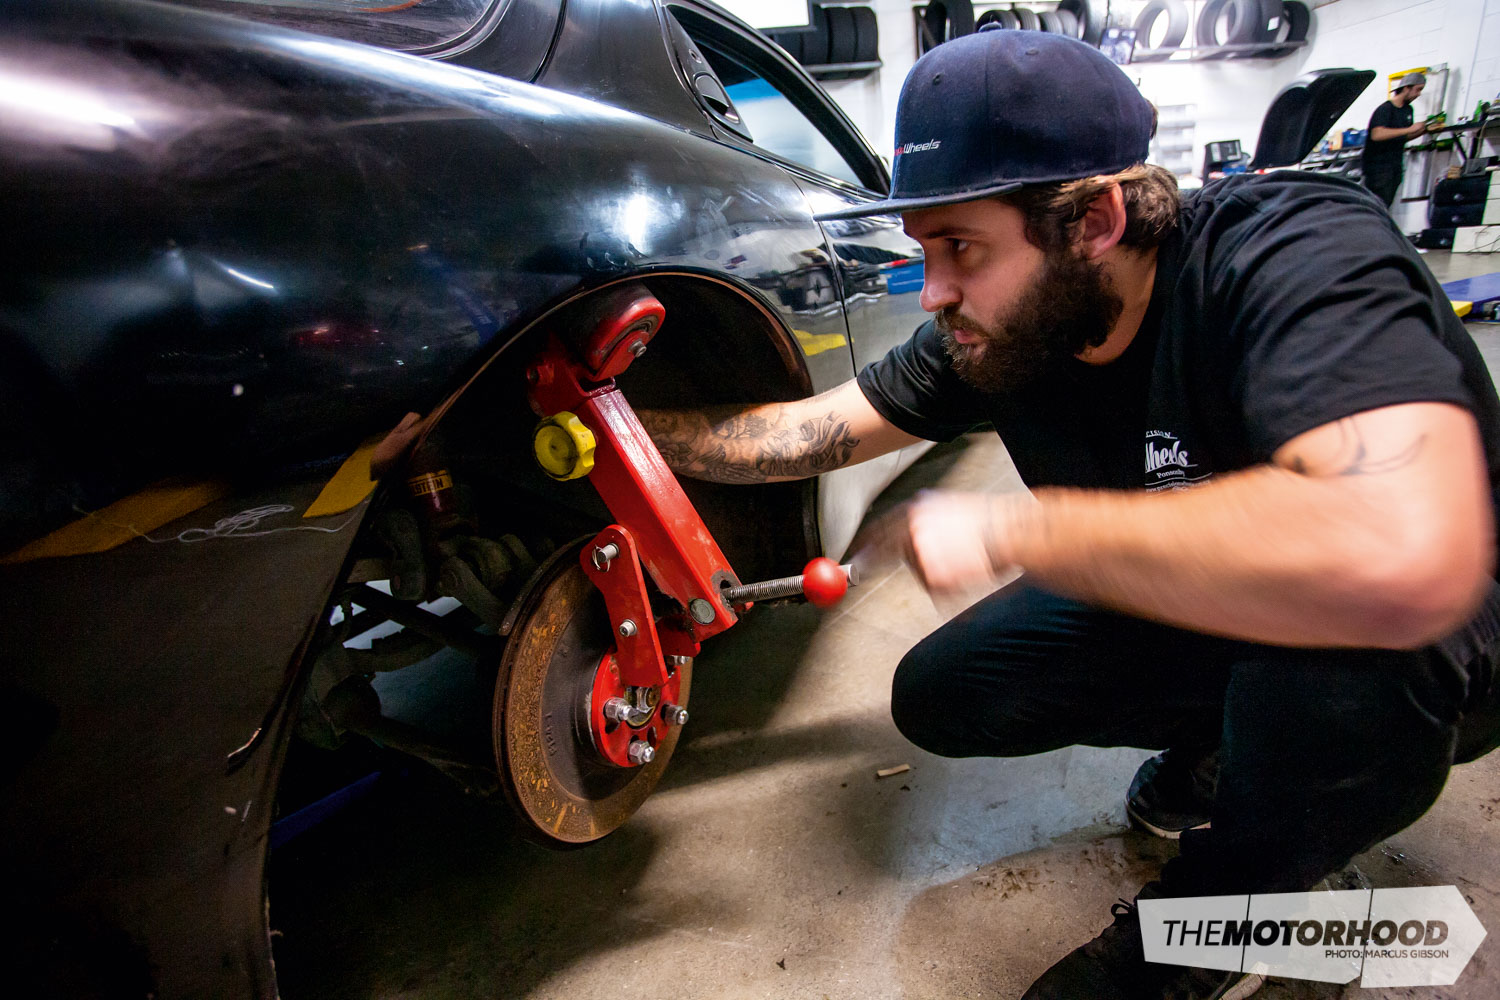
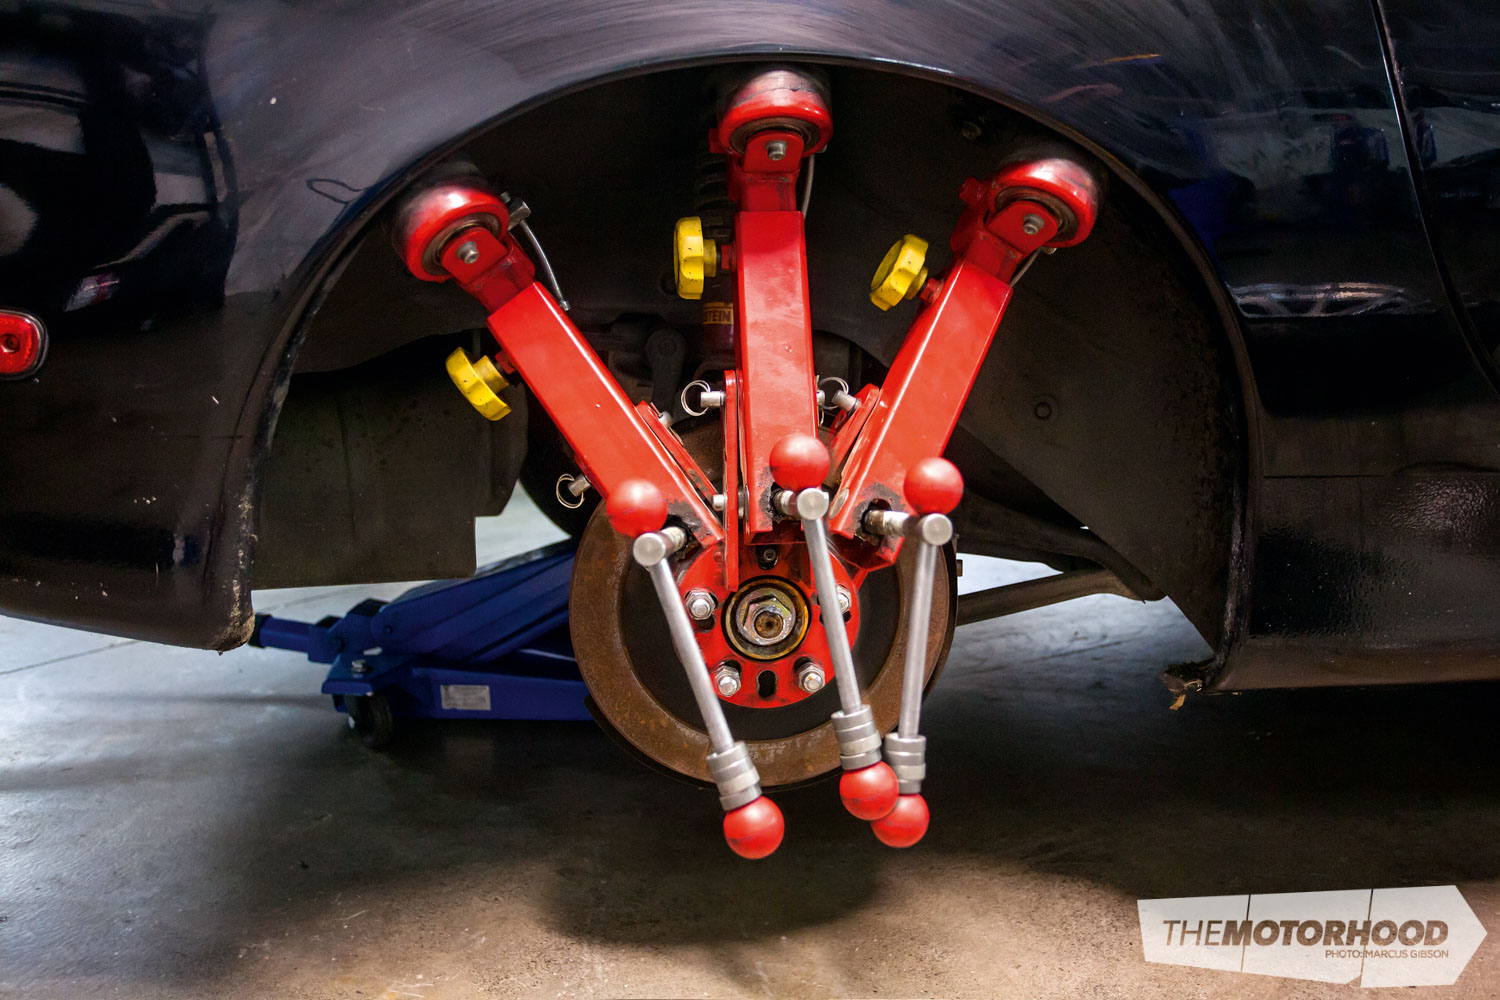
Step four — set the angle
All rollers have three points of adjustment. Ideally, you want the centre of the rolling head to be pressing against the corner of the lip. This is where you may run into trouble with the length of the roller, which we mentioned at the start. It pays to do a couple of test runs before winding on the pressure to ensure the head angle won’t hit the inner guard somewhere.
Step five — add some heat
Before rolling, it’s important you soften the paint. Take a heat gun on a low to medium heat and run it back and forth to soften the paint. Don’t heat it too much, just enough to be warm; paint is essentially a form of plastic, so responds to heat in a similar way.
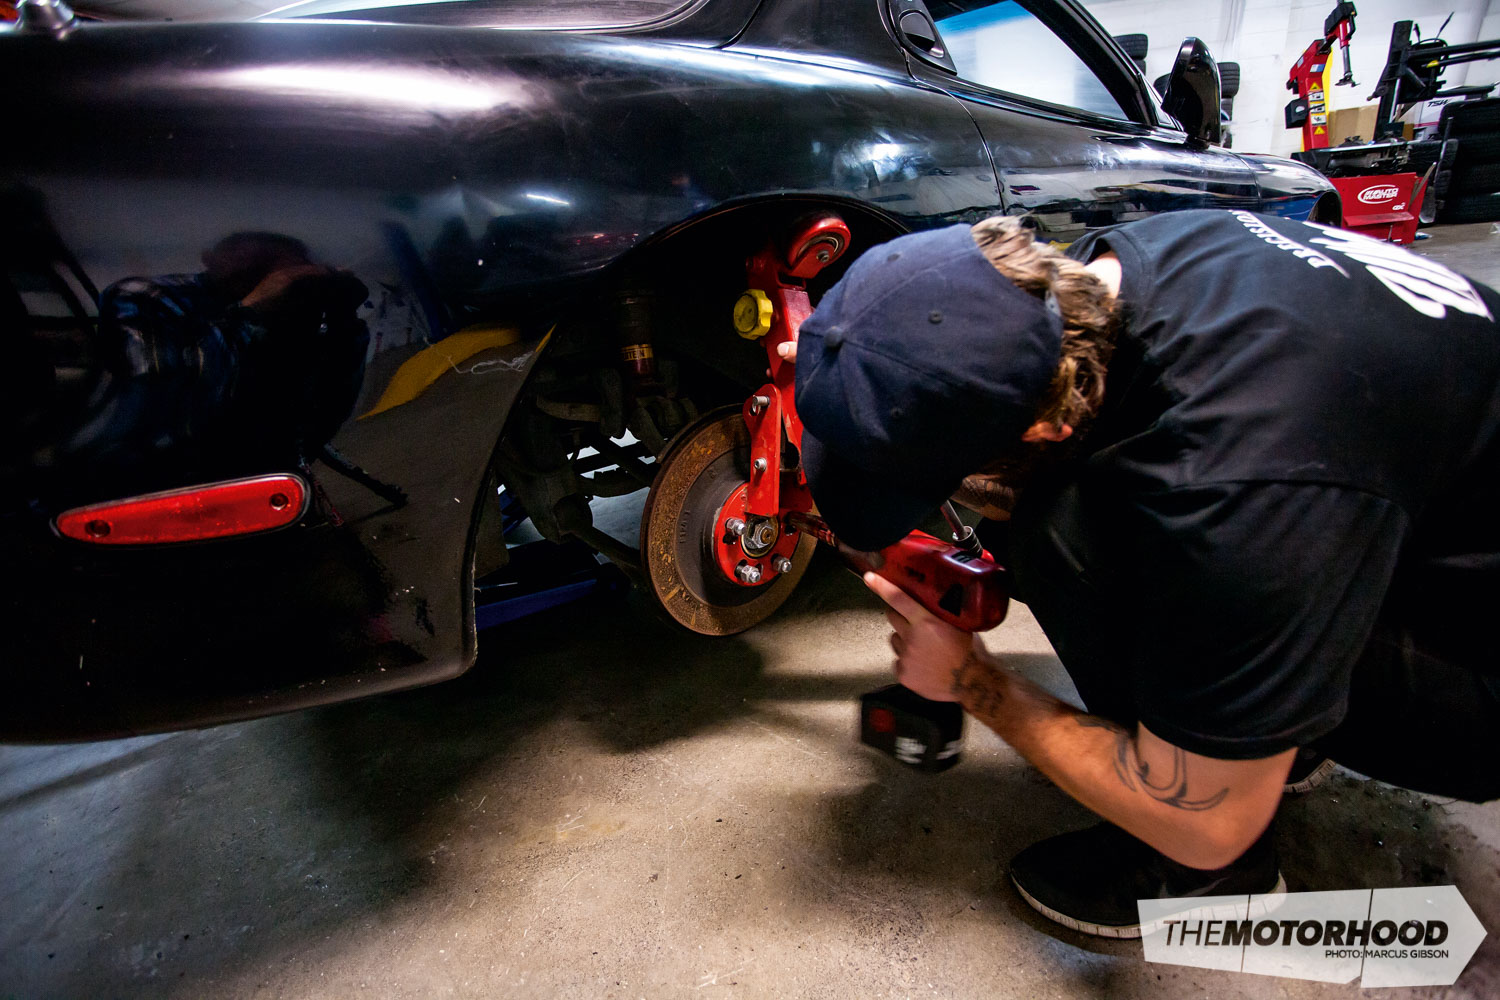
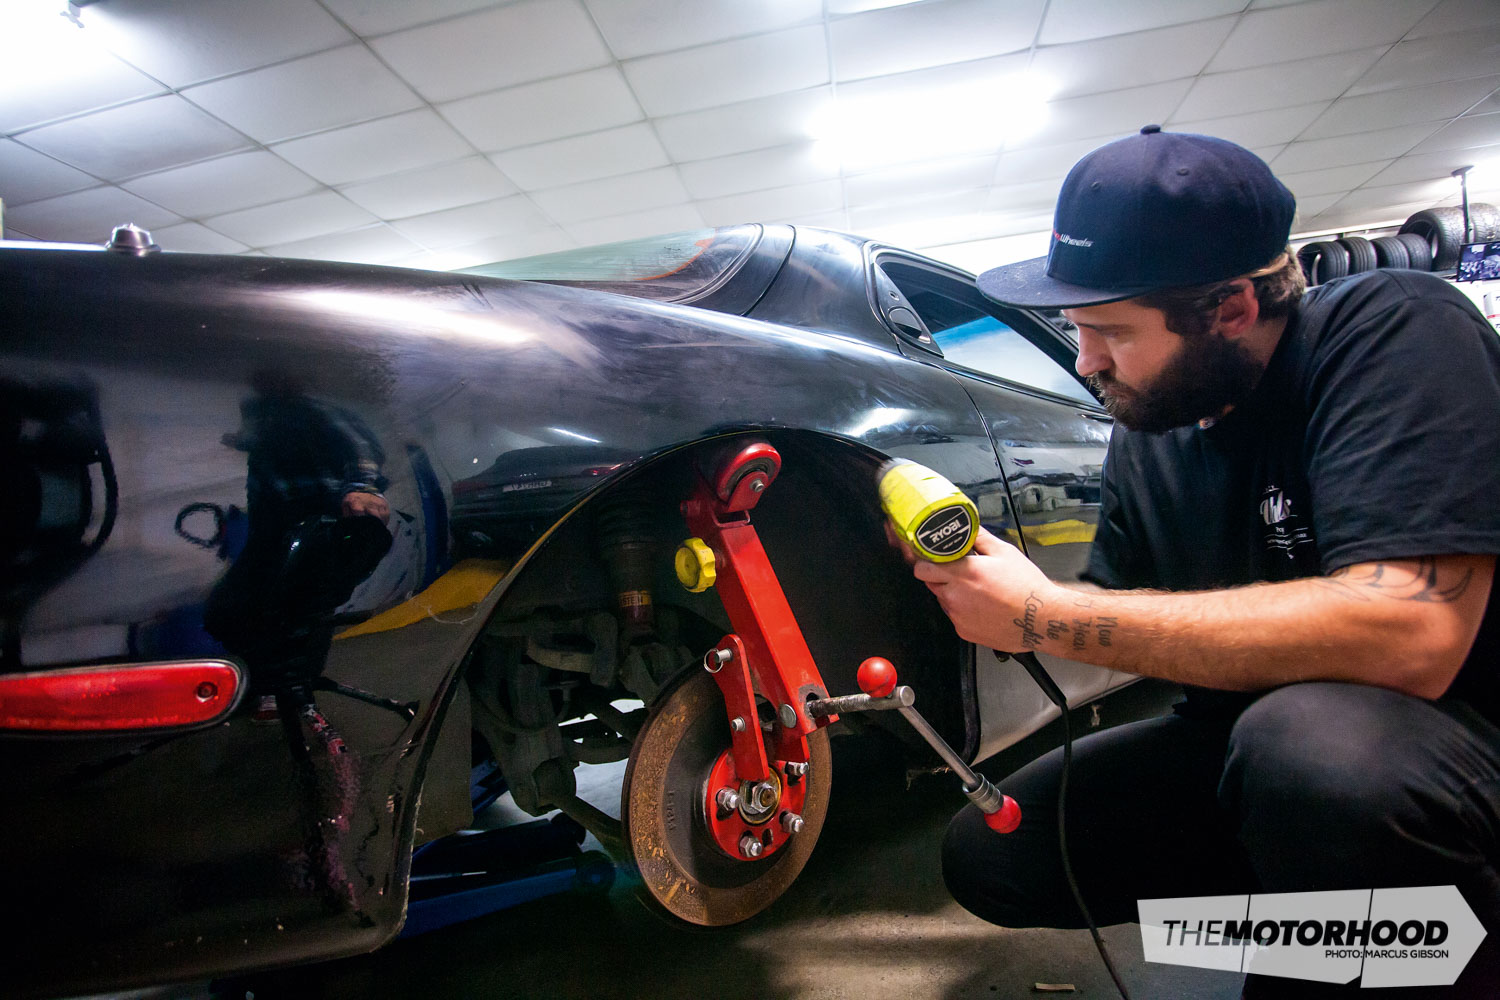
Step six — roll it up
Start with the roller in the centre of the guard and wind on a small amount of pressure but not so much that you struggle to move the roller at all. Roll it back and forth in 100mm strokes each way, each time moving one 100mm block towards the ends of the lip. Keep working it until the roll moves freely and easy as you work your way down the lip but only go as far around the guard as you need.
Step seven — repeat
This one is pretty self-explanatory. Once you have completed a single pass and begun to bend the lip, start back in the centre, add some more pressure, and roll out another set. It is a good idea to run the heat gun back over the area from time to time to keep the paint malleable.
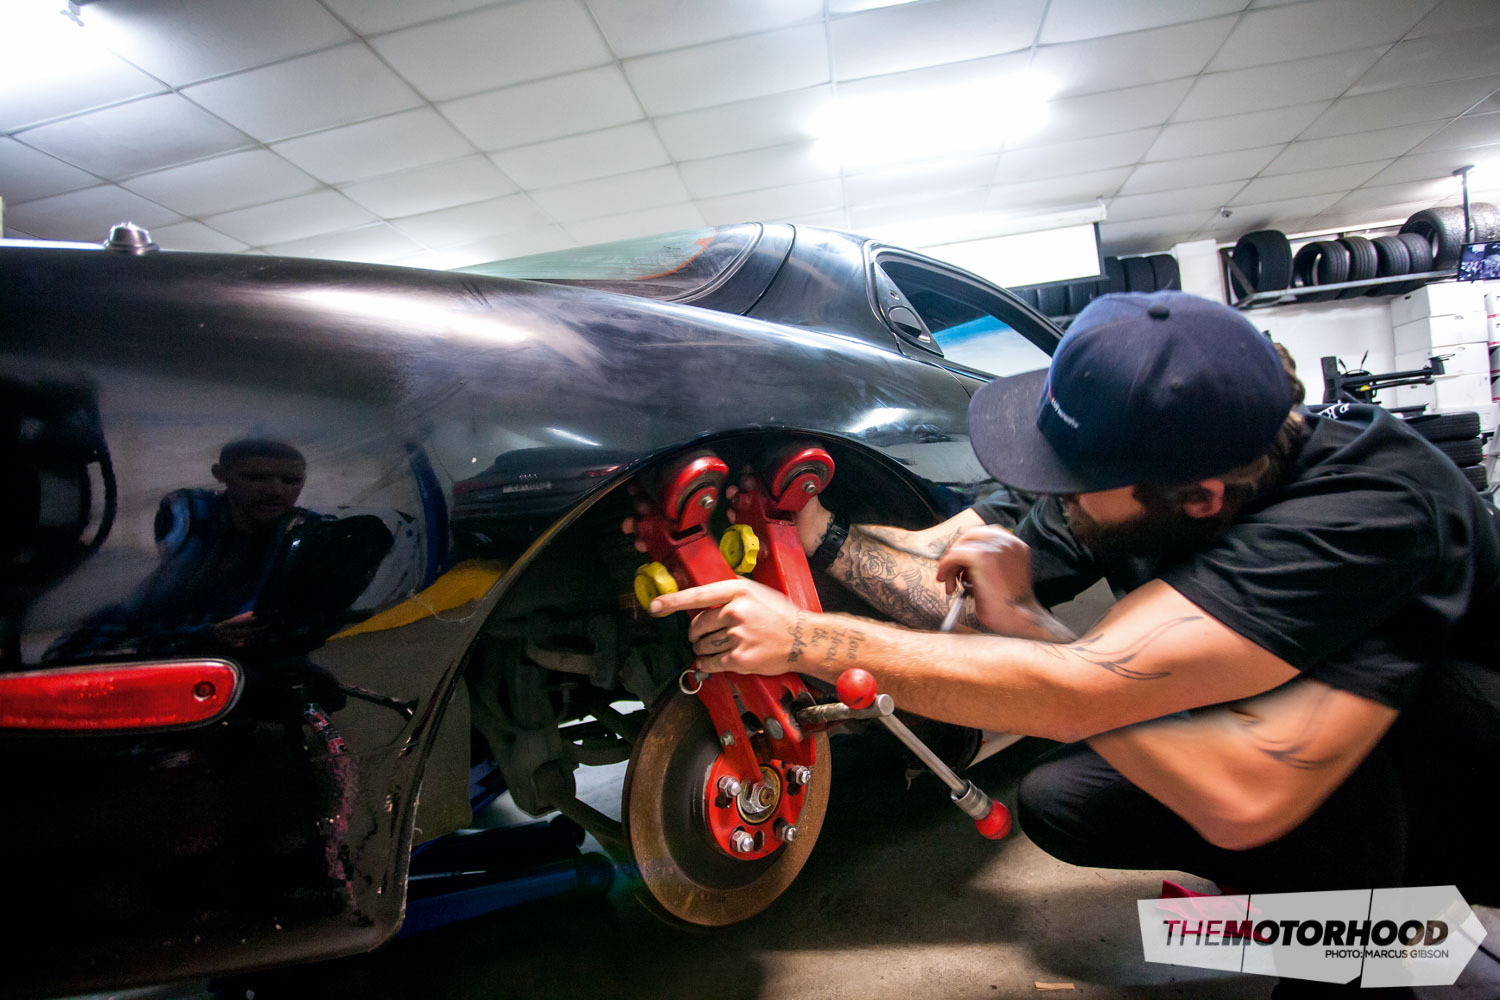
Step eight — head adjustment
After you have begun to bend the lip, you can adjust the head angle to ensure you don’t start to press against the body with the edge of the rolling head as the lip moves closer to it. Then just continue to repeat steps six and seven until you’re satisfied with the clearance. An L-shaped lip will take a lot less work than a U-shaped one, as found on the likes of BMWs. It is also worth noting that front guards are likely to be a lot less rigid than your rear quarter panels, so tread lightly here, guys.

Step nine — know your limits
The word ‘restraint’ is one we can’t stress enough. Roll the lip as little as possible to avoid deforming the panel. We spoke to numerous experts and have our own horror stories. The best way to be sure is to do it a couple times, and then refit the wheel, check the clearance, and only go further if needed and if possible. Basically, once that lip is flat against the guard, you are on very thin ice, so be careful. This is, of course, if you don’t want to have to paint it. If you’re painting it, you will be able to go further and push the guard out.
Step 10 — bolt the wheel back on
Once you have completed the task, bolt your wheels back on and enjoy. You’ll have no more rubbed-off sidewalls, cut tread, or other such things. ν